
Diaper cakes have become a must-have at baby showers, offering both charm and practicality in one creative package. Whether you’re hosting a baby shower or looking for the perfect gift, a diaper cake can wow guests and bring a smile to the new parents. These tiered creations, made primarily of diapers, can be personalized with baby essentials like clothes, toys, and ribbons, making them as functional as they are beautiful.
In this post, we’re sharing the Top 10 Diaper Cake Recipes that will not only impress at your next baby shower but also serve as thoughtful gifts that parents will appreciate. From simple designs to elaborate, themed cakes, we’ve got ideas for every style and budget. Whether you’re a DIY enthusiast or just looking for inspiration, these recipes will guide you in creating a diaper cake that steals the show. Ready to get started? Let’s dive into the world of diaper cakes!
What is a Diaper Cake?
Definition and Purpose
A diaper cake is a creative, functional gift made from rolled-up diapers arranged in tiers. It resembles a traditional birthday or wedding cake. While the concept is simple, the result is often an eye-catching centerpiece. It’s both decorative and practical for new parents.
The purpose of a diaper cake goes beyond its aesthetic appeal—it serves as a thoughtful and functional gift. Diapers are an essential item for any newborn, making them a highly practical and appreciated gift for expectant parents. By transforming diapers into an artistic arrangement, a diaper cake offers both visual appeal and usefulness, as it provides the new parents with a supply of diapers during the early stages of their baby’s life.
Diaper cakes come in various sizes, from smaller one-tier cakes to larger, multi-tier creations. They are often customized with baby essentials like onesies, bottles, pacifiers, socks, and toys. This adds a personal touch to the design. These cakes can also be themed to match the baby shower. For example, use pastel colors for a gender-neutral theme or plush animals for a playful look.
In short, a diaper cake is not only a beautiful decoration for a baby shower, but it also provides a practical solution for parents-to-be, making it a perfect gift that combines creativity with utility.
Practical Uses
While diaper cakes are undoubtedly decorative, their true value lies in their practicality. Diaper cakes are a clever way to provide new parents with a much-needed supply of diapers. Diapers are used daily in the early stages of a baby’s life. Instead of gifting a simple pack, a diaper cake turns this essential item into something fun and creative. It makes for an extra special gift.
Beyond diapers, diaper cakes often include other baby necessities such as onesies, baby bottles, socks, pacifiers, and even toys. These additions make the cake visually appealing. They also provide parents with useful items for their newborn. Some diaper cakes can be customized with personal items like baby blankets. You can also add themed decorations that match the nursery or baby shower theme.
Another practical use of a diaper cake is as a centerpiece for a baby shower. Its unique design can serve as a conversation starter and help set the tone for the party. After the shower, the parents can easily disassemble the cake, keeping the diapers and baby items for later use. In some cases, diaper cakes can even be used as a photo prop during the event, creating lasting memories.
Ultimately, a diaper cake serves as both a thoughtful gift and a functional item that parents can use in their day-to-day care of their baby, making it a perfect blend of practicality and creativity.
Materials Needed
Creating a diaper cake requires just a few basic materials, but with the right supplies, you can make a stunning and functional gift. Below are the essential materials you’ll need to craft a beautiful diaper cake:
- Diapers: The foundation of any diaper cake, usually around 50-100 diapers, depending on the size of your cake. Choose a brand that’s soft and reliable, such as Pampers or Huggies. You can use newborn-size or size 1 diapers, as these are most commonly used for diaper cakes.
- Elastic Bands or Ribbon: Elastic bands help hold the rolled-up diapers in place, while ribbons are used to decorate the layers. You’ll need wide ribbon to wrap around each tier and smaller ribbon for accentuating the cake’s details.
- Base: A sturdy base or platform is essential for assembling the cake. You can use a round cake board, foam board, or even a sturdy piece of cardboard as the foundation.
- Baby Items for Decoration: To personalize your cake, include small baby items like onesies, pacifiers, socks, baby bottles, or small toys. These items enhance the overall design while adding functionality to the cake.
- Decorative Accessories: Add a personal touch with decorative items such as fake flowers, stuffed animals, baby booties, or a baby-themed topper. These accessories will bring the cake to life and match the theme of the baby shower.
- Hot Glue Gun (Optional): For securing decorative items or for added stability, a hot glue gun can help fasten some of the accessories to the diapers or base.
With these materials, you’ll be ready to assemble a stunning diaper cake that’s both practical and beautiful!
Step-by-Step Guide to Creating a Diaper Cake
Step 1: Gather Your Supplies
Before you begin creating your diaper cake, it’s important to gather all the necessary materials to ensure a smooth and enjoyable process. Proper preparation will not only save you time but also help you build a sturdy, beautiful cake. Here’s what you’ll need to get started:
- Diapers: Choose around 50-100 diapers, depending on the size and layers of your cake. Newborn or size 1 diapers are most commonly used for diaper cakes. Make sure you have enough to cover the entire structure, as the diapers form the base of your design.
- Elastic Bands or Rubber Bands: These will help keep your diapers rolled up tightly. You’ll need a sufficient number to secure each individual diaper roll as well as the entire tier.
- Base or Cake Board: A firm base is necessary to support your cake. A round cake board, cardboard, or foam board will work well. The size of the base depends on how large you want your diaper cake to be. It’s important that it’s sturdy enough to support the weight of the diapers and other decorations.
- Ribbons: You’ll need wide ribbons to wrap around each tier of the cake and hold the diapers in place. Choose colors or patterns that match your theme or the baby shower décor. Smaller ribbons can be used for decorative accents.
- Baby Items for Decoration: Select small baby essentials like onesies, bibs, socks, or baby bottles to decorate your cake. These will enhance the design and add practicality.
Once you’ve gathered all your materials, you’ll be ready to start assembling your diaper cake. This step ensures you’re well-prepared and set for a successful craft session!
Step 2: Roll and Stack the Diapers
Once you’ve gathered your supplies, it’s time to start assembling your diaper cake. The first step in this process is rolling the diapers and stacking them into tiers. This step requires a bit of patience but is key to creating a sturdy and visually appealing cake. Here’s how to do it:
- Roll the Diapers: Begin by laying a diaper flat, folding it in half lengthwise, and then tightly rolling it from the open end to the waistband. Secure each rolled diaper with a rubber band or elastic band to keep it in place. The tighter you roll, the better the structure will hold.
- Create the Base Tier: To form the base layer, arrange the rolled diapers in a circular shape on your cake board. Place them closely together, forming a tight, even circle. Once you have a full circle, secure it by wrapping a large ribbon around the outside, making sure the diapers stay in place.
- Build Additional Tiers: For the next tier, repeat the rolling process with a smaller set of diapers. The number of diapers needed will depend on the size of your tier and how tall you want the cake to be. Stack the second tier on top of the base, making sure it’s centered. Secure it with a ribbon or elastic band around the outside.
- Adjust as Needed: Continue rolling and stacking diapers for additional tiers, progressively using fewer diapers as you move up. This creates a tapered effect, mimicking the appearance of a traditional tiered cake.
By carefully rolling and stacking the diapers, you’ll create a solid base for your diaper cake that will hold together beautifully throughout the baby shower.
Step 3: Decorate the Cake
Now that you’ve rolled and stacked your diapers into tiers, it’s time to add the finishing touches that will transform your diaper cake into a stunning centerpiece. Decorating is where you can truly get creative and personalize the cake to match the baby shower theme. Here’s how to decorate your diaper cake:
- Wrap with Ribbons: Start by wrapping wide ribbons around each tier. Choose colors that complement the baby shower theme. Use pastel pinks or blues for a traditional gender reveal. For a gender-neutral theme, opt for neutral colors. The ribbon should be wide enough to cover the elastic bands and give the cake a clean, polished look. Secure the ribbon with a bow for an extra touch of elegance.
- Add Baby Essentials: Decorate the tiers with baby essentials like onesies, socks, bibs, or baby bottles. These items not only add visual interest but also make the diaper cake practical for the parents-to-be. You can secure these items with ribbons, pins, or a hot glue gun if needed.
- Include a Topper: Every diaper cake needs a focal point, so consider adding a cute topper. You can use a stuffed animal, a plush toy, or a personalized sign with the baby’s name. For a more thematic approach, a tiny crown, a baby bootie, or a baby bottle could work perfectly.
- Final Touches: To enhance the look, add some small decorative items like faux flowers, small teddy bears, or baby blocks around the base. These will help make your diaper cake even more festive and fun.
With these decorations, you’ll create a beautiful, personalized diaper cake that will steal the show at any baby shower!
Step 4: Assemble the Cake
Once your diapers are rolled, stacked, and decorated, it’s time to assemble the entire diaper cake. This step involves securing the tiers and ensuring that your creation stays intact and sturdy. Here’s how to do it:
- Prepare the Cake Base: Start with your sturdy cake board or base. This should be large enough to support the full diaper cake. If you’re using a multi-tiered design, make sure the base is firm enough to hold the weight of the diapers and any additional decorations.
- Place the First Tier: Begin by placing the largest tier (the base) directly in the center of the cake board. Ensure the tier is tightly packed and evenly arranged. This will be the foundation of the cake, so it needs to be stable and secure.
- Stack Additional Tiers: Gently stack the second tier on top of the first, making sure it’s centered. If needed, use a dowel rod or a small wooden stick through the middle of the tiers to keep everything aligned and prevent the layers from shifting. You can also use a little bit of hot glue to attach the bottom tier to the cake board for extra stability.
- Repeat for Each Tier: Continue stacking the remaining tiers, with each one being smaller than the last to create a tapering effect. Be sure that each tier is centered and stable before moving on to the next.
- Final Adjustments: Once all tiers are stacked, take a moment to adjust the ribbons, baby items, and decorations to ensure everything is evenly spaced and visually pleasing.
With the tiers securely stacked and adjusted, your diaper cake is now complete and ready to wow at the baby shower!
Top 5 Diaper Cake Ideas for Baby Showers
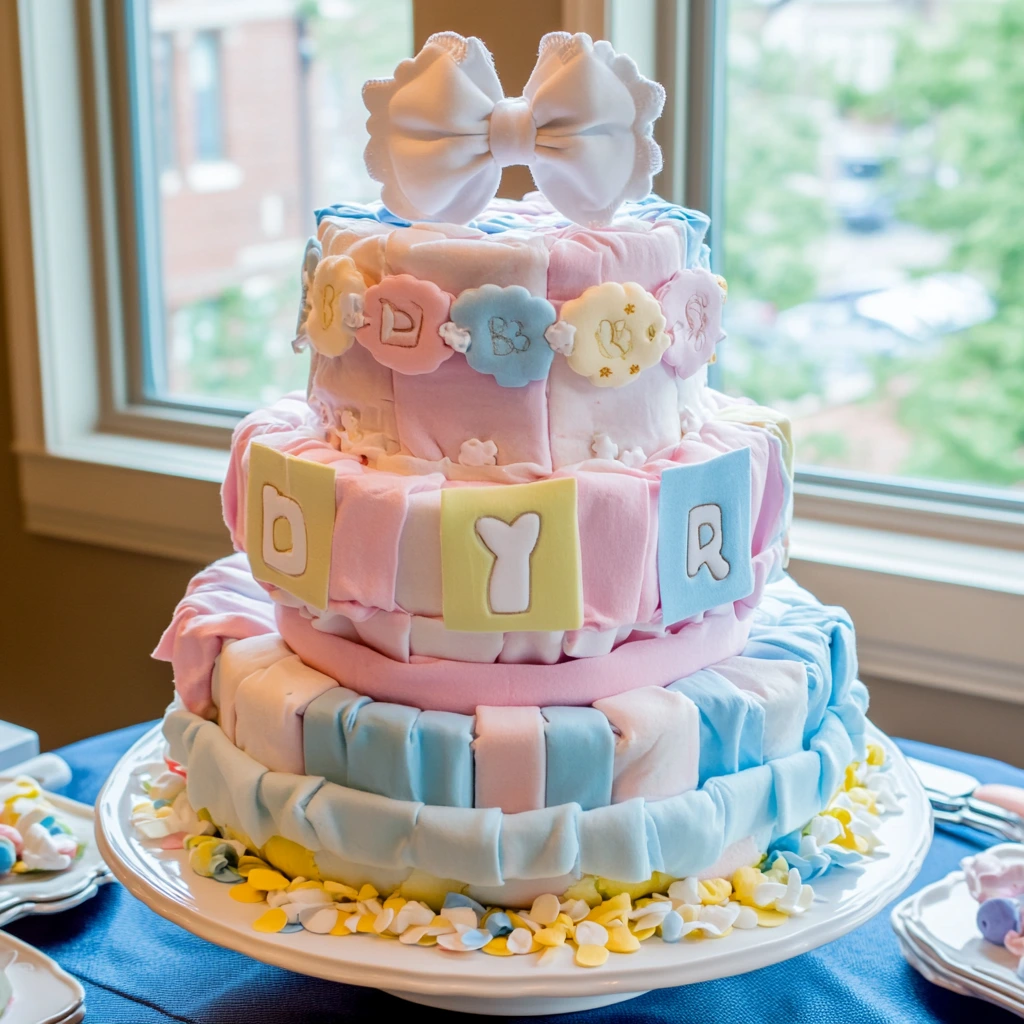
Gender Neutral Diaper Cake
A gender-neutral diaper cake is a perfect choice for baby showers where the gender of the baby is either unknown or the parents prefer not to reveal it. Creating a gender-neutral diaper cake allows you to craft a beautiful, thoughtful gift that can be enjoyed by any family, regardless of whether the baby is a boy or girl. Here’s how to create the perfect gender-neutral diaper cake:
- Choose Neutral Colors: Instead of traditional pink or blue, opt for soft, neutral tones such as yellow, green, lavender, or gray. These colors are universally loved and work well for any baby shower. You can also use a combination of these shades to give the cake a vibrant yet subtle look.
- Select Unisex Baby Items: When decorating the cake, choose baby essentials that aren’t gender-specific. For instance, opt for white onesies, beige socks, or green pacifiers. Neutral toys like plush animals or simple baby blocks work great as decorations and are useful for parents after the shower.
- Add Fun, Playful Accents: Gender-neutral diaper cakes can be made fun by adding cute details that aren’t tied to a specific gender. Think of including a fluffy stuffed animal, such as a bear or bunny, or using cheerful accessories like stars, clouds, or animals in your decorations. These elements add personality and charm to your cake without leaning towards a specific gender.
Creating a gender-neutral diaper cake is all about embracing versatility, using a balance of colors and decorations that can be enjoyed no matter the baby’s gender, ensuring a memorable and practical gift for the parents-to-be.
Themed Diaper Cake
A themed diaper cake is a creative and fun way to personalize a gift for a baby shower. By choosing a specific theme, you can design a diaper cake that aligns with the party’s overall aesthetic or reflects the parents’ interests. A themed diaper cake not only adds a unique touch but also shows thoughtfulness in the design. Here’s how to create a themed diaper cake:
- Pick a Theme: The first step in making a themed diaper cake is selecting a theme. Popular themes include animals (like jungle or farm animals), nursery rhymes, fairytale characters, or even hobbies and interests of the parents, like sports or travel. The theme will guide the colors, decorations, and accessories you choose.
- Incorporate Theme-Specific Colors and Decor: Once you’ve chosen a theme, select colors that complement it. For example, if you’re going for a nautical theme, shades of navy blue, white, and red work well. For a jungle theme, earthy greens and browns will help set the tone. Use corresponding items, such as themed baby clothes, small toys, or baby bottles, to decorate each tier of the cake.
- Add a Themed Topper: The topper is the highlight of the themed diaper cake. If your theme is animals, consider using a plush lion, giraffe, or elephant as the focal point. For a fairytale theme, a small crown or character figurine can top off the design.
- Use Creative Accents: Embellish the cake with small, theme-appropriate items like ribbons, plush toys, or even mini props that enhance the overall look and make it extra special.
A themed diaper cake adds an extra layer of fun and personalization to your gift, making it a memorable highlight at any baby shower.
Luxury Diaper Cake
A luxury diaper cake is the epitome of elegance and sophistication, designed to make a stunning statement at a baby shower. By using high-end materials and thoughtful details, you can elevate your diaper cake into a truly special gift for the parents-to-be. Here’s how to create a luxurious diaper cake:
- Select Premium Diapers: Start by choosing high-quality diapers, such as those from well-known brands like Pampers or Huggies. Opt for the softest and most absorbent options to ensure both practicality and luxury. You may even consider adding a few designer diaper brands if the budget allows for an extra touch of opulence.
- Elegant Colors and Fabrics: Luxury diaper cakes often feature refined colors like gold, silver, white, or cream. These neutral tones exude sophistication and work well with a variety of themes. Incorporate luxurious fabrics such as satin ribbons, velvet, or lace to wrap around the tiers, giving the cake an upscale look.
- Decorative Details: Choose high-end baby accessories like silk baby blankets, plush designer stuffed animals, or high-quality baby clothes to decorate the cake. You can also add premium touches like monogrammed items or custom baby gifts. These finer details will create a refined, upscale appearance that’s perfect for a luxury diaper cake.
- Topper and Accents: For the topper, consider using a plush, designer stuffed animal, a crystal baby bottle, or even a personalized keepsake like a silver-plated baby frame. Adding luxury accents, such as faux pearls or rhinestone embellishments, will take your diaper cake to the next level.
A luxury diaper cake is not just a gift; it’s an experience of elegance that will surely impress and delight everyone at the baby shower.
Mini Diaper Cakes
Mini diaper cakes are adorable, smaller versions of traditional diaper cakes, perfect for creating a cute and practical gift. They’re ideal for adding extra flair to a baby shower, either as party favors or as a charming centerpiece. Despite their smaller size, mini diaper cakes can be just as creative and thoughtful as their larger counterparts. Here’s how to make them:
- Size and Structure: Mini diaper cakes typically consist of only a few tiers, often just one or two. Start with a small base, such as a cake board or a sturdy piece of cardboard, to support your diapers. Use fewer diapers for smaller cakes—around 6 to 12, depending on the size and design.
- Roll and Stack: Like their larger counterparts, mini diaper cakes start with rolling diapers into tight cylinders. Once rolled, arrange them in a circular pattern on the base and secure them with ribbons or elastics. For a more compact look, you can create a single-tier cake or stack a few diapers to make a smaller, more manageable size.
- Decorative Touches: The decoration for mini diaper cakes can be just as elaborate as a full-sized cake. Use satin ribbons, tiny baby items like socks or bibs, and small plush toys. You can also add little touches like flowers, pacifiers, or baby booties. Since the cakes are smaller, you can use daintier items, which make them even more charming.
- Perfect for Party Favors: Mini diaper cakes also work wonderfully as party favors. These tiny creations can be wrapped in clear plastic or placed in gift boxes, ready for guests to take home. It’s a sweet, thoughtful gesture that will leave a lasting impression.
Mini diaper cakes are perfect for those who want to add a personalized, adorable touch to their baby shower celebrations.
Interactive Diaper Cake
An interactive diaper cake takes creativity and fun to the next level, transforming a traditional baby shower gift into an engaging, hands-on experience. This type of diaper cake is designed to not only be visually appealing but also allow guests to interact with it during the event. Here’s how to create an interactive diaper cake that will captivate and entertain:
- Incorporate Hidden Surprises: One way to make a diaper cake interactive is by hiding small gifts or surprises within its layers. You can tuck in baby essentials like pacifiers, teething rings, or small toys that guests can pull out as they explore the cake. This adds an element of fun and anticipation, making the diaper cake more than just a decoration.
- Add Movable Elements: Create a cake that allows guests to move or adjust elements of the design. For example, you could include a spinning mobile or a small toy that can be shifted from one tier to another. You can also use Velcro to attach removable decorations, allowing guests to rearrange pieces, creating an enjoyable activity during the shower.
- Interactive Games: Design your interactive diaper cake to tie into baby shower games. For example, you could attach small envelopes to the cake, each containing a different game or challenge for the guests to complete. These games could involve guessing the baby’s due date, writing messages to the parents, or giving advice to the parents-to-be.
- Personalized Elements: Allow guests to contribute to the cake by writing messages, signing tiny onesies, or adding ribbons to different sections. This turns the diaper cake into a collaborative and memorable keepsake for the parents.
An interactive diaper cake is a fun, creative way to engage baby shower guests while offering a practical gift the parents can use.
Tips for Personalizing Your Diaper Cake
Incorporating Baby’s Name
Incorporating the baby’s name into a diaper cake adds a personal touch that elevates the gift, making it even more special and meaningful. Including the baby’s name not only personalizes the cake but also enhances the overall aesthetic, creating a memorable centerpiece for the baby shower. Here’s how you can thoughtfully incorporate the baby’s name:
- Name Banner or Tag: One of the simplest ways to add the baby’s name is by using a small banner or tag. You can create a cute, custom banner that spells out the baby’s name and drape it across the top or wrap it around the tiers. Another option is to attach a personalized tag on the front of the cake, featuring the baby’s name in a stylish font.
- Monogrammed Baby Items: Add a touch of elegance and personalization by including monogrammed baby clothes, such as onesies or bibs, on the diaper cake. These personalized items can be draped over the tiers or tied around the base, making them both functional and decorative.
- Custom Cake Topper: A personalized cake topper featuring the baby’s name is a striking addition. You could use a wooden or acrylic topper that stands out against the rest of the design. For a more whimsical touch, consider using alphabet blocks or soft toys that spell out the name.
- Name in Decorations: Consider using name-themed decorations, such as letter-shaped balloons or fabric cutouts, to subtly weave the baby’s name into the cake’s design. This method ties everything together and makes the cake feel uniquely tailored for the baby.
Incorporating the baby’s name into the diaper cake not only adds a personal element but also creates a beautiful, one-of-a-kind gift that will be cherished by the parents.
Choosing Baby Items
When designing a diaper cake, selecting the right baby items to decorate and complete the cake is key to creating a practical and beautiful gift. The baby items you choose should be both functional and decorative, ensuring that the diaper cake is not only a lovely centerpiece but also a useful gift for the parents-to-be. Here’s how to select the best items for your diaper cake:
- Essentials for Newborns: Start with the basics—items that the parents will need for their newborn. Diapers, of course, are the foundation of any diaper cake. Along with diapers, consider including baby wipes, burp cloths, or baby lotion. These practical items will be appreciated and used often by the new parents.
- Clothing: Baby clothes, like onesies, socks, and hats, are perfect for decorating the diaper cake. Choose soft, comfortable fabrics that will be gentle on the baby’s skin. To add a personal touch, you can also select clothes in cute prints, colors, or even with the baby’s name monogrammed on them.
- Toys and Stuffed Animals: Add charm and cuteness by including small toys or plush animals. Soft toys like teddy bears or cuddly bunnies are great additions that can be used later for the baby’s comfort. Choose items that are both adorable and safe for newborns.
- Accessories: Don’t forget to include baby accessories like pacifiers, teething rings, or bottles. These items are essential for the baby and can also serve as decorative accents for the diaper cake. Ribbons, bows, and small toys can also be used to embellish the cake while maintaining functionality.
Choosing a mix of practical and cute baby items will ensure that your diaper cake is not only beautiful but also thoughtful and useful.
Color Schemes and Themes
The color scheme and theme of a diaper cake play a significant role in setting the tone and creating a cohesive design. Choosing the right combination can transform a simple diaper cake into a visually striking gift that fits the overall vibe of the baby shower. Here’s how to select the perfect color schemes and themes for your diaper cake:
- Traditional Color Schemes: For a classic look, many people choose soft pastel colors such as pink, blue, yellow, or green. These are ideal for gender-specific or neutral themes. For a boy, shades of blue or navy paired with white work beautifully, while soft pinks and lavender are perfect for a girl. Yellow and mint green are lovely gender-neutral options that suit a variety of themes.
- Gender-Neutral Options: If the baby’s gender is a surprise or you want to stick with a neutral theme, go for colors like yellow, gray, mint, or earthy tones like beige and brown. These shades are modern and versatile, allowing you to mix and match with various decorative elements.
- Themed Colors: Once you select a color palette, choose a theme that complements it. For example, if you’re creating a jungle-themed diaper cake, incorporate shades of green, brown, and orange, while adding animal motifs. For a nautical theme, navy, white, and red work perfectly. If you prefer a fairytale theme, consider soft pinks, purples, and golds for a magical touch.
- Accent Colors and Decorations: Once you have your main colors, add accent tones with ribbons, bows, or fabric. Metallic colors like gold or silver can bring a luxurious feel, while bright and bold colors like red or orange add energy to the design.
Choosing the right color scheme and theme is essential in creating a diaper cake that stands out and suits the occasion.
Where to Find Inspiration and Supplies for Your Diaper Cake
Pinterest for Diaper Cake Ideas
Pinterest is an invaluable resource for anyone looking to create a memorable diaper cake. With its vast collection of images and creative ideas, Pinterest can inspire your design choices, color schemes, and even provide step-by-step guides for making the perfect diaper cake. Here’s how you can use Pinterest to help you craft your ideal design:
- Endless Inspiration: Pinterest hosts thousands of diaper cake designs, from traditional to contemporary, and everything in between. Searching for “diaper cake ideas” or specific themes like “jungle diaper cake” or “nautical diaper cake” will bring up a plethora of photos showcasing various styles, materials, and decorations. This variety gives you the freedom to pick and choose elements that suit your vision.
- DIY Tutorials: Many Pinterest users share detailed instructions on how to make diaper cakes. These tutorials include helpful tips on the materials you’ll need, as well as step-by-step guidance on how to assemble the cake. Following a tutorial ensures that you don’t miss any important steps while adding your own personal flair.
- Pinning and Organizing: As you browse through Pinterest, you can “pin” your favorite diaper cake ideas to a dedicated board. This allows you to organize your thoughts, compare different designs, and track the items you need to purchase. Having all your inspiration in one place makes it easier to execute your plan.
- Seasonal and Trendy Ideas: Pinterest also features seasonal and trending diaper cake ideas, such as holiday or gender-specific cakes. It’s a great place to find new ideas for each baby shower you attend, keeping your creations fresh and up-to-date.
Pinterest is a goldmine for diaper cake inspiration, providing endless ideas that cater to various themes, styles, and levels of creativity.
Etsy for Materials and Finished Cakes
Etsy is a fantastic marketplace for both purchasing materials and finding finished diaper cakes. Whether you’re crafting your own diaper cake or looking for a unique pre-made option, Etsy provides a wide range of choices to suit your needs. Here’s how to use Etsy effectively for your diaper cake project:
- Materials and Supplies: Etsy is home to countless shops offering specialized supplies perfect for crafting your diaper cake. You can find high-quality diapers in various sizes, as well as decorative elements like ribbons, fabrics, and baby-themed embellishments. Etsy also offers pre-made kits with everything you need to create a diaper cake, including the diapers, accessories, and instructions. Shopping for these materials can save you time and help ensure that your diaper cake has a professional look.
- Finished Diaper Cakes: If you’re short on time or want a one-of-a-kind diaper cake without the effort of making it yourself, Etsy is the place to go. Many talented artisans create and sell beautifully designed finished diaper cakes. Whether you need a traditional style, a themed design, or a luxury cake, you can find a wide variety of options. Custom orders are often available, allowing you to request specific colors, themes, or even add personalized items like the baby’s name.
- Personalized Touches: Many sellers on Etsy offer customization options for both materials and finished cakes. From monogrammed onesies to personalized cake toppers, Etsy allows you to add that extra special touch to your diaper cake, making it truly unique.
Etsy is an excellent platform for sourcing both materials and finished diaper cakes, providing a diverse selection that allows you to create or gift the perfect design.
Baby Brands for High-Quality Diapers
When creating a diaper cake, the quality of the diapers is crucial for both appearance and practicality. Choosing reputable baby brands ensures the diapers are soft, absorbent, and comfortable for the newborn. This adds both functionality and quality to your diaper cake. Here are some top baby brands known for their high-quality diapers:
- Pampers: Pampers is one of the most well-known and trusted diaper brands worldwide. Their diapers are soft, absorbent, and come in a variety of sizes. Pampers also offers different diaper lines, such as Swaddlers and Baby Dry, catering to various needs. These diapers are perfect for creating a luxurious, high-quality diaper cake that the parents will appreciate.
- Huggies: Huggies diapers are another popular choice for diaper cakes. Known for their snug fit and excellent absorbency, Huggies provides a reliable option for a functional and high-end gift. Their Little Snugglers line is particularly soft, making it ideal for a newborn’s delicate skin.
- Honest Company: For those seeking eco-friendly and natural options, Honest Company diapers are a fantastic choice. These diapers are made with plant-based materials and are free from harmful chemicals. They offer a gentle, sustainable option, perfect for parents seeking an eco-conscious gift.
- Luvs: Luvs diapers are known for their affordability while still offering reliable quality. These diapers are absorbent and comfortable. They make a great budget-friendly option for diaper cakes, especially when creating a larger cake with multiple tiers.
Choosing the right brand ensures that your diaper cake is not only aesthetically pleasing but also functional and practical for the new parents.
Local Craft Stores
Local craft stores are a fantastic resource when creating a personalized diaper cake. They offer a wide variety of supplies that can help you bring your design ideas to life, from diapers to decorations. Shopping locally allows you to handpick your materials, ensuring quality and adding a personal touch to your project. Here’s how local craft stores can support your diaper cake creation:
- Materials for Decoration: Craft stores are full of creative items you can use to decorate your diaper cake. Look for ribbons, lace, fabric, baby-themed stickers, and embellishments like pearls or buttons. Many craft stores also carry themed decorations like small plush animals, balloons, or paper flowers that can enhance your cake’s look.
- Gift Wrapping Supplies: Craft stores often offer gift wrapping supplies like cellophane, tulle, and ribbon. These materials help wrap your diaper cake beautifully. They add that extra wow factor when you gift it.
- Local Shopping Experience: Shopping at a local craft store lets you see and feel the materials in person. This helps you choose the best items for your design. You can also ask store employees for advice, which can be especially helpful if you’re new to crafting diaper cakes.
- Last-Minute Supplies: If you’re running short on time, local craft stores can be a lifesaver. You can find most of the supplies you’ll need without waiting for shipping, allowing you to complete your diaper cake quickly and efficiently.
Local craft stores offer a convenient and hands-on shopping experience for everything you need to create a beautiful and unique diaper cake.
Conclusion
Creating a personalized diaper cake is an enjoyable and rewarding experience that allows you to express your creativity while giving a thoughtful and practical gift. Here’s a quick recap of the top 10 diaper cake ideas that can make your baby shower gift stand out:
- Gender-Neutral Diaper Cake: A versatile and stylish option using soft, neutral colors.
- Themed Diaper Cake: Custom cakes based on specific themes like animals, nautical, or fairytale.
- Luxury Diaper Cake: Incorporating premium materials and accessories for a sophisticated design.
- Mini Diaper Cakes: Smaller, adorable cakes perfect for table centerpieces or as individual gifts.
- Interactive Diaper Cake: Incorporating toys or functional baby items to make the cake interactive.
- Incorporating Baby’s Name: Personalizing the cake with the baby’s name for a unique touch.
- Choosing Baby Items: Adding essential baby products like onesies or bibs to make the cake practical.
- Color Schemes and Themes: Crafting your design based on a cohesive color palette and theme.
- Pinterest for Diaper Cake Ideas: Gathering inspiration from Pinterest for endless creative possibilities.
- Etsy for Materials and Finished Cakes: Purchasing high-quality materials or pre-made cakes from Etsy to simplify the process.
Creating a diaper cake is both fun and easy. With just a few basic materials—diapers, ribbons, and decorative items—you can create a beautiful, personalized gift quickly. Adding thoughtful details makes the cake special and unique. It shows how much you care. Whether you design a simple, elegant cake or a playful themed one, the process is rewarding. Plus, it will impress the parents-to-be.
2 thoughts on “Top 10 Diaper Cake Recipes to Wow at Your Next Baby Shower”