
Baking homemade bread is one of the most rewarding kitchen experiences, especially when you’re just starting out. The smell of fresh bread filling your home is unbeatable, and there’s nothing quite like the satisfaction of enjoying a warm slice right from the oven. If you’re a beginner in the world of bread baking, starting with a perfectly sized 8-inch bread loaf is an excellent choice. This guide will walk you through every step of the process, from mixing the ingredients to baking your loaf to golden perfection.
An 8-inch loaf is the perfect size for those new to bread making — it’s manageable, but still gives you a delicious and impressive loaf to enjoy. Whether you’re looking to make a simple white bread, add some extra flavor with herbs or seeds, or experiment with different textures, this easy-to-follow guide will ensure your first loaf turns out just right. Ready to bake the perfect 8-inch bread loaf? Let’s get started!
What You Need to Bake a Perfect 8-Inch Bread Loaf
Ingredients Overview
To bake a perfect 8-inch bread loaf, you’ll need a few simple yet essential ingredients. These are the building blocks of any great bread recipe, so it’s important to use the right ones to achieve that perfect texture and flavor.
- Flour: The foundation of any bread is flour. For an 8-inch loaf, all-purpose flour works great, providing a balanced structure and texture. You can also experiment with bread flour, which has a higher protein content and will give your bread a slightly chewier, more elastic texture. If you prefer a denser loaf, consider using whole wheat flour or a combination of whole wheat and all-purpose flour.
- Yeast: Yeast is what helps your dough rise and gives bread its airy, light texture. You can use either active dry yeast or instant yeast for this recipe. Instant yeast doesn’t require activation in water, making it convenient for beginners, but both types will work well for your loaf.
- Water: Water hydrates the flour and activates the yeast, starting the fermentation process. Use warm water (about 110°F/43°C) to ensure that the yeast activates properly, but not too hot, as it can kill the yeast. If you’re looking for a slightly richer flavor, you can experiment with milk or buttermilk.
- Salt: Salt not only enhances flavor but also helps control the yeast’s activity. It’s essential for a balanced taste and helps strengthen the dough structure.
- Sugar or Honey: A small amount of sugar or honey feeds the yeast, helping it grow and rise. It also adds a hint of sweetness to your bread.
- Olive Oil or Butter: Adding olive oil or butter provides richness and moisture, giving your bread a soft texture and golden crust.
These basic ingredients come together to form the perfect 8-inch bread loaf.
Tools & Equipment
Baking a perfect 8-inch bread loaf requires a few key tools and equipment to ensure everything goes smoothly. Here’s what you’ll need:
- 8-Inch Loaf Pan: The star of your bread-making setup is the 8-inch loaf pan. It’s the ideal size for beginners, as it gives you a manageable loaf that isn’t too big or too small. The pan helps shape the dough and creates even baking. A metal loaf pan is most common and provides a nice, even heat distribution, but you can also use a glass or ceramic pan for a slightly different crust texture.
- Mixing Bowls: You’ll need a large mixing bowl to combine the dry ingredients and wet ingredients. A glass or stainless steel bowl is perfect for bread dough because it won’t absorb moisture or odors. A smaller bowl will be handy for activating the yeast before mixing it into the dough.
- Measuring Cups and Spoons: Accuracy is key in baking. Using measuring cups for your dry ingredients and measuring spoons for liquids ensures your recipe comes out just right. It’s especially important for ingredients like yeast, salt, and sugar.
- Dough Scraper or Spoon: To mix your dough, a dough scraper or large wooden spoon will help you combine the ingredients without overworking the dough. A scraper also helps you shape and transfer the dough into the loaf pan.
- Oven Thermometer: A kitchen thermometer is helpful to ensure your oven is at the perfect temperature for baking your bread, which is usually around 350°F (175°C).
With these tools in place, you’re all set for a smooth and successful baking experience!
Optional Add-Ins
While a classic 8-inch bread loaf is delicious on its own, you can easily customize your loaf with a variety of add-ins to enhance flavor, texture, and visual appeal. Here are some great options to try:
- Herbs and Spices: Fresh or dried herbs like rosemary, thyme, or oregano can infuse your bread with an aromatic, savory flavor. If you’re aiming for a slightly sweet loaf, try adding a pinch of cinnamon or nutmeg for warmth and depth. You can incorporate these into the dough before the first rise for an evenly distributed flavor.
- Cheese: Adding cheddar, parmesan, or mozzarella to the dough will create a rich, savory flavor and a beautifully melted texture inside the bread. For a more gourmet twist, try adding blue cheese or feta for a tangy bite. Simply fold grated cheese into the dough during the mixing process.
- Seeds and Nuts: Sunflower seeds, pumpkin seeds, or sesame seeds not only add texture but also contribute healthy fats and a pleasant crunch. Walnuts or pecans offer a nutty, hearty flavor, making your bread even more satisfying. You can sprinkle these on top of the dough before baking or mix them into the dough.
- Sweet Add-Ins: For a slightly sweeter twist, consider adding raisins, dried cranberries, or even chocolate chips. These sweet treats balance the savory flavors and create a delightful contrast in each bite. Just fold them in during the final stages of dough preparation.
These optional add-ins give your 8-inch bread loaf a personal touch, making it unique and perfect for any occasion.
How to Prepare the Dough for Your 8-Inch Bread Loaf
Mixing the Ingredients
The process of mixing the ingredients is the foundation for achieving a smooth, well-textured dough. Here’s how to get it just right:
- Combine the Dry Ingredients: Start by measuring your dry ingredients—flour, sugar, salt, and yeast—into a large mixing bowl. It’s essential to mix the flour and salt well before adding the yeast to prevent direct contact between salt and yeast, which can inhibit the yeast’s activity. If you’re using instant yeast, it can be added directly to the dry ingredients. For active dry yeast, you’ll need to activate it first in warm water (around 110°F/43°C) with a pinch of sugar. Let it sit for about 5 minutes until it becomes frothy.
- Add the Wet Ingredients: Once your dry ingredients are well mixed, create a well in the center of the bowl to add your wet ingredients—water (or milk) and oil or butter. Start by pouring the liquid into the well, then gradually mix it with the dry ingredients. A wooden spoon or dough scraper works well for this step. Mix until the dough starts to come together, but don’t worry if it’s a little sticky at first.
- Form the Dough: Once most of the flour is incorporated, use your hands to finish bringing the dough together. The dough should be slightly sticky but should come away from the sides of the bowl. If the dough feels too dry, add a little water, one tablespoon at a time. If it’s too wet, sprinkle in a little more flour. The key is to achieve a soft, pliable dough that’s not too sticky to handle.
Mixing the ingredients thoroughly sets you up for a perfect rise and a soft, airy loaf.
Kneading the Dough
Kneading is an essential step in bread making, as it helps develop the gluten network that gives your bread structure and texture. Here’s how to do it properly:
- Flour Your Surface: Lightly flour a clean, flat surface, such as a countertop or cutting board, to prevent the dough from sticking. You can also use a silicone baking mat if you have one.
- Turn Out the Dough: Once your dough has come together in the bowl, transfer it onto the floured surface. Gently press it down to release any excess air.
- Start Kneading: To knead the dough, fold it in half towards you and then push it away with the heels of your hands. Turn the dough a quarter turn and repeat the process. This folding and pushing motion helps stretch the gluten, allowing the dough to become smooth and elastic. Continue kneading for about 8–10 minutes.
- Test for Readiness: After kneading, the dough should be soft, smooth, and elastic. To test if it’s ready, do the “windowpane test”: Take a small piece of dough and stretch it between your fingers. If it forms a thin, translucent membrane without tearing, your dough has been kneaded enough. If it tears, knead for a few more minutes and test again.
- Don’t Overknead: While kneading is important, overdoing it can make your bread tough. The dough should be soft and just slightly tacky, but not sticky.
Proper kneading ensures that your loaf has a light and airy crumb with a tender texture. It’s worth taking the time to get this step right!
Proofing the Dough
Proofing, or the first rise, is a crucial step in bread-making that allows the yeast to work its magic, making your dough rise and develop flavor. Here’s how to properly proof your dough:
- Shape the Dough: After kneading the dough, form it into a smooth ball or log shape. This helps ensure that the dough rises evenly during the proofing stage.
- Place in a Warm Environment: Transfer the dough to a lightly oiled bowl, ensuring that it’s well coated to prevent sticking. Cover the bowl with a clean kitchen towel or plastic wrap to trap moisture and warmth. The ideal proofing temperature is around 75–80°F (24–27°C). If your kitchen is cooler, you can place the bowl in an oven with the light on or near a warm spot in your home to maintain the right environment.
- Let It Rise: Allow the dough to proof for 1 to 1.5 hours or until it has doubled in size. This could take a little longer if your kitchen is cooler, so be patient! During this time, the yeast ferments the sugars in the dough, producing carbon dioxide, which makes the dough expand and become light and airy.
- Check for Readiness: After the dough has risen, gently press two fingers into it. If the indentations remain, the dough is ready for the next step. If the dough springs back quickly, it needs more time to rise.
Proofing is vital for achieving a soft, airy texture in your 8-inch loaf. It’s the stage where the dough gains its lightness and flavor, so don’t rush it!
Shaping and Preparing Your 8-Inch Bread Loaf for Baking
Shaping the Dough
Getting the shape right is key to ensuring your 8-inch bread loaf bakes evenly and holds its structure. Proper shaping encourages a uniform rise and an attractive, domed top. Begin by gently deflating the proofed dough, then tuck and roll it into a smooth, tight loaf. This helps build surface tension, which improves the final texture and appearance. Here’s how to shape your dough for the perfect loaf:
- Deflate the Dough: After the dough has finished its first rise and doubled in size, gently punch it down to release any excess air. This also helps redistribute the yeast and ensures an even crumb texture.
- Flatten and Shape: Transfer the dough to a lightly floured surface. Use your hands to gently flatten it into a rectangle, about the size of your loaf pan. Try not to be too rough with the dough—this keeps the air bubbles intact, which are key to the texture of the bread.
- Roll the Dough: Starting from one end of the rectangle, carefully roll the dough tightly towards the other end, like a jelly roll. This step helps the dough maintain its shape and ensures a uniform rise. As you roll, make sure there are no gaps, and tuck in the ends to prevent them from unfurling during baking.
- Place in the Pan: Once rolled, place the dough seam-side down in the 8-inch loaf pan. Press the dough gently to fit it into the pan’s corners, making sure it’s evenly distributed.
- Final Shaping: If needed, smooth the top of the dough with your hands to create an even surface. This ensures that the loaf bakes uniformly.
Shaping the dough correctly ensures that your bread has a smooth, even rise and bakes into a beautiful, well-formed loaf with a soft, tender crumb.
Placing Dough in the Pan
Once your dough is shaped, it’s time to place it in the loaf pan. Proper placement is essential to ensure that the bread rises evenly and bakes to perfection. Here’s how to do it:
- Prepare the Pan: Start by preparing your 8-inch loaf pan. Lightly grease it with butter or oil, or line it with parchment paper. This prevents the dough from sticking and ensures easy removal once baked. If you’re using a non-stick pan, a light coating will still help for a smoother release.
- Transfer the Dough: After rolling and shaping your dough, gently lift it and place it seam-side down into the center of the prepared pan. Be careful not to deflate the dough too much as you transfer it. It should still retain some of its air and structure for a good rise.
- Fit the Dough to the Pan: Gently press the dough into the corners of the loaf pan. This ensures that the dough fits snugly and bakes evenly. It’s important not to overwork the dough at this stage, as that could affect the texture of the loaf.
- Leave Space for Expansion: While pressing the dough into the pan, make sure there’s a little room at the top to allow the dough to rise during the second proofing stage. If the dough rises too high and touches the pan’s edges, it could cause uneven baking.
Placing the dough in the pan with care ensures that it will bake evenly and hold its shape, resulting in a beautifully formed loaf with a smooth, golden crust.
Second Proofing
The second proofing, also known as the final rise, is the stage where your dough gets one last chance to rise before baking. This step ensures that your bread has a light, airy texture and a beautifully soft crumb. Here’s how to handle the second proofing:
- Cover the Dough: After placing the shaped dough into the loaf pan, cover it with a clean kitchen towel or plastic wrap. This prevents the dough from drying out while it rises.
- Let It Rise: Allow the dough to proof for 30 minutes to 1 hour, or until it has visibly puffed up and is just slightly above the edge of the pan. During this time, the yeast continues to ferment, producing carbon dioxide, which makes the dough rise further and become light and airy. The dough should feel soft to the touch.
- Check the Dough: To ensure the dough is ready for baking, gently press a finger into it. If the indentation remains and doesn’t spring back, it’s fully proofed and ready to bake. If the dough bounces back, it needs a little more time.
- Avoid Over-Proofing: While the dough should rise enough to nearly double in size, be careful not to over-proof it. If the dough rises too much, it can collapse during baking, leading to a denser loaf.
The second proofing is crucial for achieving a light, fluffy loaf. It’s the final step in allowing the dough to develop its texture before baking, so don’t rush this process!
Baking Your 8-Inch Bread Loaf to Perfection
Preheating the Oven
Preheating the oven is a crucial step in baking bread, as it ensures your dough bakes evenly and achieves the desired texture. Here’s how to do it properly:
- Set the Temperature: For most 8-inch bread loaves, set your oven to 350°F (175°C). This temperature allows the bread to bake evenly, ensuring a golden-brown crust while keeping the interior soft and moist. If your recipe suggests a different temperature, always follow that guidance.
- Allow Enough Time: Preheating the oven takes time—usually about 10-15 minutes—so start this process early. This ensures that when you place your dough in the oven, it immediately starts baking at the correct temperature, giving the bread the best chance to rise and develop a beautiful texture.
- Check Your Oven’s Accuracy: Oven temperatures can sometimes be inaccurate, so it’s a good idea to use an oven thermometer to confirm that your oven is reaching the proper temperature. This step is especially important if you’re baking in a new or older oven.
- Use the Middle Rack: Position the oven rack in the center to ensure even heat distribution around the dough. If the rack is too high or too low, it can cause uneven baking, with either an overly browned top or an undercooked bottom.
Preheating your oven ensures that your 8-inch bread loaf bakes evenly and achieves the desired rise and crust. It’s a simple but essential step in achieving bakery-quality results at home.
Baking Temperature & Time
Baking your 8-inch bread loaf at the correct temperature and for the right amount of time is essential for achieving a perfect result. Here’s how to get it just right:
- Set the Right Temperature: For most bread recipes, the ideal baking temperature is 350°F (175°C). This allows the bread to bake through evenly, resulting in a golden-brown crust and soft interior. If your recipe suggests a different temperature, be sure to follow it closely to ensure the best outcome.
- Bake for the Right Amount of Time: Generally, a standard 8-inch loaf will require 25-35 minutes in the oven. However, baking times can vary based on your oven and the type of bread you’re making. Keep an eye on the bread as it bakes, and check for signs of doneness.
- Test for Doneness: To check if your bread is done, tap the top of the loaf lightly. If it sounds hollow, that’s a sign that the loaf is fully baked. You can also use a food thermometer—insert it into the center of the loaf, and it should read about 190-200°F (88-93°C) when fully cooked.
- Avoid Overbaking: Overbaking can cause the bread to become dry and hard. Once your bread is golden-brown and passes the doneness test, remove it from the oven to prevent it from baking too long.
Proper baking temperature and time are key to creating a delicious, evenly baked 8-inch bread loaf with a perfect texture. Monitoring the process closely will ensure the best results!
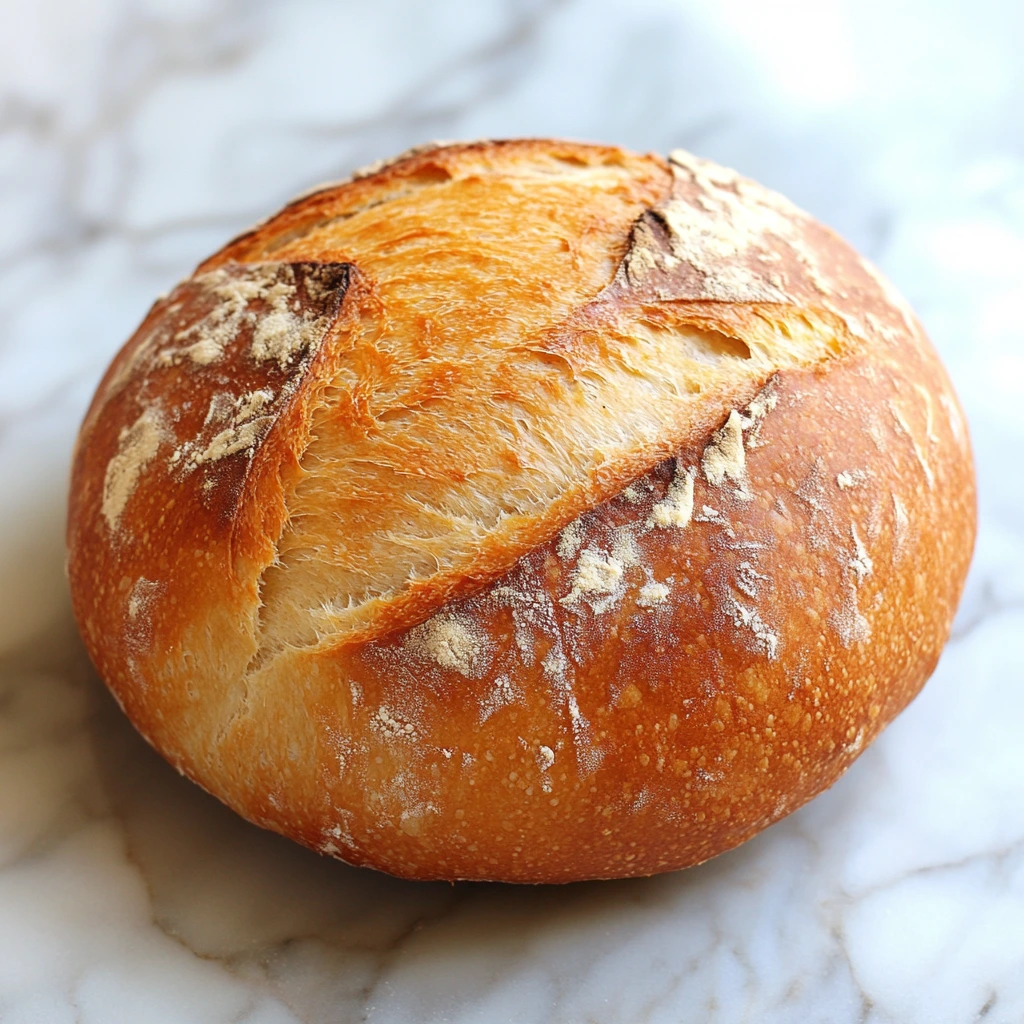
Checking for Doneness
Ensuring your 8-inch bread loaf is fully baked is crucial for achieving the right texture and flavor. Here are some reliable methods to check for doneness:
- Tap the Top: One of the most common ways to check if bread is done is by tapping the top of the loaf. If the sound is hollow, it usually means the loaf has baked through. A non-hollow sound indicates the bread might need more time in the oven.
- Use a Food Thermometer: For the most accurate method, use a food thermometer to measure the internal temperature of the loaf. Insert the thermometer into the center of the bread. When the temperature reaches about 190-200°F (88-93°C), the bread is fully cooked. This ensures that the loaf is baked all the way through, avoiding a raw or doughy interior.
- Check the Crust: The color of the crust is another indicator of doneness. A well-baked loaf should have a golden-brown crust. If the crust is too pale, the bread may need more time. However, if the crust is too dark or starting to burn, it’s best to remove the loaf from the oven.
- Check the Bottom: Flip the loaf out of the pan and tap the bottom. If it sounds hollow and feels firm, it’s likely done. If it’s soft or dense, it may need a few extra minutes in the oven.
By using these methods to check for doneness, you’ll be able to ensure your 8-inch bread loaf has the perfect texture—crispy on the outside and soft and airy on the inside.
Tips for Storing and Enjoying Your Fresh 8-Inch Bread Loaf
How to Store Your Bread
Properly storing your freshly baked 8-inch bread loaf is essential to maintain its freshness and texture. Here are some effective ways to store your bread:
- Allow the Bread to Cool: Before storing, let your bread cool completely on a wire rack. Storing hot or warm bread can cause moisture to accumulate inside the storage container, making the bread soggy and promoting mold growth. Cooling the bread ensures the best texture when you’re ready to enjoy it.
- Wrap the Bread: Once the bread has cooled, wrap it in plastic wrap, aluminum foil, or a clean kitchen towel. This helps retain moisture while preventing the bread from drying out. If you prefer, you can also use a bread bag, which is designed to keep bread fresh for longer periods.
- Room Temperature Storage: If you plan to consume the bread within a few days, store it at room temperature in a cool, dry place, away from direct sunlight. A bread box is an excellent choice for maintaining freshness, as it allows for airflow while keeping the bread protected.
- Freezing for Long-Term Storage: For longer storage, freezing your bread is a great option. Slice the loaf before freezing so you can easily take out just the pieces you need. Wrap the bread tightly in plastic wrap or place it in a freezer bag to protect it from freezer burn. When you’re ready to eat it, simply thaw the slices at room temperature or toast them for a fresh-out-of-the-oven taste.
By following these storage methods, your 8-inch bread loaf will stay fresh and delicious for days or even weeks, allowing you to enjoy it at your convenience.
How to Slice & Serve
Once your 8-inch bread loaf is fully baked and cooled, it’s time to slice and serve it. Proper slicing ensures that the bread maintains its texture and flavor, making each slice as delicious as the last. Here’s how to do it:
- Cool Completely Before Slicing: Allow your bread to cool completely before slicing. Cutting into warm bread can cause it to become gummy and misshapen. Cooling also lets the crumb set, which gives you clean, even slices.
- Use a Serrated Knife: A serrated bread knife is the best tool for slicing bread. Its teeth allow you to cut through the crust without squishing the soft interior. Gently saw back and forth to create even slices, rather than pressing down hard, which can flatten the loaf.
- Cut Thin or Thick Slices: Depending on your preference, you can cut thin slices for sandwiches or thicker slices for serving with soups or as toast. Just be sure to slice evenly to maintain the loaf’s structure.
- Serve with Butter or Toppings: Freshly sliced bread is delicious on its own, but it can also be served with various toppings. Butter, jam, or honey are classic choices, or you can enjoy it with savory options like cheese or avocado. Toasting the bread before serving enhances its flavor, creating a crispy, golden crust.
By following these simple steps for slicing and serving, you’ll ensure that your 8-inch bread loaf looks as great as it tastes and is ready to be enjoyed with your favorite toppings.
Troubleshooting Common Issues
Baking bread can sometimes come with challenges, but understanding common issues can help you resolve them for a better loaf. Here are some typical problems you might encounter and how to troubleshoot them:
- Dough Not Rising: If your dough doesn’t rise, it could be due to inactive yeast. Make sure the yeast is fresh and properly activated. If you’re using active dry yeast, dissolve it in warm water (between 100-110°F/37-43°C) before adding it to your dough. Also, ensure the dough is kept in a warm environment (around 75°F/24°C) for proofing.
- Dense or Heavy Loaf: A dense loaf may result from over-kneading or under-kneading the dough. Ensure that the dough is kneaded long enough (about 8-10 minutes) to develop gluten, but avoid overworking it. Also, check the amount of flour you’re using. Too much flour can result in a heavy loaf, so measure flour accurately.
- Uneven Crust: An uneven crust can be caused by placing the dough on a too-low or too-high oven rack. To ensure an even bake, position your loaf in the center of the oven. If the crust is too dark, you can cover it with aluminum foil in the last 10 minutes of baking.
- Bread Too Dry: If your bread turns out too dry, it might have been overbaked or over-mixed. Always check the bread’s internal temperature to avoid overbaking, and consider reducing the baking time slightly for a moister loaf.
By recognizing and addressing these common issues, you can troubleshoot effectively and bake a perfect 8-inch bread loaf every time.
Conclusion
Baking the perfect 8-inch bread loaf is a straightforward process when broken down into key steps. Here’s a quick recap to ensure you achieve great results:
- Gather Your Ingredients: Begin by measuring out your flour, yeast, salt, sugar, and water. If desired, add optional ingredients like butter or honey for flavor.
- Mix the Ingredients: Combine the dry ingredients in a large bowl, then gradually add the wet ingredients. Stir until a dough forms, ensuring that everything is evenly incorporated.
- Knead the Dough: Knead the dough for about 8-10 minutes until it becomes smooth and elastic. This process develops gluten, giving your bread structure.
- Proof the Dough: Let the dough rise in a warm place for 1-2 hours until it doubles in size. This step allows the yeast to ferment and produce carbon dioxide, which makes the dough rise.
- Shape the Dough: After proofing, punch down the dough and shape it into a loaf. Place the shaped dough into your 8-inch bread pan.
- Second Proofing: Allow the dough to rise again in the pan for about 30-60 minutes until it slightly expands, preparing it for baking.
- Preheat the Oven & Bake: Preheat your oven to 350°F (175°C), then bake the loaf for 25-35 minutes until it’s golden brown and sounds hollow when tapped.
- Cool & Slice: Let the bread cool completely before slicing with a serrated knife to maintain its texture.
By following these key steps, you can consistently bake a soft, delicious 8-inch bread loaf with a golden crust every time!
2 thoughts on “How to Bake a Perfect 8-Inch Bread Loaf: A Beginner’s Guide”