
Baking bread from scratch is a rewarding experience that fills your home with warmth and delicious aromas. But the secret to perfect homemade bread starts with mastering one key component: the bread dough. Whether you’re a beginner or an experienced baker, the right dough recipe is crucial for achieving soft, fluffy, and flavorful bread every time.
In this guide, we’ll walk you through the ultimate bread dough recipe—one that’s easy to follow and guarantees consistent results. From understanding the essential ingredients like yeast, flour, and water, to kneading techniques and proofing tips, you’ll learn everything you need to make perfect bread dough that’s ready for any type of loaf you desire. Say goodbye to store-bought bread and discover the joy of making your own fresh, homemade loaves right in your kitchen!
Essential Ingredients for the Perfect Bread Dough
Yeast
Yeast is the magic ingredient that makes bread dough rise and become light and airy. It’s a living organism that ferments the sugars in the dough, producing carbon dioxide and alcohol in the process. This carbon dioxide gas creates bubbles that cause the dough to expand, giving your bread its soft and fluffy texture.
There are two main types of yeast used in bread-making: active dry yeast and instant yeast. Active dry yeast needs to be dissolved in warm water before use to activate it, whereas instant yeast can be added directly to the dry ingredients without needing to be pre-hydrated. Both types work well, but instant yeast is more convenient because it’s faster and doesn’t require proofing.
When using yeast, it’s important to pay attention to the water temperature. Too hot, and you risk killing the yeast; too cold, and the yeast will be sluggish. Ideally, water should be around 110°F (43°C) to activate the yeast properly. If you’re using sugar, remember that yeast feeds on sugars, which helps it grow and rise faster. However, adding too much sugar can inhibit yeast activity, so it’s important to follow your recipe carefully.
If your dough isn’t rising properly, it might be due to expired or improperly stored yeast. Always check the expiration date, and store yeast in a cool, dry place for maximum freshness. With the right yeast and a little patience, you’ll achieve the perfect rise and the softest bread every time!
Flour
Flour is the backbone of bread dough, providing the structure and texture that transforms into a beautiful loaf. The two most common types of flour used in bread-making are all-purpose flour and bread flour. The key difference lies in their protein content, which affects the dough’s texture and the final bread’s quality.
Bread flour has a higher protein content, typically around 12-14%, which helps develop more gluten as you knead the dough. This gluten network gives bread its chewy texture and helps it rise properly. For soft, airy loaves like baguettes or pizza dough, bread flour is your best option. It creates that desirable elasticity and structure that makes bread airy yet sturdy.
All-purpose flour, with a lower protein content (around 9-11%), is more versatile and can be used for a variety of baking projects. It works well for softer breads like sandwich loaves or dinner rolls. However, if you’re aiming for a denser, more rustic loaf, you might need to combine it with some bread flour for that extra structure.
There are also other specialized flours like whole wheat flour and rye flour, which can be used in bread recipes to create different flavors and textures. Whole wheat flour, for example, adds a nuttier taste and denser texture, while rye flour contributes to a tangy flavor.
When selecting flour for your dough, always consider the bread type you’re making. The right flour will ensure your dough has the correct consistency and that your bread comes out with the perfect texture every time.
Water
Water is an essential component in bread dough, acting as a medium to hydrate the flour, dissolve the yeast, and activate gluten development. The quality and temperature of the water can significantly impact the final result of your bread.
The temperature of the water is particularly crucial. If the water is too hot, it can kill the yeast, preventing the dough from rising properly. On the other hand, if the water is too cold, the yeast will remain dormant and fail to activate. The ideal water temperature for activating yeast is around 110°F (43°C)—warm to the touch but not scalding. This temperature ensures the yeast ferments the sugars in the dough and produces the carbon dioxide that causes the dough to rise.
Water quality also plays a role in the bread-making process. If your tap water has a high mineral content or is heavily chlorinated, it can affect the yeast’s activity and the flavor of your bread. In such cases, using filtered or bottled water can help achieve more consistent results.
The amount of water in your dough is another important factor. Too little water will make the dough too stiff, while too much can cause it to become sticky and hard to handle. The right balance is key to achieving the perfect dough consistency, which should be soft, smooth, and slightly tacky to the touch.
In summary, the right water temperature and quality, along with the correct amount of water, are critical to making the perfect bread dough. It ensures proper yeast activation, smooth dough consistency, and a beautiful final loaf.
Salt and Sugar
Salt and sugar, though often used in small amounts, are essential ingredients in bread dough. They serve distinct purposes that contribute to the flavor, texture, and overall success of your loaf.
Salt plays several critical roles in bread making. First, it helps to regulate yeast activity by slowing down fermentation. Without salt, the yeast would rise too quickly, leading to a dough with less flavor and structure. Salt also strengthens the gluten network, helping the dough maintain its shape and improving its texture. Additionally, it enhances the overall flavor of the bread, balancing the natural sweetness of the flour and enriching the taste. When adding salt, be mindful not to add it directly on top of the yeast, as too much salt can inhibit the yeast’s ability to ferment properly.
Sugar serves as food for the yeast. It is fermented by the yeast to produce carbon dioxide gas, which makes the dough rise and contributes to a light, airy texture. Sugar also contributes to the browning of the bread’s crust, giving it a golden color when baked. While sugar is important for activating yeast, it should be used in moderation. Too much sugar can interfere with yeast activity, causing the dough to rise unevenly or making the bread overly sweet. In certain recipes, sugar also enhances the bread’s flavor, adding a hint of sweetness to loaves like brioche or cinnamon rolls.
In summary, while salt and sugar may seem like small ingredients, they play a vital role in balancing yeast activity, improving flavor, and ensuring your bread has the perfect texture.
Step-by-Step Guide to Making Bread Dough
Mixing the Ingredients
Mixing the ingredients properly is the first crucial step in creating the perfect bread dough. It sets the foundation for the dough’s texture, consistency, and ultimately, the final loaf.
Start by combining your dry ingredients, such as flour, salt, and sugar, in a large mixing bowl. In a separate bowl, activate the yeast by mixing it with warm water (around 110°F or 43°C) and a small amount of sugar. The warm water helps to activate the yeast, allowing it to ferment and begin producing carbon dioxide, which makes the dough rise.
Once the yeast has dissolved and bubbled, pour it into the dry ingredients and mix. If you’re using a stand mixer, you can use the dough hook attachment to mix the ingredients at low speed, ensuring they come together smoothly. If mixing by hand, use a wooden spoon or your hands to combine the ingredients until they form a rough dough.
As you mix, you may need to gradually add more water, depending on the humidity and the type of flour you’re using. The dough should come together but still be slightly sticky. Once the dough begins to form, it’s time to move on to the next step: kneading.
Proper mixing ensures that the flour absorbs the water evenly, activating the yeast and creating a smooth, consistent dough. If done incorrectly, the dough can be too dry or too wet, leading to issues during the rising and baking stages. In summary, careful and thorough mixing is key to setting up your dough for success, creating the right foundation for proper gluten development and a perfect loaf.
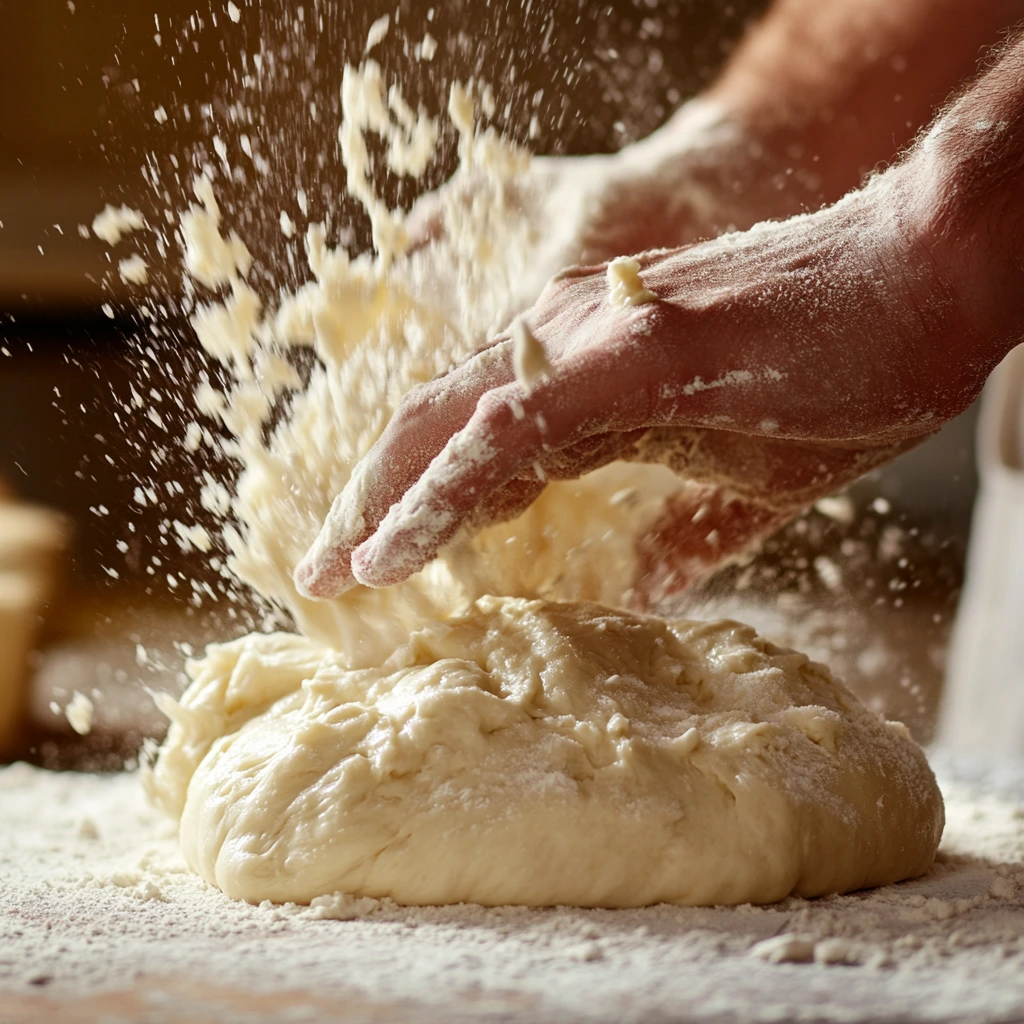
Kneading the Dough
Kneading is an essential step in bread-making that helps develop the dough’s structure and texture. This process involves working the dough to encourage the formation of gluten, the protein network that gives the bread its elasticity and chewy texture. Proper kneading is key to achieving the perfect rise and a light, airy loaf.
To knead by hand, start by turning the dough out onto a clean, lightly floured surface. Gently press the dough with the heels of your hands, then fold it over itself and push it down again. Repeat this process, turning the dough a quarter turn after each press. Continue kneading for about 8-10 minutes, or until the dough becomes smooth, elastic, and no longer sticky. You should be able to stretch the dough without it tearing—a sign that the gluten has developed properly.
If you’re using a stand mixer, attach the dough hook and knead on low speed for about 5-7 minutes. The mixer makes the process quicker, but it’s still important to monitor the dough’s texture. It should pull away from the sides of the bowl and form a smooth, elastic ball.
Kneading also serves to evenly distribute the yeast throughout the dough, ensuring an even rise. Over-kneading can lead to tough bread, while under-kneading may result in a dense texture. A simple test is the “windowpane test”—stretch a small piece of dough between your fingers. If it forms a thin, translucent sheet without tearing, the dough has been kneaded properly.
In summary, kneading is crucial for developing gluten and ensuring your bread dough is ready for the next stage—proofing—where it will rise to perfection.
Proofing
Proofing, also known as fermentation, is the process where the yeast in the dough works its magic, causing the dough to rise and develop flavor. It is one of the most crucial stages in bread-making, as it allows the yeast to produce carbon dioxide, which creates the bubbles that make the bread light and airy.
After kneading, your dough needs time to rest and rise. Place it in a large, lightly oiled bowl and cover it with a damp cloth or plastic wrap to prevent it from drying out. The dough should be kept in a warm, draft-free area, ideally around 75°F to 80°F (24°C to 27°C). This temperature range helps the yeast work efficiently, producing the carbon dioxide necessary for the dough to expand.
The first proofing, also known as the bulk fermentation, usually lasts about 1 to 1.5 hours, or until the dough has doubled in size. You can test this by gently pressing two fingers into the dough—if the indentation remains, the dough is ready for the next step.
For a lighter, airier loaf, you can also do a second proofing after shaping the dough. This stage is shorter, typically lasting 30 minutes to an hour, and ensures the dough is fully risen before baking.
Proofing not only helps the dough rise but also develops the flavor. The longer the proofing time (within reason), the more complex the flavors will become. Be sure not to over-proof, as this can cause the dough to lose its structure and collapse. With proper proofing, your bread will have a perfect texture and a rich, slightly tangy flavor from the fermentation process.
Common Mistakes to Avoid When Making Bread Dough
Using the Wrong Yeast
Using the wrong type of yeast can have a significant impact on the texture, rise, and flavor of your bread. There are two primary types of yeast commonly used in bread-making: active dry yeast and instant yeast. While both types work similarly, using the wrong one or failing to properly activate it can lead to dough that doesn’t rise correctly or produces an undesirable texture.
Active dry yeast needs to be dissolved in warm water (around 110°F or 43°C) before use. If not properly activated, the yeast may not ferment the dough as effectively, resulting in a denser loaf. Additionally, using active dry yeast in a recipe that calls for instant yeast can cause longer proofing times, making the process less efficient.
Instant yeast is more convenient because it can be mixed directly into the dry ingredients without pre-dissolving. It works faster than active dry yeast and is ideal for recipes that need a quicker rise. If you use instant yeast in place of active dry yeast, the dough may rise too quickly, leading to uneven fermentation and an overly light texture.
In addition to choosing the right type of yeast, it’s crucial to check the expiration date. Yeast is a living organism, and expired yeast may not be active enough to help the dough rise. Always store yeast in a cool, dry place to maintain its freshness, and if using it infrequently, consider refrigerating or freezing it.
In summary, using the correct yeast for your recipe and ensuring it’s fresh will help your bread rise properly and develop the perfect texture.
Not Kneading Enough
Kneading is a vital step in bread-making that allows the dough to develop its gluten structure, which is key to creating a chewy, airy texture. If you don’t knead the dough enough, it can lead to a dense, heavy loaf with poor rise and texture.
When kneading, you are helping the proteins in the flour—mainly glutenin and gliadin—combine to form gluten, the network that traps air bubbles created by the yeast. This gluten network allows the dough to stretch and rise properly. If the dough isn’t kneaded enough, the gluten network remains weak and underdeveloped, which means the dough will struggle to rise and hold its shape.
Under-kneaded dough also tends to be sticky and uneven, which can result in uneven baking. The bread may collapse during baking or have a dense, crumbly texture. You’ll also notice that the dough may not hold its shape when you try to shape it for the final rise.
To ensure proper kneading, aim to knead the dough for about 8-10 minutes by hand, or 5-7 minutes with a stand mixer using the dough hook. The dough should become smooth, elastic, and slightly tacky but not overly sticky. If it’s still rough or tears easily, it needs more kneading.
One way to test if your dough has been kneaded enough is the windowpane test. Stretch a small piece of dough between your fingers—if it forms a thin, translucent sheet without tearing, it’s ready. Proper kneading will ensure your bread rises well, has the perfect texture, and bakes evenly.
Incorrect Proofing Time
Proofing time is crucial in bread-making, as it directly affects the dough’s rise, texture, and flavor. Incorrect proofing time, whether too short or too long, can result in bread that doesn’t rise properly or has an undesirable texture.
If the dough is under-proofed, meaning it doesn’t have enough time to rise, the yeast hasn’t had the opportunity to produce enough gas, resulting in a dense, heavy loaf. The dough will be tough, and the bread will likely have a poor crumb structure. Under-proofing can happen if you don’t allow the dough to double in size or if it’s rushed through the proofing process.
On the other hand, over-proofing occurs when the dough rises for too long, causing the yeast to consume all the available sugars and leaving the dough without enough structure. Over-proofed dough will be overly soft and lose its elasticity, resulting in a bread that could collapse during baking or have a sour, overly yeasty flavor. The texture might be too airy, and the bread could have large holes in an uneven pattern.
The key to successful proofing is monitoring the dough’s rise. Most recipes call for proofing the dough for about 1 to 1.5 hours for the first rise (bulk fermentation) or until it doubles in size. For the second rise after shaping, it typically takes around 30 to 60 minutes. To check if your dough is proofed correctly, press your finger gently into the dough—if the indentation remains, it’s ready for the next step.
In conclusion, correct proofing time ensures the perfect rise and structure, contributing to delicious, well-textured bread.
Too Much or Too Little Water
The amount of water in your bread dough is critical for achieving the right consistency, texture, and rise. Too much or too little water can lead to a variety of issues, affecting both the dough’s handling and the final product.
Too little water makes the dough dry and difficult to knead. It will lack elasticity and might feel rough and crumbly, making it hard for the gluten to develop properly. A dry dough can also prevent the yeast from activating fully, resulting in poor rise and dense bread. The dough may not expand well during proofing, and it can have an uneven crumb structure once baked.
On the other hand, too much water creates a sticky, loose dough that is hard to shape and handle. Excess water dilutes the flour’s ability to form a strong gluten network, leading to a weak dough that may collapse during rising or baking. Too much moisture can also slow down fermentation, as the yeast may struggle to work effectively in an overly wet environment. The bread may end up overly airy with large, irregular holes and could have a soggy or overly soft crust.
To achieve the perfect dough, it’s important to add water gradually. Start with the recommended amount and adjust as needed. The dough should feel soft, slightly tacky, but not sticky. You can test the dough’s consistency by gently pressing it with your finger—it should spring back slightly without sticking too much to your hands. In summary, balancing the water content ensures a smooth, manageable dough that rises well and bakes into a perfect loaf.
Tips and Tricks for Perfect Bread Dough
How to Tell if the Dough is Ready
Knowing when your dough is ready is crucial for achieving the perfect bread. There are several ways to determine if your dough has been properly kneaded, proofed, and is ready for the next step, whether it’s shaping or baking.
1. The Windowpane Test: One of the most reliable methods to check if the dough is ready after kneading is the windowpane test. Take a small piece of dough and gently stretch it between your fingers. If the dough forms a thin, translucent sheet without tearing, the gluten has developed properly, and the dough is ready. If it tears easily, the dough needs more kneading.
2. The Finger Test: After the first proofing, gently press two fingers into the dough. If the indentation remains and the dough doesn’t spring back, it’s ready for shaping or the next rise. If the dough springs back quickly, it needs more time to proof.
3. The Size Test: During proofing, the dough should double in size. You can visually check its size or gently press your finger into the dough. If it leaves an indentation and the dough feels airy and light, it’s ready for the next step.
4. The Texture Test: The dough should feel soft, elastic, and slightly tacky but not overly sticky. When you press your finger into the dough, it should spring back slowly, indicating that the dough has the right balance of moisture and gluten development.
In summary, the dough is ready when it passes the windowpane or finger tests and has doubled in size. These checks ensure your bread will rise properly, resulting in a light, airy loaf.
Using a Dough Hook
A dough hook is a valuable tool for those who want to streamline the bread-making process. It’s a kitchen appliance attachment designed to mimic the action of hand-kneading, saving time and energy while still producing well-structured dough. However, using the dough hook properly is essential to achieving the best results.
When using a dough hook with a stand mixer, start by adding your dry ingredients (flour, salt, sugar) to the bowl, then add the wet ingredients (water, yeast, oil). Mix the ingredients on low speed to combine them into a shaggy dough. Once the ingredients are incorporated, increase the speed to medium to begin kneading. The dough hook should automatically pull the dough around the bowl, folding and stretching it, similar to hand-kneading.
Kneading with a dough hook typically takes 5-7 minutes, depending on the recipe. You’ll want to monitor the dough closely to make sure it’s developing properly. The dough should form a smooth, elastic ball that pulls away from the sides of the bowl, but it may still be slightly sticky. If it’s too sticky, add a little more flour; if it’s too dry, add a bit more water.
One of the key benefits of using a dough hook is consistency. It provides more uniform kneading than hand-kneading, which can vary depending on technique and strength. However, be careful not to overwork the dough, as this can lead to dense bread. The dough hook does a great job at ensuring proper gluten development, so you can be confident that your bread will rise beautifully with the right texture and flavor.
In summary, using a dough hook efficiently makes the bread-making process quicker and more consistent, yielding a perfect dough ready for proofing.
Temperature Considerations
Temperature plays a crucial role in bread-making, influencing yeast activity, dough consistency, and the final texture of your bread. Understanding how to manage temperature throughout the process can lead to better results.
1. Water Temperature: The temperature of the water you use to activate the yeast is essential. If the water is too hot (above 120°F or 49°C), it can kill the yeast, preventing the dough from rising. Conversely, if the water is too cold, the yeast won’t activate properly, and the dough may not rise effectively. The ideal temperature for activating yeast is around 105°F to 110°F (40°C to 43°C). Always use a thermometer if you’re unsure.
2. Dough Temperature: As you mix and knead your dough, the temperature of the dough should remain moderate—around 75°F to 80°F (24°C to 27°C). If the room is too hot, the dough may rise too quickly, affecting the texture and flavor. If it’s too cold, fermentation slows down, leading to under-proofed dough. Try to keep your dough in a warm, draft-free place during proofing to help it rise at a steady pace.
3. Oven Temperature: The temperature of your oven is just as important for baking bread. Most bread recipes call for an oven temperature between 350°F to 475°F (175°C to 245°C). A preheated oven ensures that your bread starts baking immediately, helping it rise well and develop a golden crust. If the oven is too cool, the bread may bake unevenly or fail to rise properly; too hot, and the crust could burn before the inside is fully cooked.
In conclusion, managing the right temperatures at each stage of bread-making is vital for achieving a well-risen, delicious loaf.
Flour Substitutes
While all-purpose flour is a go-to for most bread recipes, there are several flour substitutes you can use, depending on dietary needs, flavor preferences, or ingredient availability. Substituting flour can alter the texture, rise, and flavor of your bread, so it’s important to choose carefully.
1. Whole Wheat Flour: Whole wheat flour adds a richer, denser texture and a nutty flavor, as it retains the bran and germ. It absorbs more water, so adjust the liquid in your recipe. To keep the texture light, consider mixing whole wheat with all-purpose flour.
2. Bread Flour: Bread flour has a higher protein content than all-purpose flour, which makes it ideal for recipes requiring more structure and chew, like artisan loaves or baguettes. It helps create more gluten, giving bread its characteristic elasticity. If substituting for all-purpose flour, you may need to reduce the water slightly as bread flour absorbs more moisture.
3. Gluten-Free Flours: For those avoiding gluten, a variety of gluten-free flours are available, such as rice flour, almond flour, and sorghum flour. Gluten-free bread recipes typically require a blend of different flours and additional binders like xanthan gum to mimic the elasticity of wheat flour. Keep in mind that gluten-free breads tend to have a denser, crumbly texture.
4. Spelt Flour: Spelt is an ancient grain related to wheat and has a slightly nutty flavor. It’s often used in bread recipes as a substitute for all-purpose flour. It contains gluten but in lower amounts, so bread made with spelt can be slightly softer and more delicate.
Choosing the right flour substitute can create unique, flavorful loaves, but adjustments in hydration and mixing may be necessary for the best results.
Troubleshooting Bread Dough Problems
Dough Too Sticky
A sticky dough can be frustrating and challenging to work with, especially when you’re trying to shape it or transfer it into the pan. However, stickiness is not always a sign of a bad dough—it may just need a little adjustment.
1. Why Dough Becomes Sticky: Dough becomes sticky for a variety of reasons. One common cause is too much water in the recipe. Water activates the flour and yeast, but if there’s too much, the dough can become wet and unmanageable. Another cause of sticky dough is insufficient flour. While you don’t want to add too much flour, failing to add enough can prevent the dough from holding together. Additionally, high humidity or wet weather can affect the moisture levels in your dough, making it stickier than usual.
2. How to Fix Sticky Dough: Resist adding too much flour, as it can make the bread dense and dry. Lightly flour your work surface and hands, then gently knead the dough, adding small amounts of flour as needed. If using a stand mixer, check the dough’s texture and add flour gradually until it’s soft, tacky, and elastic but not wet.
3. Using Oil: If your dough is still too sticky to handle, you can also try greasing your hands with oil. This helps prevent it from sticking to your fingers, making it easier to knead and shape without adding extra flour.
By making small adjustments to your dough’s hydration and handling, you can easily correct sticky dough and achieve the perfect texture for your bread.
Dense or Heavy Bread
A dense or heavy loaf of bread can be disappointing, especially when you expect a light, airy texture. There are several potential causes for dense bread, and understanding these factors can help you troubleshoot and achieve a better result next time.
1. Under-Kneading: Insufficient kneading is a common cause of dense bread. Kneading develops gluten, giving the dough structure and allowing it to rise. Knead until the dough is smooth, elastic, and passes the windowpane test, stretching without tearing.
2. Too Much Flour: Adding too much flour during mixing or kneading can also lead to dense bread. Excess flour stiffens the dough, making it difficult for the yeast to rise effectively. While it’s important to have enough flour to handle the dough, use only what’s necessary for the dough to form a soft, slightly tacky ball.
3. Under-Proofing: If the dough hasn’t had enough time to rise during proofing, the yeast won’t have a chance to create the bubbles and air pockets that give bread its light texture. Make sure to allow the dough to double in size during the first rise and to proof sufficiently during the second rise, if applicable. A warm, draft-free place will help speed up the proofing process.
4. Incorrect Yeast Activation: If your yeast isn’t properly activated—either due to the water being too hot or too cold—it won’t produce enough gas, leading to a denser loaf. Always use warm water (105°F to 110°F) to activate your yeast and ensure it’s bubbling before adding it to the dough.
By addressing these common issues, you can avoid dense or heavy bread and create a light, fluffy loaf with the perfect crumb.
Dough Not Rising
One of the most frustrating issues in bread-making is when your dough fails to rise. There are several common reasons why this happens, and understanding them can help you troubleshoot and ensure a successful bake next time.
1. Yeast Problems: The most common cause of dough not rising is inactive or expired yeast. Yeast is a living organism, and if it’s not active, it won’t produce the carbon dioxide necessary for the dough to rise. Always check the expiration date on your yeast, and make sure it’s properly activated. To activate yeast, dissolve it in warm water (105°F to 110°F) with a pinch of sugar. If it doesn’t bubble after a few minutes, the yeast is likely dead.
2. Incorrect Temperature: Yeast thrives in warm environments, with ideal proofing temperatures between 75°F and 80°F (24°C to 27°C). Too hot can kill yeast, while too cold slows fermentation. Keep your kitchen warm or proof dough in a slightly warm oven or near a radiator.
3. Over-Kneading or Under-Kneading: Both over-kneading and under-kneading can lead to dough that doesn’t rise. Under-kneaded dough will lack gluten development, preventing it from trapping air and rising properly. On the other hand, over-kneaded dough can become too tight and dense, making it difficult for the yeast to expand. Be sure to knead your dough until it’s smooth and elastic, but not excessively so.
4. Overproofing: Leaving dough to rise for too long can result in overproofing. The dough will rise too much, and the yeast will exhaust itself, causing the dough to collapse and fail to rise properly during baking.
By troubleshooting these factors, you can prevent dough from failing to rise and achieve a beautifully fluffy loaf.
Conclusion
Making perfect bread dough is a rewarding process that requires attention to detail and a few key techniques. Here’s a quick recap of the essential tips to ensure your dough turns out perfectly every time:
1. Use Fresh, Active Yeast: Always check the expiration date on your yeast and activate it properly. Dissolve it in warm water (105°F to 110°F) with a pinch of sugar to ensure it’s bubbling and ready to go.
2. Measure Ingredients Accurately: Accurate measurements of flour, water, and other ingredients are critical. Too much flour can lead to dense dough, while too little can make the dough too sticky. Consider using a kitchen scale for the most precise results.
3. Control Temperature: Yeast thrives in warm environments. Ensure your water is at the right temperature to activate the yeast and keep your dough in a warm, draft-free spot to rise. Ideal dough temperature for kneading is around 75°F to 80°F.
4. Knead the Dough Properly: Kneading develops gluten, which gives the dough structure and helps it rise. Knead until the dough is smooth, elastic, and slightly tacky. You can also use a dough hook or stand mixer to save time.
5. Proof the Dough Correctly: Allow your dough to rise in a warm, controlled environment. The dough should double in size during the first rise. Over-proofing can exhaust the yeast, while under-proofing may result in dense bread.
6. Don’t Overwork or Underwork the Dough: Achieving the right texture and consistency is key. Avoid adding too much flour during kneading and be sure not to rush the process.
By following these essential tips, you’ll be well on your way to making perfectly risen, delicious bread every time.