
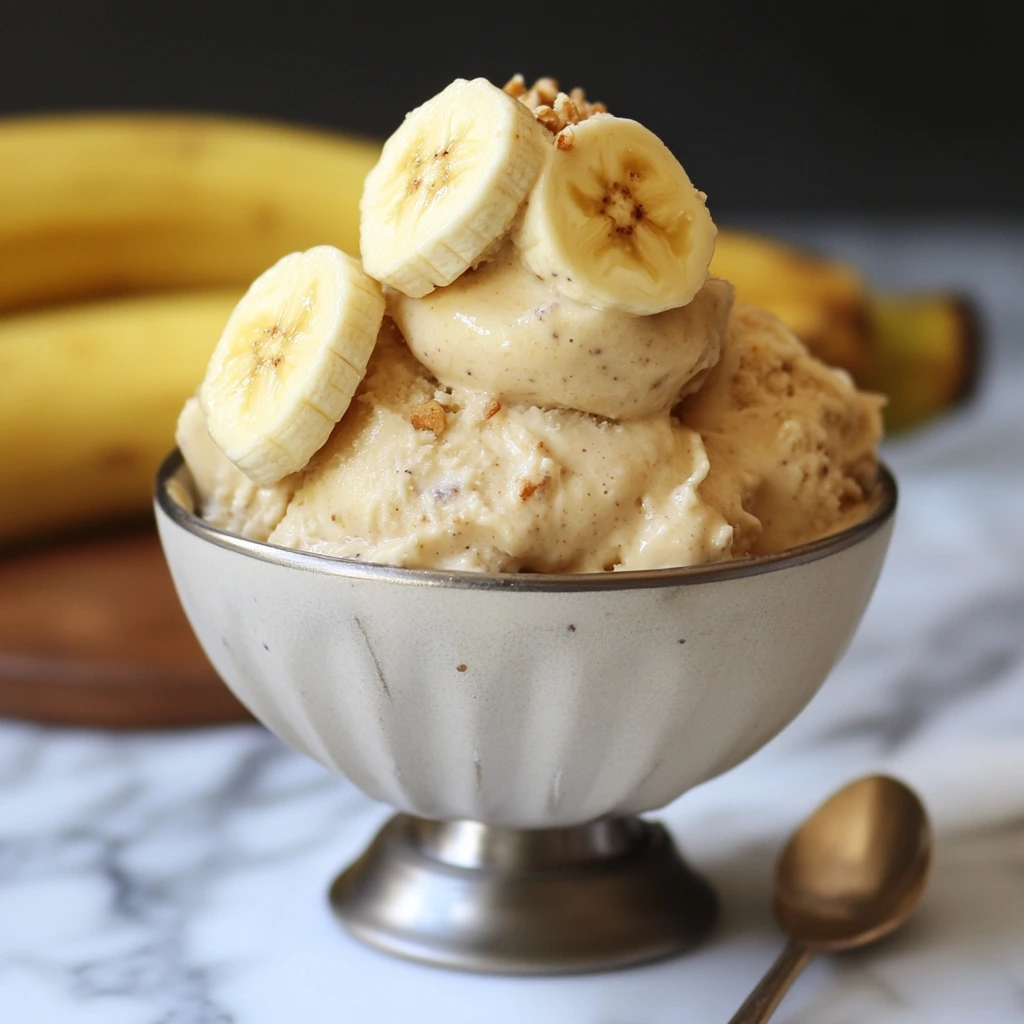
Nothing says summer like a bowl of cold, creamy ice cream—but what if you could enjoy that rich texture and sweet flavor without all the extra sugar, heavy cream, or artificial additives? That’s where this banana ice cream recipe comes in. Made with just a handful of wholesome ingredients, this healthy homemade treat transforms ripe, frozen bananas into a velvety dessert that’s naturally sweet, dairy-free, and surprisingly indulgent.
Whether you want an easy banana ice cream recipe, a vegan frozen dessert, or a way to use overripe bananas, this guide will help. You’ll learn how to select the best bananas and add mix-ins like cocoa powder, peanut butter, or coconut milk. Make creamy banana ice cream at home—no ice cream maker needed.
Why This Banana Ice Cream Recipe Is Perfect for Any Occasion
Naturally Sweet from Ripe Bananas – No Added Sugar Needed
This banana ice cream recipe needs no added sugar—ripe bananas are naturally sweet thanks to their fructose content, providing pleasant sweetness without refined sweeteners. As bananas ripen, their starches gradually convert into simple sugars, giving them that distinct caramel-like flavor.
Choosing the right bananas is key. Look for ones with a bright yellow peel speckled with brown spots. These are at their peak sweetness and will give your ice cream a rich, dessert-like taste while still being completely natural. Under-ripe bananas, on the other hand, can taste bland or starchy, so patience pays off here.
This natural sweetness means you can skip artificial sweeteners or syrups, making your ice cream a healthier, low-guilt treat. It’s perfect for kids, people watching their sugar intake, or anyone who wants to enjoy dessert without compromising on nutrition. Plus, bananas are packed with potassium, vitamin C, and fiber, so you’re getting more than just flavor—you’re getting a nutritional boost in every spoonful.
For extra sweetness, add natural sweeteners like honey, maple syrup, or dates, though ripe bananas are usually sweet enough. Blended, they create a creamy, soft-serve texture as satisfying as traditional ice cream—without the sugar crash.
In short, with the natural sugars from ripe bananas, you get all the sweetness your taste buds crave, while keeping your dessert wholesome, simple, and incredibly delicious.
Creamy Texture Without Heavy Cream or Dairy
One of the most surprising things about this banana ice cream recipe is just how luxuriously creamy it is—without using heavy cream, milk, or any dairy products at all. The secret lies in the natural composition of bananas. When frozen and blended, bananas break down into a smooth, velvety purée that mimics the texture of traditional ice cream. This makes it an excellent option for anyone who is lactose intolerant, vegan, or simply trying to cut back on high-fat dairy.
Unlike store-bought ice cream that uses cream, eggs, and stabilizers, bananas get their creaminess from natural pectin and starches. Blended frozen bananas create a thick, scoopable dessert with a texture close to classic ice cream.
Keep it pure banana for a light fruit flavor, or add dairy-free milks like coconut, almond, or oat milk. Coconut adds tropical creaminess, almond keeps it light and nutty, and oat brings natural sweetness and heartiness.
For extra indulgence, add a spoonful of nut butter like peanut, almond, or cashew. It makes your banana ice cream richer without any dairy.
The best part? You get silky-smooth ice cream with fewer calories, no saturated fats, and a lighter aftertaste. It shows you can enjoy a creamy dessert that’s kind to your body and your taste buds.
Works for Vegan and Dairy-Free Dessert Lovers
Finding a dessert that’s indulgent yet vegan and dairy-free can be tough, but this banana ice cream fits perfectly. Made from fruit and plant-based mix-ins, it’s naturally free of animal products and lactose.
The base ingredient, ripe frozen bananas, contains no dairy whatsoever. When blended, they transform into a creamy, rich dessert that rivals traditional ice cream in texture and taste. You can keep it as a simple one-ingredient treat, or elevate it with vegan-friendly additions like coconut milk, almond milk, or oat milk for extra creaminess.
Flavor customization is endless and still completely plant-based. Stir in a swirl of peanut butter or almond butter, sprinkle in dark chocolate chips made with dairy-free cocoa, or blend in berries for a fruity twist. You can even create a tropical variation with mango, pineapple, and a splash of coconut cream.
Because this recipe skips the heavy cream, eggs, and refined sugar often found in store-bought ice cream, it’s not only vegan but also lighter and easier to digest. It’s perfect for family gatherings where guests may have different dietary needs—everyone can enjoy the same dessert without compromise.
In short, this banana ice cream proves you don’t have to sacrifice creaminess, flavor, or fun for a vegan dessert. Whether you’re plant-based or just want a dairy-free option, it’s a sweet, satisfying treat for everyone at the table.
A Quick Summer Dessert That’s Ready in Minutes
When the weather is hot, the last thing you want is to spend hours in the kitchen making dessert. That’s where this banana ice cream recipe shines—it’s one of the fastest, most refreshing treats you can whip up, with minimal prep and no fancy equipment required.
After slicing and freezing ripe bananas (which you can prep ahead), blending them into creamy ice cream takes just minutes. Using a high-powered blender or food processor, you’ll have a fresh, healthier treat faster than a trip to the store.
It’s also an ideal recipe for last-minute cravings or unexpected guests. Keep frozen bananas on hand for a quick, indulgent treat. Enjoy plain or add mix-ins like cocoa, berries, peanut butter, or coconut milk for extra flavor.
Because it’s quick and no-cook, it’s perfect for summer days when you want something cold and sweet without heating up the kitchen. Plus, cleanup is a breeze—just rinse your blender, and you’re done.
Whether you’re cooling off after a hot afternoon, hosting a summer barbecue, or simply want a wholesome frozen snack, this banana ice cream proves that delicious doesn’t have to be time-consuming. It’s the ultimate easy summer dessert—fresh, fast, and fuss-free.
Ingredients You’ll Need for Homemade Banana Ice Cream
Ripe Bananas
The key to great banana ice cream is ripe bananas—yellow with brown speckles. At this stage, starches turn into natural sugars, giving a sweet, creamy flavor without added sugar.
Ripe bananas also blend more smoothly than underripe ones, creating that luscious, velvety texture you expect from ice cream. Underripe bananas, by contrast, can taste starchy, slightly bitter, and won’t produce the same rich flavor.
If your bananas are ripe but you’re not ready to make ice cream yet, simply peel and slice them, then freeze them in an airtight container or freezer bag. This way, you’ll always have the main ingredient ready to go for a quick, healthy dessert.
Freezing the bananas not only makes the blending process easier but also helps mimic the cold, creamy consistency of traditional ice cream. A high-powered blender or food processor works best to break down the frozen fruit into a silky-smooth treat.
Ripe bananas pair perfectly with cocoa powder for chocolate, peanut butter for nuttiness, or frozen berries for a tangy twist. Starting with ripe bananas ensures natural sweetness and creamy, dairy-free flavor without added sugar.
Milk Alternatives
Bananas alone create a creamy base. Adding a bit of liquid helps blending and lets you customize the flavor and texture of your banana ice cream. For those avoiding dairy, plant-based milk alternatives are the perfect solution.
Almond milk is a popular choice because it’s light, subtly nutty, and doesn’t overpower the banana flavor. It blends smoothly and keeps the ice cream lower in calories while still adding creaminess. Coconut milk, especially the full-fat canned variety, brings a rich, tropical flavor and a velvety texture that feels extra indulgent—perfect if you enjoy a more decadent dessert. Oat milk is another excellent option, offering a naturally sweet, slightly malty taste that complements bananas beautifully.
Other plant-based milks like soy, cashew, or macadamia also work. Each adds a unique twist. Use unsweetened varieties to let ripe bananas control the sweetness.
Adding milk alternatives not only makes blending easier but also allows you to experiment with different flavor profiles. Mix almond milk with vanilla extract for a dessert-like aroma. Or combine coconut milk with pineapple for a tropical “banana colada” ice cream.
Using dairy-free milks keeps the recipe vegan and lactose-free. This way, everyone—from plant-based eaters to those with dairy sensitivities—can enjoy a creamy, refreshing scoop without compromise.
Optional Mix-Ins
One joy of making banana ice cream is how easy it is to customize with simple mix-ins. These ingredients can turn your creamy base into a dessert that fits your taste and mood—without making the recipe complicated.
For a nutty twist, stir in a spoonful of natural peanut or almond butter. They add flavor and boost protein, making your ice cream more satisfying and nutritious.
If you love chocolate, mix in unsweetened cocoa powder or dairy-free chocolate chips for a decadent chocolate banana ice cream. Cocoa powder blends well into the banana base, giving a smooth chocolate flavor without extra sugar or additives.
For a tropical flair, toss in shredded coconut flakes or a splash of coconut cream. The subtle sweetness and creamy texture of coconut complement the banana perfectly and add a bit of texture.
Berries, such as frozen strawberries, blueberries, or raspberries, can add a refreshing tartness and vibrant color to your ice cream. You can blend them in for a uniform flavor or gently fold them in after blending for bursts of fruit in every bite.
If you prefer extra sweetness, natural options like honey, maple syrup, or dates can be added sparingly. These enhance sweetness without overpowering the natural banana flavor.
Feel free to experiment with spices like cinnamon, nutmeg, or a pinch of sea salt. These can bring out the best in your banana ice cream and make it uniquely yours.
These mix-ins keep your dessert fun and versatile. They let you create endless creamy, healthy banana ice cream variations to match your cravings.
Kitchen Tools
This creamy, healthy banana ice cream needs minimal tools—just a powerful blender or food processor to blend frozen bananas into smooth, ice-cream-like texture.
A high-speed blender like a Vitamix or Ninja Creami works best because these machines can easily crush frozen fruit without overheating or leaving chunks behind. However, if you don’t have one of these, many standard food processors or blenders can still do the job—just be patient and use short pulses to avoid straining the motor.
If you have a Yonanas machine, this is another fantastic option designed specifically for making fruit-based soft serve. It effortlessly turns frozen bananas into creamy ice cream in seconds, making the process even easier.
Besides blending tools, you’ll need a knife and cutting board to slice bananas before freezing. You’ll also need a freezer-safe container or airtight tub to store the ice cream.
The right tools ensure your banana ice cream is creamy and smooth, with no lumps or ice crystals. Plus, with minimal cleanup involved, it’s a convenient dessert option any time of year.
In summary, you only need a good blender or food processor, frozen ripe bananas, and your favorite mix-ins. With these tools, homemade banana ice cream is simple, quick, and satisfying. You can enjoy it again and again.
Step-by-Step Guide to Making Creamy Banana Ice Cream
Step 1: Slice and Freeze Ripe Bananas Overnight
The first and most important step to making delicious, creamy banana ice cream is to prepare your bananas properly. Start with ripe bananas spotted with brown—they’re sweetest and add natural sweetness without sugar.
Begin by peeling the bananas and slicing them into evenly sized pieces, about half an inch thick. Slicing bananas helps them freeze faster and blend easier for a smooth, creamy texture.
Next, arrange the banana slices in a single layer on a parchment-lined baking sheet or tray. Make sure the pieces aren’t touching each other to prevent them from sticking together during freezing. This simple step makes it easier to scoop out the exact amount you need when you’re ready to make your ice cream.
Place the tray in the freezer and let the banana slices freeze overnight—or for at least 6 hours—until they’re completely solid. Freezing the bananas thoroughly is essential because it creates the icy base that blends into a creamy, soft-serve consistency.
If you want to save time later, you can freeze the slices in portion-sized bags or containers after the initial freeze. This way, you have ready-to-use banana “ice cream” portions on hand whenever the craving hits.
Properly frozen bananas are the foundation of your homemade banana ice cream, ensuring every scoop is smooth, naturally sweet, and perfectly creamy.
Step 2: Blend Frozen Bananas Until Smooth
Once your banana slices are fully frozen, it’s time to blend them into creamy ice cream. Place the frozen banana pieces into a high-powered blender or food processor—this is key to achieving a smooth, soft-serve texture without any icy chunks.
Start blending on a low speed to break down the frozen pieces, then gradually increase to high speed. You’ll notice the bananas going through stages: first, they’ll crumble into small bits, then become thick and creamy as the natural starches and pectin release their binding properties.
If the mixture is too thick or the blender struggles, add a splash of your chosen milk alternative—such as almond, coconut, or oat milk—to help loosen it up. Be careful not to add too much liquid; you want the ice cream to stay thick and scoopable, not runny.
Blend continuously, pausing occasionally to scrape down the sides of the blender, ensuring all pieces are fully incorporated. The process usually takes 2 to 5 minutes, depending on your blender’s power.
When the banana ice cream reaches a silky, soft-serve consistency, it’s ready to enjoy! You can eat it immediately for a creamy, soft texture or transfer it to a freezer-safe container and chill it for a firmer scoop.
Blending frozen bananas this way not only creates a rich, smooth dessert but also preserves the natural sweetness and flavor of the fruit. No ice cream maker is needed—just your blender and ripe bananas for a quick, healthy treat.
Step 3: Add Flavor Twists – Vanilla, Cocoa, or Nut Butter
Once your frozen bananas are blended into a smooth, creamy base, it’s time to add flavor twists. Simple ingredients like vanilla extract, cocoa powder, or nut butter can elevate your dessert. They make it truly irresistible.
A splash of pure vanilla extract enhances the natural sweetness of the bananas and adds a warm, comforting aroma that pairs beautifully with any mix-ins. Vanilla is a classic addition that deepens the flavor without overpowering the fruitiness.
For chocolate lovers, stirring in unsweetened cocoa powder is a fantastic way to create a rich, chocolatey banana ice cream. Cocoa powder blends seamlessly into the base, giving a smooth chocolate flavor while keeping the dessert dairy-free and low in sugar. You can also add dairy-free chocolate chips for extra texture and bursts of chocolate in every bite.
If you prefer a nutty twist, mixing in a spoonful of peanut butter, almond butter, or cashew butter adds creaminess and a boost of protein. Nut butters complement the banana’s sweetness perfectly and create a luscious, indulgent texture that feels extra satisfying.
Feel free to experiment with combinations—vanilla and peanut butter, or cocoa and almond butter, for example—to find your favorite flavor profile. These simple additions take your banana ice cream from basic to gourmet without adding complicated steps or unhealthy ingredients.
In short, these natural flavor boosters keep your banana ice cream wholesome while making every scoop exciting and delicious.
Step 4: Freeze for a Firmer Texture or Enjoy Immediately as Soft-Serve
After blending your frozen bananas into a smooth, creamy base, you have two delicious options depending on your texture preference: enjoy the banana ice cream immediately as a soft-serve or freeze it for a firmer, scoopable consistency.
Eating it right away offers a luscious, velvety soft-serve experience. The ice cream will be creamy and smooth, perfect for those who love a lighter, almost mousse-like dessert. This option is ideal if you want to satisfy your sweet tooth quickly without waiting.
If you prefer a traditional ice cream texture, transfer the banana ice cream into a freezer-safe container and place it in the freezer for at least 2 to 4 hours. This additional freezing time allows the mixture to firm up, making it easier to scoop into perfect balls.
When you’re ready to serve, remove the ice cream from the freezer and let it sit at room temperature for about 5 to 10 minutes. This brief thawing softens the ice cream slightly, making scooping easier and enhancing the creamy texture.
Be sure to store any leftovers in an airtight container to prevent ice crystals from forming and maintain freshness. Homemade banana ice cream is best enjoyed within one to two weeks for optimal flavor and texture.
Whether you like it as a soft-serve or firm ice cream, this recipe offers flexibility to suit your cravings. No matter which way you choose, you’re in for a refreshing, healthy treat that’s naturally sweet, dairy-free, and utterly delicious.
Flavor Variations to Try
Chocolate Banana Ice Cream
If you love chocolate, the chocolate banana ice cream is a tasty way to combine two classic flavors. Adding cocoa powder or dairy-free chocolate chips to the banana base creates a rich, indulgent treat. It’s simple and nutritious too.
To make chocolate banana ice cream, start with your blended frozen bananas and mix in 1 to 2 tablespoons of unsweetened cocoa powder. Cocoa powder brings a deep chocolate flavor without any added sugar or dairy, keeping the dessert light and vegan-friendly. Blend again briefly to fully combine the cocoa with the banana base.
For extra texture and bursts of chocolate, you can fold in dairy-free chocolate chips or chunks after blending. These melt slightly when scooped, creating a luscious, melty surprise in every bite.
This variation pairs wonderfully with natural sweeteners like maple syrup or dates if you want a touch more sweetness, but many find the ripe bananas and cocoa powder combo perfectly balanced on its own.
Chocolate banana ice cream is great on its own or served with toppings like crushed nuts, shredded coconut, or fresh berries to add crunch and freshness.
Because it’s made without cream or processed sugar, it’s a guilt-free way to indulge your chocolate cravings, perfect for hot summer days or any time you want a satisfying, wholesome dessert.
In summary, chocolate banana ice cream is a simple, delicious upgrade to the classic recipe, combining the creamy sweetness of bananas with the rich flavor of chocolate—without any dairy or added sugars.
Peanut Butter Banana Ice Cream
For a creamy, indulgent twist on classic banana ice cream, try adding peanut butter. This variation combines the natural sweetness of ripe bananas with the rich, nutty flavor of peanut butter to create a satisfying, protein-packed dessert that feels decadent yet remains healthy.
To make peanut butter banana ice cream, blend your frozen banana base as usual, then add 2 to 3 tablespoons of natural, unsweetened peanut butter. Blend again until the peanut butter is fully incorporated and the mixture is smooth and creamy. Using natural peanut butter without added sugars or oils keeps the recipe wholesome and aligned with the healthy vibe of the original.
The peanut butter adds a velvety texture and a subtle saltiness that balances perfectly with the banana’s sweetness. It also boosts the protein content, making this ice cream a more filling snack or dessert option.
If you want to add a little crunch, sprinkle chopped peanuts or swirl in some peanut butter chips just before serving. You can also experiment by adding a touch of cinnamon or a splash of vanilla extract for an extra layer of flavor.
This peanut butter banana ice cream is naturally dairy-free and vegan, making it accessible to a variety of dietary preferences. It’s perfect for anyone craving a creamy, nutty dessert without the guilt of processed sugars or heavy creams.
Whether you enjoy it as soft-serve right out of the blender or frozen for a firmer scoop, this peanut butter variation offers a delicious way to elevate your homemade banana ice cream into a richer, more satisfying treat.
Tropical Banana Ice Cream
If you want a refreshing, exotic twist on banana ice cream, try the tropical variation. Blend ripe bananas with mango, pineapple, and coconut. This creates a creamy, naturally sweet dessert full of bright, sunny flavors.
To make tropical banana ice cream, start with your frozen banana base. Add chunks of frozen mango or pineapple while blending. These fruits add juicy sweetness and a tangy contrast to the mellow bananas. The result is a balanced flavor that feels like a mini vacation in every bite.
For extra creaminess and tropical flair, add a splash of coconut milk or sprinkle shredded coconut flakes on top after serving. Coconut milk adds richness and keeps the recipe dairy-free and vegan. The coconut flakes give a delightful crunch and aroma.
You can also enhance the flavor with a squeeze of fresh lime juice or a pinch of toasted ginger for a zesty kick that brightens the dessert even more.
This tropical banana ice cream is perfect for warm days when you want something cool and revitalizing but still indulgent. It’s a great way to enjoy fresh fruit while satisfying your sweet tooth with a healthy, homemade frozen treat.
Because it’s free from added sugars and dairy, this variation is suitable for vegan, dairy-free, and health-conscious eaters alike.
In summary, tropical banana ice cream combines creamy bananas with juicy mango, pineapple, and coconut for a vibrant, refreshing dessert that transports your taste buds straight to the beach.
Berry Banana Ice Cream
For a deliciously vibrant and refreshing twist, try making berry banana ice cream. This variation blends the natural sweetness of ripe bananas with the tartness of mixed berries, creating a colorful and flavorful frozen dessert that’s as nutritious as it is tasty.
To make berry banana ice cream, add a cup of frozen berries like strawberries, blueberries, raspberries, or blackberries to your frozen banana base before blending. The berries add antioxidants, vitamins, and vibrant color. They turn simple banana ice cream into a gourmet treat.
You can blend the berries fully for a smooth, uniform pink or purple color and flavor. Or, pulse the mixture lightly to keep berry chunks. This adds texture and bursts of fruity goodness in every bite.
Berry banana ice cream goes well with mix-ins like chia seeds, honey or maple syrup, and granola for crunch. The tart berries balance the sweet, creamy banana. This makes a refreshing, satisfying dessert—perfect for warm days or anytime you want a wholesome frozen treat.
This recipe remains vegan and dairy-free when made with just fruit, making it accessible to many dietary preferences. Plus, the combination of bananas and berries delivers fiber, vitamins, and antioxidants, turning your dessert into a nutrient-rich indulgence.
In summary, berry banana ice cream is a colorful, tasty way to enjoy two fruits at once, offering a refreshing, healthy frozen dessert with a perfect balance of sweet and tart flavors.
Tips for Storing and Serving Your Banana Ice Cream
Store in an Airtight Container to Prevent Ice Crystals
Proper storage is key to keeping your homemade banana ice cream creamy and delicious for as long as possible. One common issue with homemade frozen desserts is the formation of ice crystals, which can affect texture and flavor. The best way to avoid this is to store your banana ice cream in an airtight container.
Using an airtight container minimizes exposure to air and moisture inside your freezer. When ice cream is left uncovered or loosely covered, moisture evaporates and then refreezes on the surface, creating unpleasant ice crystals. These crystals make the ice cream grainy rather than smooth, detracting from that creamy texture you worked hard to achieve.
Choose a container made of plastic or glass with a tight-sealing lid. Some people like to place a piece of parchment paper or plastic wrap directly on the surface of the ice cream before sealing the container. This extra barrier further reduces air contact and helps maintain a perfect texture.
Store your banana ice cream in the coldest part of the freezer—not in the door—where temperatures fluctuate more and can contribute to ice crystal formation.
For best results, consume your homemade banana ice cream within 1 to 2 weeks. While it may still be safe to eat after that, the texture and flavor tend to degrade over time.
Before serving, let the ice cream sit at room temperature for 5 to 10 minutes. This softens it slightly, making scooping easier and restoring its creamy mouthfeel.
In summary, using an airtight container and proper freezer storage will keep your banana ice cream smooth, creamy, and free of ice crystals—ensuring every scoop is just as enjoyable as the first.
Let Sit at Room Temperature for 5–10 Minutes Before Scooping
Homemade banana ice cream is often very firm right from the freezer. Let it sit at room temperature for 5 to 10 minutes before serving to achieve a creamy texture.
Allowing the ice cream to soften slightly helps it thaw just enough to become scoopable without melting completely. This brief resting period loosens the frozen mixture, making it easier to dish out smooth, clean scoops that hold their shape.
If you try to scoop it right away, you may find the ice cream too hard, which can damage your scoop or result in uneven, crumbly portions. On the other hand, letting it sit too long will cause it to melt and lose its creamy consistency. The sweet spot is usually about 5 to 10 minutes, but this can vary slightly depending on your room temperature.
To speed up the softening process, you can place the container on the counter or in a warm spot away from direct sunlight or heat sources. Avoid microwaving the ice cream, as this can cause uneven melting and affect the texture.
This simple step ensures your banana ice cream is perfectly soft and creamy, making each bite smooth and enjoyable. It’s a small effort that makes a big difference in the eating experience, especially since homemade banana ice cream doesn’t contain stabilizers that keep store-bought ice cream scoopable straight from the freezer.
In summary, patience is key—let your banana ice cream rest at room temperature for a few minutes before serving to enjoy that luscious, creamy texture every time.
Serve with Toppings Like Nuts, Granola, or Fruit Compote
One of the best ways to improve your homemade banana ice cream is by adding tasty toppings. They add texture, flavor, and visual appeal. Toppings also let you customize your dessert to match your taste and mood.
Crunchy nuts like chopped almonds, walnuts, pecans, or pistachios add a satisfying contrast to the smooth, creamy ice cream. They bring a nutty flavor and a healthy dose of protein and healthy fats, making your dessert feel more substantial and indulgent.
Granola is another fantastic topping choice, especially for those who enjoy a bit of crunch with a touch of sweetness. Whether you prefer classic granola or a flavored variety with cinnamon or dried fruit, it pairs perfectly with the banana base and can even turn your ice cream into a wholesome breakfast treat.
For a burst of natural sweetness and vibrant color, try spooning warm fruit compote over your banana ice cream. A simple compote from berries, cherries, or stone fruits adds juicy contrast to the banana’s mellow flavor. Fruit compotes are easy to make by simmering fresh or frozen fruit with natural sweeteners like honey or maple syrup.
Other tasty topping ideas include shredded coconut, chia seeds, cacao nibs, or a drizzle of nut butter or dark chocolate sauce. These options bring extra flavor and nutrition without overpowering the natural goodness of your banana ice cream.
In short, toppings are an easy way to personalize your dessert, adding fun textures and complementary flavors that make every scoop even more enjoyable.
Best Enjoyed Within 1–2 Weeks for Maximum Freshness
For the best taste and texture, enjoy homemade banana ice cream within 1 to 2 weeks. It’s fresh and preservative-free but lacks stabilizers that extend shelf life like store-bought ice cream.
Even stored properly, homemade ice cream can develop ice crystals, lose creaminess, and change flavor over time. Eating it sooner ensures the best taste and texture.
Keeping the ice cream in the coldest part of your freezer—not the door—also helps maintain a more consistent temperature and preserves quality. Make sure to use a container with a tight seal to prevent freezer burn and absorption of other freezer odors.
If stored over two weeks, the ice cream may become icy and lose flavor. Letting it sit at room temperature before scooping softens it but won’t restore full creaminess.
For the freshest and creamiest banana ice cream, plan to make small batches that can be enjoyed within a couple of weeks. This way, every scoop stays smooth, flavorful, and satisfying without waste or quality loss.
In summary, eating your banana ice cream within 1 to 2 weeks guarantees the best texture, flavor, and overall enjoyment of this naturally sweet and healthy frozen dessert.
Conclusion
Making creamy, healthy ice cream at home is easier—and tastier—than ever with this simple banana recipe. Use ripe frozen bananas and a few wholesome ingredients to create a naturally sweet, dairy-free dessert. It satisfies your cravings without guilt.
Enjoy it plain or add flavor twists like chocolate, peanut butter, or tropical fruits. This recipe suits every palate. It’s perfect for vegans, those with dairy sensitivities, or anyone cutting back on sugar and heavy cream.
You don’t need many kitchen tools or an ice cream maker. You can whip up this refreshing treat in minutes. It’s perfect for quick summer desserts or anytime you want a wholesome frozen snack.
Remember to store your banana ice cream in an airtight container to keep it smooth and fresh, and enjoy it within a couple of weeks for the best taste and texture.
Give this easy, healthy banana ice cream a try and discover how delicious simple ingredients can be when transformed into a creamy, satisfying frozen dessert. Your taste buds—and your body—will thank you!
1 thought on “Banana Ice Cream Recipe: How to Make Creamy, Healthy Ice Cream at Home”