
If you’ve ever grabbed a sweet treat with your coffee at Starbucks, you’ve likely indulged in their famous Starbucks cake pops. These bite-sized delights are soft, moist, and coated in a delicious chocolate shell—making them an irresistible favorite for both kids and adults. But did you know you can make Starbucks cake pops at home with just a few simple ingredients? With this easy Starbucks cake pop recipe, you can enjoy the same tasty treat without the trip to the coffee shop.
In this easy copycat Starbucks cake pop recipe, we’ll walk you through every step to recreate these popular treats in your own kitchen. With a moist cake center, a smooth candy coating, and a touch of sprinkles, these homemade cake pops taste just like the real thing—if not better! Plus, making them yourself means you can customize the flavors and decorations to your liking.
Ready to whip up your own DIY Starbucks cake pops? Let’s get started! 😊🍰
What Are Starbucks Cake Pops?
A Quick Background on Starbucks Cake Pops and Their Popularity
Starbucks introduced cake pops as part of their bakery menu, and they quickly became a fan-favorite treat. These bite-sized desserts are made by combining cake crumbs with frosting, rolling them into balls, and dipping them in a smooth candy coating. The result is a soft, sweet, and visually appealing treat served on a stick—perfect for an easy, mess-free indulgence.
One of the biggest reasons for their popularity is their convenience and portability. Unlike traditional cake slices or cupcakes, cake pops are easy to eat on the go, making them the ideal sweet treat to pair with your favorite Starbucks coffee or tea. Their small size also makes them a guilt-free indulgence for those who want just a touch of sweetness without committing to a full dessert.
Another reason Starbucks cake pops are so beloved is their signature flavor and texture. The most well-known variety, the Birthday Cake Pop, features a vanilla cake and frosting mixture coated in a pink candy shell with white sprinkles. Other popular flavors include Chocolate Cake Pop (a rich chocolate cake with a chocolatey coating) and seasonal varieties that appear throughout the year.
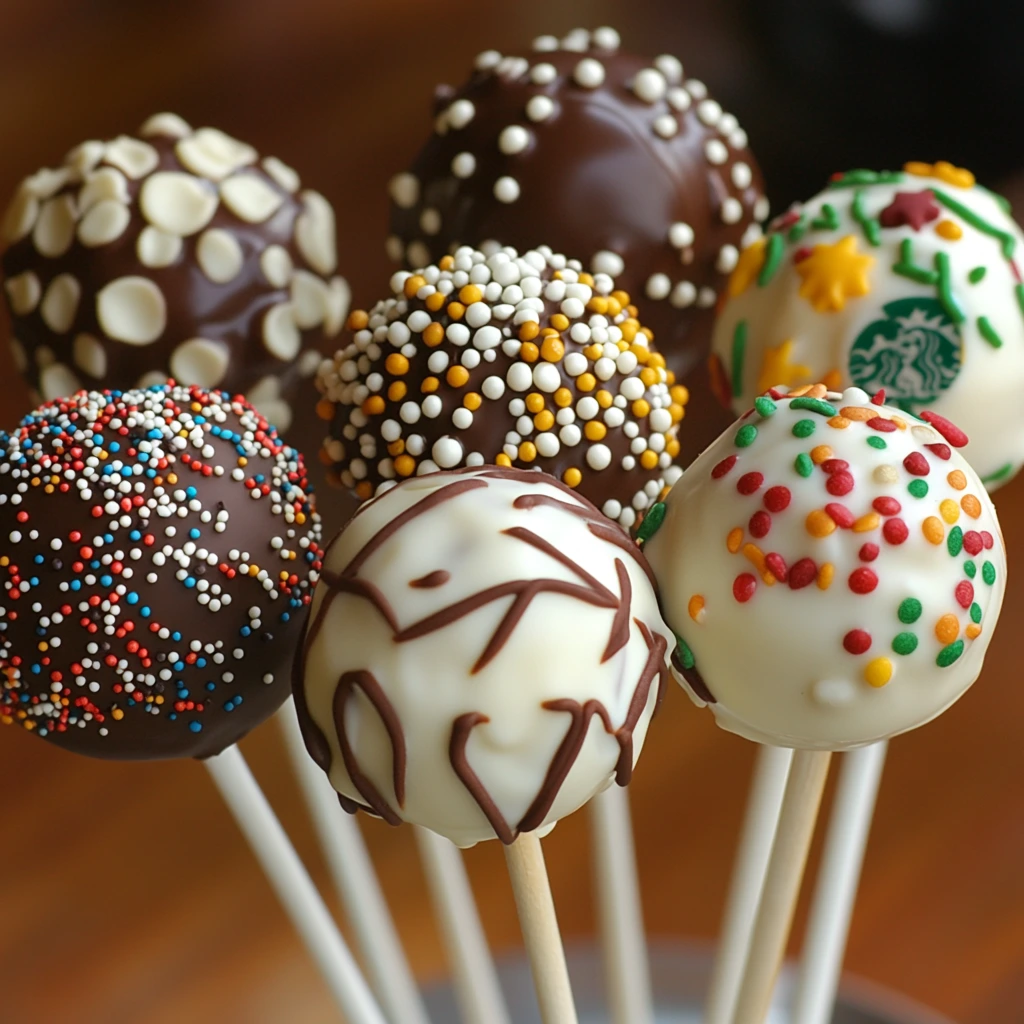
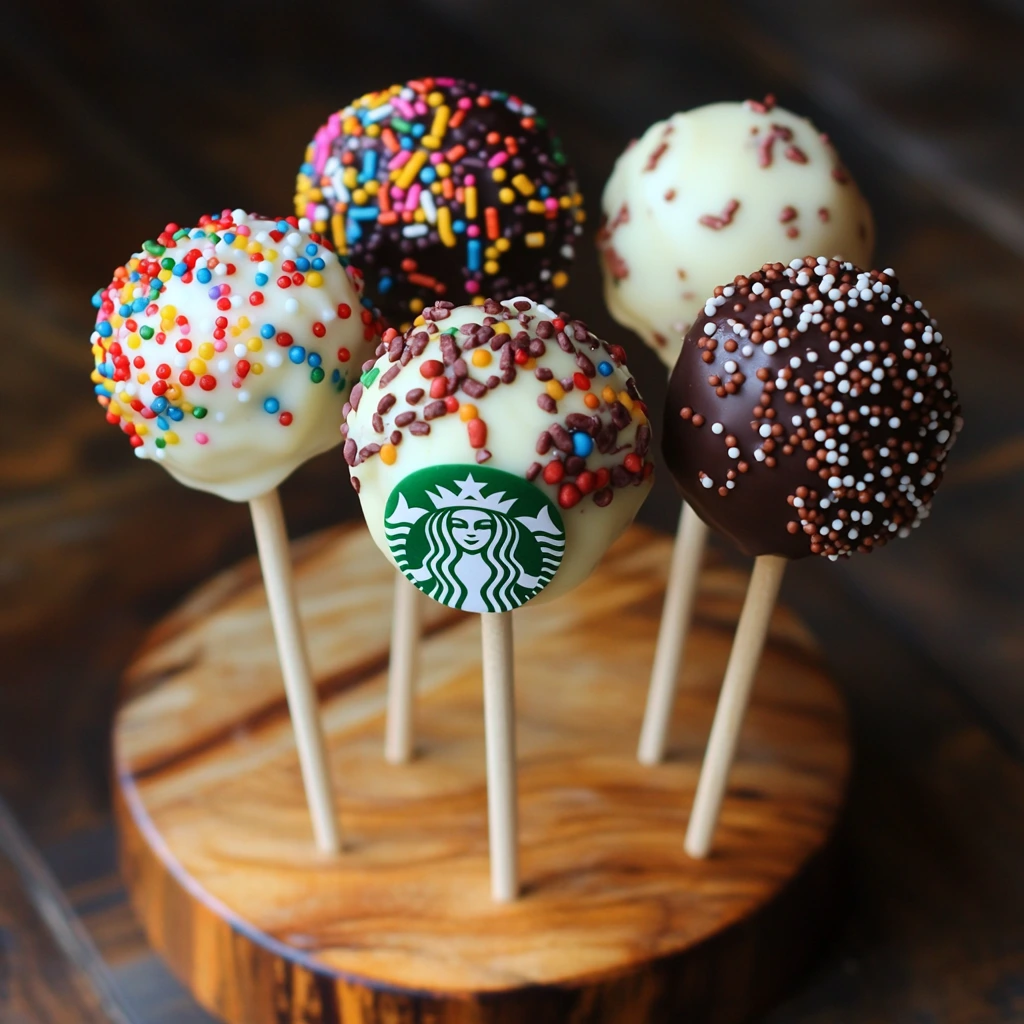
Beyond taste, Starbucks cake pops have gained traction thanks to their aesthetic appeal. Their vibrant colors and picture-perfect round shape make them Instagram-worthy treats, adding to their popularity on social media.
While Starbucks cake pops are a favorite among coffee lovers, making them at home allows for endless customization—from different cake flavors to unique decorations. Plus, homemade versions can be just as delicious while being more cost-effective than buying them at Starbucks.
Different Flavors Available at Starbucks
Starbucks offers a variety of cake pop flavors, with some being permanent menu items and others appearing as seasonal or limited-edition treats. Each cake pop is made with a moist cake and frosting mixture, shaped into a ball, and coated with a smooth candy shell. While all Starbucks cake pops share the same signature look and texture, their flavors bring unique tastes that cater to different preferences.
1. Birthday Cake Pop (Classic Vanilla Cake Pop)
The most recognizable and best-selling cake pop at Starbucks is the Birthday Cake Pop. It features a soft vanilla cake blended with creamy frosting, dipped in a pink-colored candy coating, and finished with white sprinkles. This flavor is perfect for those who love a classic, buttery vanilla cake with a hint of sweetness from the candy shell.
2. Chocolate Cake Pop
For chocolate lovers, the Chocolate Cake Pop is an indulgent option. It consists of a rich, fudgy chocolate cake mixed with chocolate frosting, coated in a deep chocolate candy shell. The result is a decadent, brownie-like texture with an extra layer of chocolate goodness.
3. Cookies & Cream Cake Pop (Limited Edition)
This flavor appears occasionally as a seasonal treat. It features a vanilla and chocolate cake mixture blended with cookie crumbles, dipped in a white chocolate coating, and topped with more cookie bits. It’s a fan-favorite for those who enjoy a sweet and slightly crunchy texture.
4. Seasonal and Holiday Cake Pops
Starbucks frequently introduces holiday-themed cake pops, such as Peppermint Brownie Cake Pop during the winter or Pumpkin Spice Cake Pop in the fall. These limited-edition flavors make cake pops even more exciting for Starbucks fans.
Why Homemade DIY Cake Pops Can Be Just as Delicious and More Affordable
Making Starbucks-style cake pops at home is not only fun and easy, but it’s also a cost-effective alternative to buying them from the store. While Starbucks cake pops are undeniably delicious, they can be quite pricey—often costing around $2–$3 per pop. When you make them at home, you can produce an entire batch for a fraction of the cost, using basic ingredients like cake mix, frosting, and candy melts.
Beyond saving money, homemade cake pops allow you to control the quality of ingredients. Store-bought versions often contain preservatives and artificial flavors to maintain their shelf life. When you make them yourself, you can choose high-quality, organic, or all-natural ingredients, ensuring a fresher and more flavorful treat. You can also adjust the sweetness level to your preference, making them a great option for those who prefer desserts that aren’t overly sugary.
Another advantage of DIY cake pops is the endless customization. At Starbucks, you’re limited to a handful of flavors, but at home, you can get creative. Whether you want red velvet, lemon, peanut butter, or funfetti cake pops, the possibilities are endless. You can even experiment with different coatings, fillings, and toppings—such as dark chocolate, caramel drizzle, crushed nuts, or edible glitter.
Lastly, making cake pops at home is a fun activity for families and special occasions. Kids love shaping and decorating them, making them perfect for birthday parties, holiday treats, or gifts. By making them yourself, you get more value, better flavors, and a truly homemade touch that rivals even the best Starbucks cake pops!
Ingredients You’ll Need for Starbucks-Style Cake Pops
Cake Base
The cake base is the foundation of any cake pop, determining its texture, moisture level, and overall flavor. While Starbucks cake pops typically use a classic vanilla or chocolate cake, making your own at home allows for endless variations. You can opt for store-bought cake mix for convenience or go the homemade route for a more personalized touch.
1. Choosing the Right Cake
For a traditional Starbucks-style cake pop, a simple vanilla or chocolate cake works best. However, you can experiment with different flavors like red velvet, lemon, funfetti, or even carrot cake for unique twists. If you prefer a richer texture, using a pound cake or butter cake will yield a denser, more decadent cake pop.
2. Baked vs. No-Bake Options
Most cake pops start with a fully baked and cooled cake that is then crumbled and mixed with frosting. However, there are no-bake alternatives, such as using crushed Oreos or graham crackers mixed with cream cheese. These options provide a shortcut for those who want quick and easy cake pops without baking from scratch.
3. Getting the Right Consistency
Once the cake is crumbled, it needs to be combined with a binding ingredient, typically buttercream frosting, cream cheese frosting, or even condensed milk. The key is to use just enough to hold the mixture together without making it too wet or sticky. The final dough should be soft, pliable, and easy to roll into smooth balls.
A well-balanced cake base ensures moist, flavorful cake pops that hold their shape and deliver the perfect bite—just like your favorite Starbucks treats!
Binding Agent
The binding agent is a crucial component in making cake pops because it holds the crumbled cake together, creating a smooth and moldable dough. Without it, the mixture would be too dry and crumbly to shape into perfect cake pop balls. The right binding agent ensures the cake pops maintain their structure while staying moist, soft, and flavorful.
1. Classic Binding Agents: Frosting & Cream Cheese
The most commonly used binding agent is frosting—typically buttercream or cream cheese frosting. When mixed with crumbled cake, it creates a rich and creamy texture that makes it easy to roll into smooth balls. The amount of frosting needed varies depending on the cake’s moisture level, but a general rule is ¼ to ½ cup of frosting per cake.
- Buttercream frosting provides a sweet, classic taste and works well with vanilla, chocolate, and funfetti cake pops.
- Cream cheese frosting adds a tangy, slightly less sweet flavor, pairing perfectly with red velvet, carrot cake, or spiced cake pops.
2. Alternative Binding Agents
If you prefer a less sweet or dairy-free option, there are several alternatives:
- Nut butters (peanut, almond, cashew) – Add a nutty flavor and work well with chocolate-based cakes.
- Condensed milk – Provides a rich, caramel-like sweetness and works as a strong binder.
- Greek yogurt or mashed bananas – A healthier alternative that keeps the cake pops soft while adding natural moisture.
Using the right binding agent ensures the perfect consistency—not too wet, not too dry—resulting in delicious, Starbucks-style cake pops that hold their shape and taste amazing!
Coating
The coating is what gives cake pops their signature smooth, glossy shell and adds a satisfying crunch when you take a bite. Starbucks cake pops are known for their vibrant, candy-coated exteriors, and recreating this look at home is easier than you might think. The key is to use the right type of coating and proper dipping techniques to achieve a flawless finish.
1. Choosing the Right Coating
The most common coating for cake pops is candy melts (also called candy wafers or coating chocolate). These are specially formulated for easy melting and drying to a firm, non-sticky finish. Wilton, Ghirardelli, and Merckens candy melts are popular choices.
Alternatively, you can use high-quality chocolate, such as white, milk, or dark chocolate. However, real chocolate needs to be tempered or mixed with a bit of coconut oil or vegetable shortening to create a smooth, even coating that hardens properly.
2. Melting the Coating Properly
To avoid clumping or burning, melt the coating using a double boiler or microwave in 30-second intervals, stirring between each round. If the coating is too thick, add a teaspoon of coconut oil or shortening to thin it out. Avoid adding water, as this will cause the coating to seize.
3. Dipping for a Smooth Finish
Dip each cake pop into the melted coating, ensuring full coverage. Tap off excess coating by gently tapping the stick against the bowl while rotating the cake pop. Let them dry upright in a foam block or cake pop stand.
For added flair, sprinkle with sprinkles, crushed nuts, edible glitter, or a chocolate drizzle before the coating fully sets. A well-applied coating makes homemade cake pops just as visually appealing and delicious as Starbucks’ versions!
Extras
Once your cake pops are coated and set, it’s time for the fun finishing touches that make them visually appealing and even more delicious! While Starbucks cake pops typically have a clean, minimal look, making them at home gives you the freedom to customize and elevate them with a variety of extras.
1. Sprinkles & Toppings
Adding sprinkles is one of the easiest ways to make your cake pops pop! Consider:
- Classic rainbow sprinkles for a fun, festive look.
- Gold or silver edible glitter for a touch of elegance.
- Crushed nuts (almonds, hazelnuts, pistachios) for extra crunch.
- Mini chocolate chips or crushed cookies for added texture.
Make sure to sprinkle them immediately after dipping, before the coating hardens, so they stick properly.
2. Drizzles & Designs
For a Starbucks-style drizzle effect, melt a contrasting color of chocolate or candy melts and drizzle it over the cake pops using a spoon or piping bag. This works great with:
- White chocolate drizzle over dark chocolate coating.
- Dark chocolate drizzle over a vanilla-coated cake pop.
- Colorful candy melts for a fun, themed look.
3. Unique Fillings & Flavor Enhancers
Want to take your cake pops to the next level? Try:
- Stuffing them with caramel, Nutella, or peanut butter for a surprise inside.
- Adding a few drops of flavored extracts (vanilla, almond, or peppermint) to the cake mix or coating.
- Using flavored candy melts (strawberry, butterscotch, mint) for a twist on the classic.
By experimenting with extras, you can make homemade cake pops that rival Starbucks’ in both flavor and presentation!
Step-by-Step Guide to Making Starbucks Cake Pops at Home
Step 1: Bake and Prepare the Cake Base
The first step in making delicious Starbucks-style cake pops is to create a moist, flavorful cake base. You can either bake a cake from scratch, use a boxed cake mix, or even use leftover cake for convenience. The key is to ensure the cake has the right texture and flavor before crumbling it into fine pieces.
1. Choosing the Right Cake
For an authentic Starbucks-style cake pop, vanilla or chocolate cake is the best choice. However, you can also experiment with flavors like red velvet, funfetti, or lemon. If making a cake from scratch, use a recipe that results in a soft, moist cake rather than one that is overly dense or dry.
2. Baking the Cake
- Preheat your oven according to your cake recipe or box mix instructions.
- Prepare your cake batter and pour it into a greased 9×13-inch pan (or similar).
- Bake until a toothpick inserted in the center comes out clean, typically 25–35 minutes.
- Allow the cake to cool completely before moving to the next step.
3. Crumbling the Cake
Once cooled, break the cake into large chunks and use your hands or a food processor to crumble it into fine, even crumbs. The goal is to eliminate any large lumps while ensuring the texture remains soft.
At this stage, you have the perfect cake base ready for the next step—adding the binding agent to create the perfect dough for your cake pops!
Step 2: Mix with Frosting to Form Cake Balls
Now that your cake is crumbled into fine pieces, it’s time to bind the crumbs together with frosting to create a smooth, moldable dough. This step is essential because it ensures the cake balls hold their shape while staying moist and flavorful.
1. Choosing the Right Frosting
The most commonly used frosting for cake pops is buttercream or cream cheese frosting. However, you can also experiment with:
- Chocolate ganache for a rich, decadent flavor.
- Nutella or peanut butter for a nutty twist.
- Condensed milk for a sweet, caramel-like texture.
If using store-bought frosting, stick to classic vanilla or chocolate for a Starbucks-style taste.
2. Mixing the Cake and Frosting
- Start by adding ¼ cup of frosting to your cake crumbs.
- Mix using a spoon, spatula, or your hands until the mixture resembles cookie dough—it should hold together but not be too wet.
- If the dough is too dry and crumbly, add more frosting, one tablespoon at a time, until the right consistency is achieved.
- If it becomes too sticky, chill the mixture in the fridge for 10–15 minutes before shaping.
3. Rolling the Cake Balls
- Scoop out tablespoon-sized portions and roll them into smooth, even balls using your hands.
- Place them on a parchment-lined tray and refrigerate for at least 30 minutes to firm up before dipping.
At this stage, your cake balls are perfectly shaped and ready for the next step—inserting the sticks and coating them in chocolate!
Step 3: Dip and Decorate
Now that your cake balls are firm and ready, it’s time to dip them in a smooth chocolate coating and add decorations to achieve that signature Starbucks cake pop look. This step requires patience and proper technique to ensure a flawless, professional finish.
1. Preparing the Cake Pops for Dipping
- Melt a small amount of candy melts or chocolate and dip one end of the lollipop stick into it.
- Insert the coated end about halfway into each cake ball—this helps secure the stick and prevents it from slipping out later.
- Place the cake pops back on the tray and chill them for 10–15 minutes to set the chocolate.
2. Melting the Coating
- Use candy melts, white chocolate, or dark chocolate for the outer shell. Candy melts are the easiest to work with because they set quickly and don’t require tempering.
- Melt the coating in a microwave-safe bowl, heating in 30-second intervals and stirring between each round to prevent burning.
- If the coating is too thick, add ½ teaspoon of coconut oil or vegetable shortening to thin it out.
3. Dipping for a Smooth Finish
- Hold the cake pop by the stick and dip it fully into the melted coating, ensuring even coverage.
- Gently tap off excess coating by lightly tapping the stick against the bowl while rotating the cake pop.
4. Decorating
- While the coating is still wet, sprinkle on sprinkles, edible glitter, or crushed nuts for extra flair.
- Let the cake pops dry by placing them upright in a foam block. Once set, they’re ready to enjoy!
Now you have Starbucks-style cake pops that are just as delicious and visually stunning as the real thing!
Step 4: Chill and Serve
Once your cake pops are fully coated and decorated, the final step is to chill them to set and then serve for a perfect treat. This step ensures the coating hardens properly, giving your cake pops that glossy, firm finish while also helping the flavors meld together.
1. Chilling to Set the Coating
After dipping and decorating, the cake pops need to cool and harden. To ensure a smooth, firm coating:
- Place the cake pops in a foam block or stand to keep them upright, preventing the coating from smudging.
- Refrigerate for 15–30 minutes or until the coating is completely set. If you need them to harden more quickly, you can chill them in the freezer for 10–15 minutes.
2. Storing Your Cake Pops
Once the cake pops are fully chilled and the coating has hardened, you can store them:
- At room temperature for up to 3 days in an airtight container.
- For longer storage, refrigerate them for up to one week. If you want to keep them even longer, you can freeze them for up to three months—just make sure to wrap each cake pop individually in plastic wrap before freezing.
3. Serving and Enjoying
When it’s time to serve, place the cake pops on a tray or stand for an easy, fun presentation. These treats are perfect for parties, gifts, or even an afternoon snack! The cake pops are best enjoyed at room temperature, so remove them from the fridge about 15–20 minutes before serving for the best flavor and texture.
With the final chilling step, your homemade Starbucks cake pops are ready to be savored and shared with others!
Pro Tips for Perfect Copycat Starbucks Cake Pops
Use the Right Cake-to-Frosting Ratio to Avoid Overly Moist Cake Pops
One of the most important factors in making perfect cake pops is getting the right cake-to-frosting ratio. If you add too much frosting, your cake pops may turn out too moist, sticky, or soggy, making them difficult to shape and dip. On the other hand, not enough frosting will leave your cake pops too dry and crumbly, causing them to fall apart.
1. Finding the Ideal Ratio
Typically, a good starting point is to add ¼ cup of frosting for every 2 cups of crumbled cake. This ratio allows the crumbs to bind together without becoming too wet. If the mixture seems dry and doesn’t hold together when rolled into a ball, gradually add more frosting—one tablespoon at a time—until you achieve a dough-like consistency that is moist but not overly sticky.
2. Testing Consistency
To test the consistency, try rolling a small portion of the mixture into a ball. If it holds its shape without cracking or falling apart, you’re on the right track. If it feels too soft or sticky, it might need more cake. If it’s too stiff or dry, add a little more frosting and mix thoroughly.
3. Avoiding Too Much Frosting
Adding excess frosting can cause your cake pops to be overly moist, making the coating slip off or causing them to lose their shape. To prevent this, always start with a small amount of frosting and add gradually. It’s easier to add more than to try and fix an overly wet mixture.
With the right cake-to-frosting balance, your cake pops will have the perfect texture—moist, delicious, and easy to work with!
Chill Before Dipping to Prevent Cake Pops from Falling Apart
Chilling your cake pops before dipping is a crucial step in ensuring they stay intact and maintain their shape during the dipping process. Without chilling, the cake ball may become too soft, causing it to fall apart or lose its shape when you insert the stick or dip it into the melted coating.
1. Why Chilling Is Important
Once you’ve mixed the cake crumbs and frosting to form the dough, the mixture can be a bit soft and malleable. Chilling the cake balls allows the cake and frosting to firm up, making it easier to handle and dip. It also prevents the lollipop stick from sliding out of the cake ball while coating.
2. The Chilling Process
After you’ve shaped the cake balls and inserted the sticks, place them on a parchment-lined tray or foam block. Refrigerate them for 30 minutes to 1 hour—this allows the mixture to set and solidify. You can also freeze the cake pops for 10–15 minutes if you’re short on time. The key is to make sure they are firm enough to dip without falling apart.
3. Benefits of Chilling
Chilling your cake pops helps:
- Stabilize the texture, so the coating won’t melt into the cake ball.
- Prevent the cake from crumbling during the dipping process.
- Ensure the stick stays secure, avoiding any frustrating mishaps where the cake pop slides off.
By taking the time to chill your cake pops before dipping, you’ll enjoy smoother, more stable cake pops that are easier to coat and handle!
Use High-Quality Candy Melts for a Smooth and Glossy Coating
When it comes to creating the perfect coating for your cake pops, using high-quality candy melts is key to achieving that smooth, glossy finish that makes them visually appealing and adds to the overall texture. The coating is just as important as the cake itself, and using the right product can make a noticeable difference in the final result.
1. Why Candy Melts Are the Best Choice
Candy melts are the go-to choice for coating cake pops because they are specifically designed to melt easily and set smoothly. Unlike regular chocolate, candy melts don’t require tempering and harden quickly, giving you a clean, professional look. They also have a smooth texture that allows for easy dipping, ensuring your cake pops get an even coating without clumps or air bubbles.
2. Choosing High-Quality Candy Melts
While many brands offer candy melts, premium-quality brands like Wilton or Ghirardelli often provide superior texture, flavor, and meltability. These high-quality melts are less likely to seize up or become lumpy when melted, giving you a smoother finish.
3. How to Achieve a Glossy Finish
To get a glossy coating, make sure to melt the candy melts in short, controlled bursts in the microwave (stirring in between). You can also add a small amount of vegetable oil or coconut oil (½ teaspoon per cup) to help achieve a shinier, more fluid finish. This ensures that the candy coating goes on smoothly and dries to a beautiful, professional shine.
Using high-quality candy melts is the secret to creating smooth, glossy cake pops that not only taste delicious but also look stunning!
Experiment with Flavors, Such as Chocolate, Birthday Cake, or Cookies and Cream
One of the best parts about making homemade cake pops is the freedom to experiment with different flavors. While traditional Starbucks cake pops often feature vanilla or chocolate, you can get creative by adding a variety of cake flavors to match your tastes or the occasion. Flavor experimentation allows you to personalize your treats and bring a fun twist to the classic cake pop!
1. Chocolate Cake Pops
For chocolate lovers, a rich chocolate cake base pairs wonderfully with chocolate, vanilla, or even a dark chocolate coating. This flavor combination is decadent and perfect for anyone who enjoys the depth of cocoa. Adding chocolate chips or a drizzle of melted chocolate to the outside can enhance the chocolatey goodness.
2. Birthday Cake Pops
Nothing says celebration like birthday cake cake pops! Use a vanilla cake base mixed with colorful sprinkles for that classic funfetti vibe. You can coat them in white or pastel-colored candy melts to create a festive look. Adding a hint of vanilla extract or a dash of almond extract can enhance the flavor, giving it that sweet, nostalgic birthday cake taste.
3. Cookies and Cream Cake Pops
For something indulgent and unique, try cookies and cream cake pops. Use chocolate cake as the base, then mix in crushed Oreos to infuse the filling with a satisfying crunch. A white chocolate coating works best for this flavor, but a combination of milk and white chocolate can create a stunning contrast and bring out the richness of the cookies.
By experimenting with flavors like chocolate, birthday cake, or cookies and cream, you can elevate your cake pops and make them even more enjoyable and memorable for your guests!
FAQs About Making Starbucks Cake Pops at Home
Can I Make Starbucks Cake Pops Without Frosting?
While traditional cake pops are typically made with frosting to bind the cake crumbs together, you may wonder if it’s possible to make them without it. The short answer is yes, but it requires a bit of creativity to achieve the right texture and consistency without frosting’s usual role as a binding agent.
1. Using Alternative Binding Agents
If you prefer to skip frosting, there are a few alternative binding agents you can use. One common option is cream cheese or Greek yogurt, which adds moisture and a creamy texture to the cake without the sweetness of frosting. You can also experiment with marshmallow fluff or a small amount of butter mixed with a little sugar, both of which can help hold the cake crumbs together while keeping the cake pop moist.
2. Adjusting Consistency
When you make cake pops without frosting, the key is to adjust the consistency of the cake crumbs and binding agent. It should be firm enough to roll into a ball without crumbling, but not too soft or sticky. To achieve this, you may need to gradually add your chosen binding agent and mix until the dough holds together. Keep testing by rolling a small amount of the mixture into a ball to ensure it maintains its shape.
3. Texture and Flavor Considerations
Without frosting, your cake pops will have a slightly different texture—less rich but still flavorful. The key is to balance the cake’s flavor with your choice of binding agent, so the cake pops are still delicious and satisfying, even without frosting.
While making Starbucks-style cake pops without frosting is possible, it’s important to experiment with alternatives to achieve the desired consistency and taste.
How Long Do Homemade Cake Pops Last?
When you put in the effort to make homemade cake pops, you’ll want to know how long they stay fresh and tasty. The shelf life of cake pops largely depends on how they’re stored, the ingredients used, and the conditions in which they’re kept. However, with the right care, you can enjoy these treats for several days!
1. At Room Temperature
Homemade cake pops can typically last 2 to 3 days when stored at room temperature. Be sure to store them in an airtight container to prevent them from drying out or absorbing moisture from the air. If your cake pops have been coated with chocolate or candy melts, they will last slightly longer, but still, avoid leaving them out in a warm or humid environment, as this can cause the coating to soften or melt.
2. In the Refrigerator
If you want your cake pops to last longer, store them in the refrigerator. When properly sealed in an airtight container, cake pops can last up to 1 week in the fridge. The cool temperature will help preserve the freshness and prevent the cake from spoiling. Just be sure to let them come to room temperature before serving, as the coating may become hard and lose its glossy finish when chilled.
3. Freezing for Longer Storage
For even longer storage, you can freeze cake pops. Wrapped individually in plastic wrap and placed in a freezer-safe bag or container, cake pops can last for up to 2 months. To thaw, remove them from the freezer and let them sit at room temperature for about 30 minutes before enjoying.
By storing cake pops properly, you can ensure that they remain delicious and fresh for several days or even weeks!
What’s the Best Way to Store Cake Pops?
Proper storage is essential to maintain the freshness and appearance of your homemade cake pops. Whether you’re storing them for a few days or a few weeks, the right method ensures that your treats remain moist, delicious, and intact. Here are some of the best ways to store your cake pops:
1. Store at Room Temperature (Short-Term)
If you plan to enjoy your cake pops within a couple of days, the best place to store them is at room temperature. Place them in an airtight container to protect them from air exposure, which can dry them out. Be sure the container is large enough to prevent the cake pops from touching each other to avoid smudging or damaging the coating. Keep them in a cool, dry place away from direct sunlight, which could melt the coating.
2. Refrigerate for Longer Shelf Life
For longer storage, store your cake pops in the refrigerator. Wrap each cake pop individually in plastic wrap or place them on a tray lined with parchment paper and cover them with plastic wrap or an airtight container. When refrigerated, cake pops can last up to one week. However, it’s important to let them come to room temperature before serving, as the cold can affect the texture and gloss of the coating.
3. Freezing for Extended Storage
For even longer storage, you can freeze cake pops. To freeze, wrap each cake pop tightly in plastic wrap and place them in a freezer-safe container or bag. They can last up to 2 months in the freezer. When you’re ready to enjoy, allow them to thaw at room temperature for about 30 minutes. This method helps preserve freshness without compromising the texture.
Storing your cake pops properly ensures that they stay delicious and fresh for days to come!
Can I Use a Cake Mix for an Easy Version?
If you’re looking for a quicker and simpler way to make cake pops, using a cake mix is a great option. While from-scratch cakes offer a more personalized flavor, cake mixes provide a convenient and time-saving alternative that still yields delicious results. Using a cake mix streamlines the process, so you can skip the hassle of measuring and mixing individual ingredients. Here’s why using a cake mix can work wonders for your cake pops:
1. Quick and Easy Preparation
Cake mixes are designed to be user-friendly and reduce the time spent on prep. You just follow the instructions on the box, mix the ingredients, bake the cake, and you’re ready to start making your cake pops. It’s a great choice if you’re pressed for time but still want to make homemade cake pops.
2. Consistent Results
One of the benefits of using a cake mix is that it provides consistent results. The cake will have a moist texture and fluffy crumb, which is ideal for making cake pops. Since cake mixes are formulated for simplicity, they reduce the chances of your cake turning out too dry or too dense—common issues when making a cake from scratch.
3. Versatility and Flavor Options
Cake mixes come in a variety of flavors, from classic vanilla and chocolate to more unique options like red velvet, funfetti, or lemon. This allows you to experiment with different cake pop flavors easily without needing to make multiple cakes from scratch. You can even add your own twist by mixing in flavorings or toppings.
Using a cake mix is an easy, convenient way to create tasty cake pops with minimal effort and guaranteed results!
Conclusion
Making Starbucks-style cake pops at home is easier than you might think! With just a few simple steps, you can enjoy these delightful treats whenever you want. Here’s a quick recap of how to make them:
1. Bake the Cake Base
Start by baking your cake, either from scratch or using a cake mix. Choose a flavor that suits your taste, such as chocolate, vanilla, or red velvet. Once baked, allow the cake to cool completely before moving on to the next step.
2. Crumble the Cake
Once the cake is cool, crumble it into fine pieces using your hands or a fork. The texture should be fluffy and light, similar to coarse breadcrumbs. This step helps create the base for your cake pops.
3. Mix with Frosting
To bind the cake crumbs together, mix them with frosting (store-bought or homemade). Add the frosting gradually until the mixture is moist and can easily form a ball without falling apart. This mixture should have a dough-like consistency.
4. Shape the Cake Balls
Roll the cake mixture into small balls, about 1 to 1.5 inches in diameter. Insert a lollipop stick into each ball, ensuring that it goes about halfway through the cake ball to help hold it together.
5. Dip and Decorate
Next, dip each cake pop into melted candy melts or chocolate, ensuring an even coating. You can decorate with sprinkles, chocolate drizzle, or other toppings to match the Starbucks-style look.
6. Chill and Serve
Let the cake pops chill in the fridge for at least 30 minutes to set. Once firm, they’re ready to serve and enjoy!
These simple steps will have you making delicious, homemade Starbucks-style cake pops in no time!
1 thought on “Starbucks Cake Pop Recipe: Make Your Favorite Treat in Just a Few Steps”