
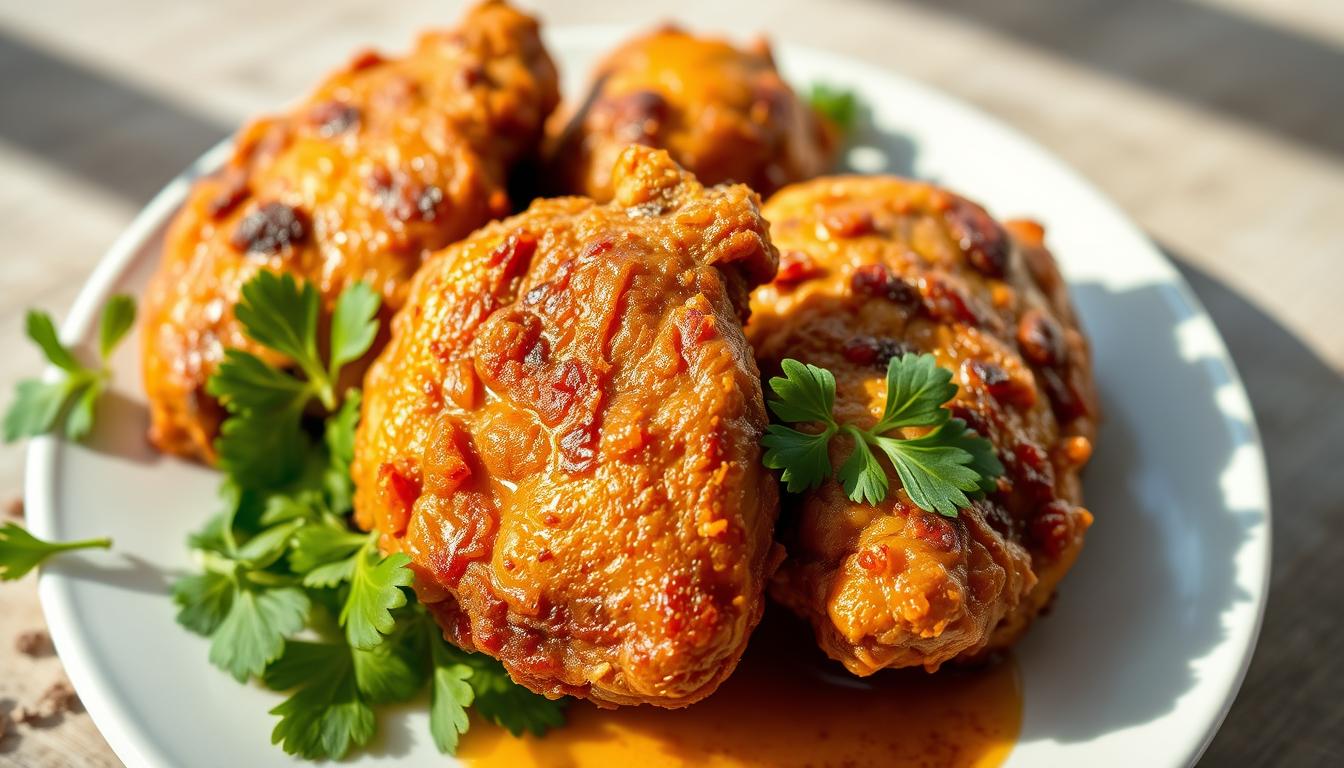
Southern kitchens love chicken livers as a comfort food. Fried chicken livers turn this meat into a crispy, tender treat. It’s a favorite across the United States.
Making crispy chicken livers needs skill and care. Both home cooks and chefs know it’s all about the right texture. You’ll learn how to make fried chicken livers crispy and tender here.
This guide will teach you how to make tender chicken livers at home. You’ll learn about selection, preparation, and cooking. You’ll discover the secrets to making this Southern classic a hit with everyone.
Table of Contents
Understanding the Appeal of Chicken Liver Dishes
Chicken livers are a treasured part of Southern cuisine. They mix tradition with great nutrition. These small organs have won the hearts of many, becoming a favorite comfort food.
Exploring chicken liver nutrition shows it’s a nutrient powerhouse. It’s not just tasty but also good for you. Adding it to your meals can boost your health.
The Cultural Significance in Southern Cuisine
In Southern cuisine, chicken livers are a key ingredient. They tell stories of resourcefulness and flavor. Recipes passed down through generations celebrate these tender pieces as a link to heritage and community.
- Represents traditional cooking methods
- Symbolizes culinary creativity
- Reflects economic wisdom of using entire animal
Nutritional Benefits and Protein Content
Chicken liver nutrition is outstanding. It’s full of protein, vitamins, and minerals. These small organs offer great health benefits with every bite.
| Nutrient | Amount per 100g |
|---|---|
| Protein | 20.4g |
| Vitamin A | 13,000 IU |
| Iron | 9.0mg |
Why Chicken Livers Are a Comfort Food Classic
Comfort food is more than just food. It brings back memories, warmth, and emotional connections. Chicken livers perfectly capture this, offering a rich, nostalgic experience.
“A bite of chicken liver is like a taste of home” – Southern Cooking Tradition
Chicken livers, whether crispy-fried or sautéed, are a beloved part of Southern cuisine. They offer both nutritional value and deep-rooted culinary satisfaction.
Essential Ingredients for Perfect Fried Chicken Livers
To make delicious fried chicken livers, start with the right ingredients. Choose high-quality items to turn simple chicken livers into a tasty treat.
For the best fried chicken livers, pick fresh, clean chicken livers. Also, choose the right breading and seasonings.
Key Ingredients Breakdown
- Fresh chicken livers
- All-purpose flour
- Eggs for coating
- Buttermilk or regular milk
- Seasonings
Each ingredient is key for the perfect taste and texture. The right frying ingredients will give you a golden-brown outside and a soft inside.
| Ingredient Category | Purpose | Recommended Type |
|---|---|---|
| Chicken Livers | Primary Protein | Fresh, cleaned, and trimmed |
| Flour | Coating Base | All-purpose or seasoned flour |
| Liquid Binder | Helps Coating Stick | Buttermilk or beaten eggs |
| Seasonings | Flavor Enhancement | Salt, black pepper, paprika |
Choose fresh and high-quality chicken livers. Your local butcher or meat counter has the best options.
Pro tip: Always pat your chicken livers dry before coating to ensure maximum crispiness!
Knowing how each ingredient works will make your fried chicken livers amazing. The right mix of ingredients will impress everyone.
Preparing Your Chicken Livers Before Cooking
To make delicious fried chicken livers, start with the right prep. Cleaning, trimming, and soaking are key steps. They turn these delicate organs into a dish that wows everyone.
Cleaning and Trimming Techniques
When you’re getting ready to cook chicken livers, cleaning is important. First, take off any connective tissues or dark spots. Use a sharp knife to cut away greenish or discolored parts. These can taste bitter.
- Rinse chicken livers under cold water
- Pat dry with paper towels
- Remove any visible membranes
- Check for and remove any dark spots
The Milk Soaking Debate
Soaking chicken livers in milk is a topic of debate. Some say it makes the livers less gamey and tender. The milk can also soften the flavor.
| Soaking Method | Benefits | Duration |
|---|---|---|
| Milk Soak | Reduces gamey flavor | 30 minutes |
| Buttermilk Soak | Adds subtle tanginess | 1 hour |
Proper Drying Methods
After cleaning and soaking, thorough drying is essential. Too much moisture stops the breading from sticking and can cause splatters. Dry the livers with paper towels before seasoning and breading.
Pro tip: The dryer the surface, the crispier your fried chicken livers will be!
By using these steps, you’ll get a crispy, tasty dish. It will impress your guests and satisfy your food cravings.
The Perfect Breading Mixture
Making the right chicken liver breading is an art. It turns simple chicken livers into a crispy, tasty treat. Your seasoned flour is the base for a dish that will wow everyone.
The secret to great chicken liver breading is choosing the right ingredients and balancing flavors. A classic mix includes:
- All-purpose flour as the base
- Salt and black pepper for basic seasoning
- Garlic powder for extra flavor
- Paprika for a hint of warmth
- Cayenne pepper for optional heat
Experts say to mix your dry ingredients well. This makes sure every chicken liver gets a tasty coating.
| Ingredient | Quantity | Purpose |
|---|---|---|
| All-purpose flour | 1 cup | Primary breading base |
| Salt | 1 tsp | Enhance flavor |
| Black pepper | 1/2 tsp | Add spice |
| Garlic powder | 1 tsp | Provide aromatic depth |
| Paprika | 1/2 tsp | Introduce color and mild heat |
Try different things with your chicken liver breading to find your favorite. Some like adding cornstarch for crunch or herbs like thyme for more taste.
Mastering the Double-Dredging Technique
The secret to making chicken livers super crispy is the double-dredging technique. This method turns regular chicken livers into a crunchy, golden treat. It will wow even the pickiest eaters.
Double-dredging chicken livers needs careful prep and a smart coating process. It makes a thick, crispy coating that keeps flavors in and textures irresistible.
First Coating Steps
To start the double-dredging, you’ll need three stations:
- Seasoned all-purpose flour
- Beaten eggs with a splash of milk
- A second batch of seasoned flour
Creating the Crispy Outer Layer
The method has several coating stages for a thick, crispy outside:
- Pat chicken livers dry with paper towels
- Dredge livers in first flour mixture
- Dip completely in egg wash
- Coat again in second flour mixture
Double-dredging creates layers that trap air, making the coating super crispy. The trick is to make sure each layer sticks well before moving on.
| Coating Stage | Purpose | Technique Tips |
|---|---|---|
| First Flour Coat | Initial binding | Season flour with salt and pepper |
| Egg Wash | Create adhesive layer | Add small amount of hot sauce for flavor |
| Final Flour Coat | Develop crispy texture | Press coating gently to ensure adherence |
Pro tip: Let coated livers rest for 5-10 minutes before frying. This helps the coating set right.
Oil Temperature and Frying Methods

Getting the oil temperature right is key when frying chicken livers. The best temperature is between 350°F and 375°F. This ensures your chicken livers are crispy outside and tender inside.
Knowing about oil temperature is more than just turning up the heat. Different oils have different smoke points. This affects the taste and texture of your dish. Peanut oil and vegetable oil are great for frying chicken livers because of their high smoke points and neutral flavors.
Testing Oil Temperature Techniques
- Use a digital thermometer for accuracy
- Drop a small piece of bread into the oil
- Watch for steady, consistent bubbling
- Avoid overheating, which burns the breading
When frying chicken livers, consistency is crucial. Keep the oil between 365-375°F for even cooking. If it’s too low, your livers will be greasy. If it’s too high, the outside will burn before the inside is cooked.
| Oil Type | Smoke Point | Best for Frying Chicken Livers |
|---|---|---|
| Peanut Oil | 450°F | Excellent |
| Vegetable Oil | 400°F | Very Good |
| Canola Oil | 400°F | Good |
“Perfect frying is an art of temperature control and patience.” – Southern Cooking Tradition
Remember, mastering frying chicken livers takes practice. Start with small batches. This will help you get better at managing oil temperature and cooking technique.
How to Make Fried Chicken Livers
Cooking chicken livers needs care to get that perfect crispy outside and soft inside. The frying process turns simple ingredients into a tasty Southern treat. With the right techniques, your chicken liver recipe will shine.
Step-by-Step Cooking Process
Get ready to make the tastiest fried chicken livers by following these steps:
- Heat oil in a heavy-bottomed skillet to 350°F
- Carefully place breaded chicken livers into the hot oil
- Fry for 5-6 minutes, turning once halfway through
- Ensure golden brown color on all sides
Timing and Temperature Control
Controlling the temperature is key when cooking chicken livers. Too low, and they get greasy; too high, and they burn fast. Use a deep-fry thermometer to keep the heat steady at 350-375°F.
Safety Considerations
Safety is crucial when frying. Always use long-handled tongs and wear protective clothes. Never put too many in the pan, as it can splash oil and lower the heat.
Pro tip: Let the fried chicken livers rest on a wire rack or paper towels to drain excess oil. This keeps them crispy and prevents them from getting soggy.
Achieving the Perfect Texture
Mastering the chicken liver texture is an art that needs precision and skill. You want a dish with a crispy outside and a tender, creamy inside. The secret is knowing how different cooking methods affect the final texture.
To get the perfect chicken liver texture, keep these tips in mind:
- Select fresh, uniform-sized chicken livers for consistent cooking
- Pat livers completely dry before breading
- Maintain oil temperature between 350-375°F
- Avoid overcrowding the cooking pan
The crispy outside starts with proper preparation. Your breading technique is key to that satisfying crunch. A well-seasoned coating that sticks well to the liver is essential for the perfect texture.
| Texture Factor | Impact on Chicken Livers |
|---|---|
| Oil Temperature | Determines crispiness and prevents greasiness |
| Breading Technique | Creates crisp outer layer |
| Cooking Time | Ensures tender interior |
The tender inside comes from careful cooking. Fry your chicken livers quickly, usually 2-3 minutes per side. Overcooking will make them tough and dry, which no one likes. You want a golden-brown outside and a soft, almost creamy inside that’s a joy to eat.
Pro tip: Let your fried chicken livers rest on a wire rack for a minute after cooking to maintain that perfect crispy exterior.
Serving Suggestions and Accompaniments
Turning fried chicken livers into a memorable meal is all about the right sides and sauce. The perfect choices can make your meal special and exciting.

Choosing the right sides can really bring out the flavor of chicken livers. Southern cuisine has many great options that go well with this dish.
Classic Side Dishes
- Creamy mashed potatoes
- Buttered white rice
- Collard greens
- Cornbread
- Coleslaw
Delectable Sauce Pairings
Finding the right sauce can make chicken livers even more delicious. Here are some tasty options:
| Sauce Type | Flavor Profile |
|---|---|
| Honey Mustard | Sweet and tangy |
| Remoulade | Creamy and spicy |
| Gravy | Rich and savory |
| Hot Sauce | Spicy and bold |
“The right side dish and sauce can turn a simple chicken liver meal into a culinary masterpiece.” – Southern Cooking Traditions
For a true Southern taste, add a lemon wedge to your fried chicken livers. The lemon’s brightness cuts through the richness, making your meal even better.
Storage and Reheating Tips
Keeping fried chicken livers crispy is all about how you store and reheat them. Saving leftovers or preparing ahead of time? Proper storage keeps their taste and quality in check.
Here’s how to store fried chicken livers right:
- Cool the chicken livers completely before storing
- Place in an airtight container
- Refrigerate within two hours of cooking
- Consume within 3-4 days for optimal taste
Reheating chicken livers can be a challenge. You want to get that crispy outside back without drying out the meat. Here are the top ways to do it:
- Oven Method:
- Preheat oven to 375°F
- Place livers on a wire rack
- Heat for 5-7 minutes
- Use a baking sheet to catch any drips
- Air Fryer Technique:
- Set air fryer to 370°F
- Reheat for 3-4 minutes
- Shake basket midway through
Don’t use the microwave to reheat chicken livers. It can make them soggy and tough. For the best results, use methods that keep their crispy coating and tender inside.
Pro tip: Add a light coating of oil before reheating to help restore the original crispiness.
Common Cooking Mistakes to Avoid
Mastering fried chicken livers can be tricky, even for experienced cooks. Mistakes can turn a delicious dish into a disappointment. Knowing common pitfalls helps you fix fried chicken livers and get great results.
Successful fried chicken livers need attention to detail and technique. Let’s look at the most critical areas where home cooks often go wrong:
Temperature Control Challenges
Proper oil temperature is key when frying chicken livers. The most common mistakes involve wrong heat management:
- Using oil that’s too cold, resulting in greasy livers
- Overheating oil, which burns the exterior while leaving the inside undercooked
- Overcrowding the pan, which drops the oil temperature dramatically
Breading Technique Troubles
Troubleshooting fried chicken livers often comes down to perfecting the breading process. Watch out for these potential issues:
- Skipping the milk soak, which helps tenderize and remove gamey flavors
- Using wet breading that prevents crispy texture
- Not allowing excess breading to fall off before frying
Seasoning Slip-Ups
Bland chicken livers can ruin a dish. Avoid these seasoning errors:
- Under-seasoning the liver before breading
- Using only salt and pepper
- Forgetting to season the breading mixture
“The secret to perfect fried chicken livers is patience and precision in every step of preparation.” – Southern Cooking Expert
By understanding these common mistakes, you’ll be well on your way to creating crispy, flavorful fried chicken livers. These will impress even the most discerning palates.
Conclusion
Mastering the chicken liver recipe takes patience, practice, and a love for Southern cooking. You’ve learned the key techniques to turn simple chicken livers into a crispy, tender treat. This dish captures the essence of traditional cuisine.
You now know how to pick the right ingredients and fry them perfectly. Your skills in temperature control, breading, and seasoning will make your fried chicken livers stand out. Each step, from cleaning to frying, is crucial.
These skills are great for cooking at family gatherings or exploring Southern dishes. With practice, you’ll get better at making delicious chicken liver dishes. Your hard work will show in every bite.
Start your journey to becoming a fried chicken liver expert. Try new techniques and enjoy the tasty results. Your culinary adventure is just beginning.
4 thoughts on “Fried Chicken Livers: How to Make Them Crispy and Tender”