
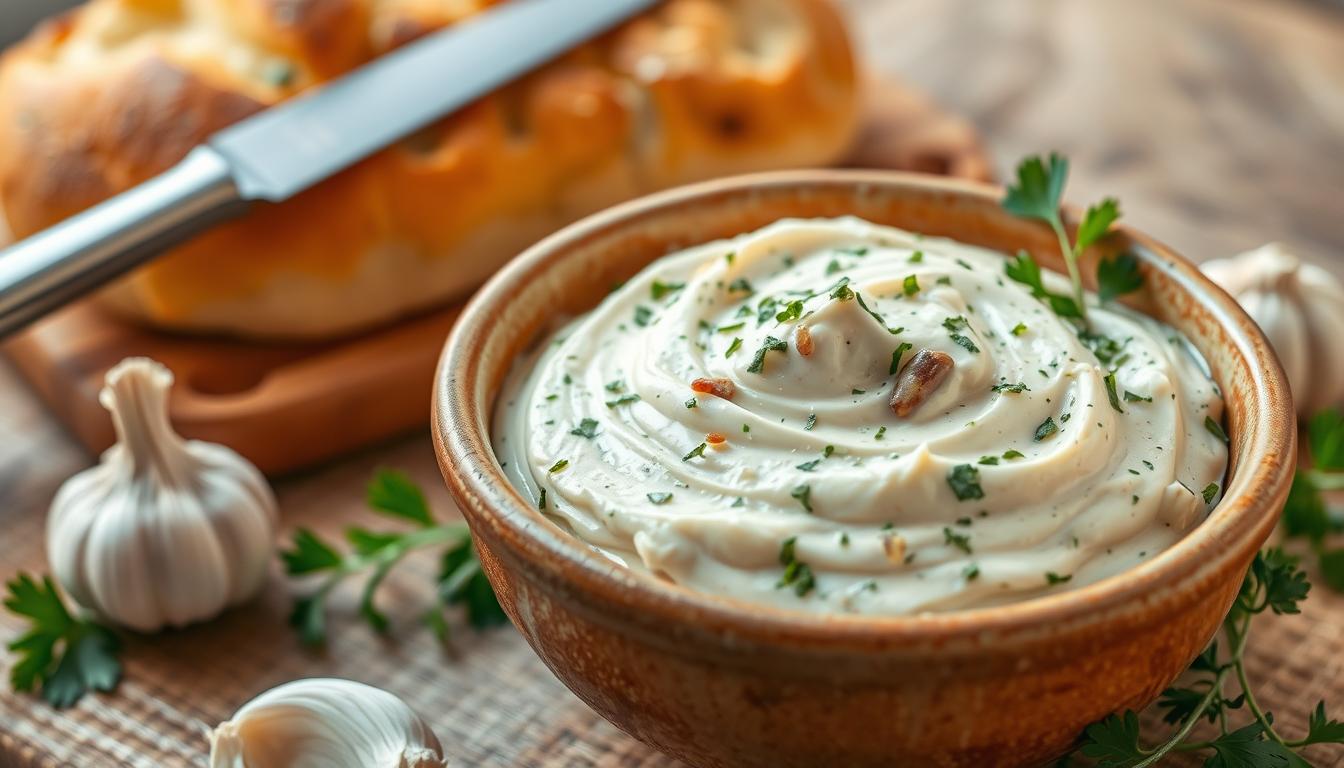
Making your own garlic spread for garlic bread is simple. You just need a few basic ingredients. This way, you can make ordinary bread into a tasty treat. Plus, you get to choose the flavor and save money.
Whether you’re a pro in the kitchen or just starting out, you can learn to make garlic spread. This guide will show you how to make different kinds of garlic spread. You’ll learn how to make one that will wow your loved ones.
Table of Contents
Why Homemade Garlic Spread Beats Store-Bought Every Time
Making your own garlic bread spread is more than just cooking. It’s a way to transform your kitchen. Store-bought spreads can’t compare to the fresh, vibrant flavors you can make at home with little effort.
So, why choose homemade over store-bought? Here are the main reasons:
- Superior fresh ingredient quality
- Complete control over flavor intensity
- Zero artificial preservatives
- Significant cost savings
When you make your own garlic bread topping, it becomes a personal creation. Say goodbye to unknown ingredients. Your homemade spread will have real butter, fresh garlic, and herbs you pick.
| Homemade Spread | Store-Bought Version |
|---|---|
| Fresh ingredients | Processed components |
| No artificial additives | Multiple preservatives |
| Customizable flavor | Standard taste profile |
“I stopped buying frozen garlic bread after discovering how simple homemade spread is!” – Home Cook Magazine
Making your spread only takes a few minutes. You’ll save money, eat healthier, and wow everyone with your homemade garlic bread.
Essential Ingredients for Garlic Spread for Garlic Bread
Making the perfect creamy garlic spread starts with choosing top-notch ingredients. The right mix can turn simple garlic butter into a tasty treat. It makes your garlic bread truly special.
Your garlic butter with fresh herbs needs a special mix of ingredients. Let’s look at the key parts that make your spread stand out.
Choosing the Right Butter Base
The base of any great garlic spread is butter. Choose unsalted European-style butter for its rich taste. Softened butter makes mixing and spreading easy.
- Unsalted European-style butter
- Room temperature butter
- High fat content (at least 82%)
Fresh Garlic Versus Garlic Powder
Fresh garlic beats garlic powder in flavor. For a real creamy garlic spread, use fresh garlic cloves. Pick firm garlic bulbs for the best taste.
- Fresh garlic cloves (minced or grated)
- Avoid pre-minced jarred garlic
- Select firm, plump garlic bulbs
Herbs and Seasonings That Elevate Your Spread
Fresh herbs can make your garlic butter amazing. Add finely chopped parsley, chives, or Italian herbs for extra flavor.
- Fresh parsley
- Chives
- Optional: Grated Parmesan cheese
- Sea salt
- Cracked black pepper
Preparing Your Butter for the Perfect Consistency
Making the perfect homemade garlic butter starts with knowing how to prepare butter. The secret is in its temperature and how you handle it. You want it soft and easy to mix with garlic and herbs.
It’s important to let your butter get to room temperature. Take it out of the fridge about 60 to 90 minutes before you mix it. This lets it soften just right, making it easy to work with.
- Let butter sit at room temperature (65-70°F)
- Check for a gentle indent when pressed
- Avoid melting or greasy appearance
Here’s what to look for when your butter is ready:
- Soft to the touch but still holds its shape
- Leaves a slight indent when gently pressed
- Smooth and creamy in texture
Pro tip: If your butter gets too soft, put it back in the fridge for a bit. If it’s too hard, cut it into smaller pieces. Don’t use the microwave, as it can mess up the texture.
The secret to great homemade garlic butter is patience and careful temperature management.
Classic Garlic Butter Spread Recipe
Making the perfect garlic spread for garlic bread is simple. This classic recipe turns your bread into a tasty side dish. With just a few ingredients, you can make a garlic bread topping that’s as good as any restaurant’s.

Essential Ingredients for Perfect Garlic Spread
Here are the key ingredients for your garlic spread:
- 1/2 cup unsalted butter (room temperature)
- 2 fresh garlic cloves, finely grated
- 1 tablespoon fresh parsley or chives, chopped
- 1/2 teaspoon sea salt
Mixing Instructions for Creamy Garlic Spread
Here’s how to make your garlic spread:
- Make sure butter is soft
- Grate garlic cloves finely
- Chop herbs finely
- Mix all ingredients in a bowl
- Stir until everything is well mixed
| Ingredient | Measurement | Purpose |
|---|---|---|
| Unsalted Butter | 1/2 cup | Creamy base |
| Fresh Garlic | 2 cloves | Intense flavor |
| Fresh Herbs | 1 tablespoon | Added freshness |
| Sea Salt | 1/2 teaspoon | Flavor enhancement |
Pro Tips for the Perfect Garlic-to-Butter Ratio
Finding the right balance is key for a great garlic bread topping. Pro tip: Let the spread rest for 15-30 minutes. This lets the garlic flavors blend well with the butter, making the taste better.
Your homemade garlic spread can be stored in the fridge for up to a week. It’s a tasty and easy addition to your cooking.
Italian Herb Garlic Spread Variation
Turn your simple garlic spread into a true Italian delight. This version brings the taste of Italy right to your table. It makes your bread taste amazing and adds a splash of Mediterranean flavor to your meals.
Making a great italian herb garlic spread is all about mixing the right herbs and quality ingredients. The secret is in choosing the perfect blend of dried herbs:
- Dried Basil: Adds sweet, slightly peppery notes
- Oregano: Provides an earthy, robust flavor
- Marjoram: Offers delicate, floral undertones
- Parsley: Contributes a fresh, bright taste
For a quick fix, use Italian Seasoning. About 1-1.5 teaspoons per half cup of butter works wonders. If you’re up for it, add some extra flair:
- Red pepper flakes for a spicy kick
- Sun-dried tomatoes for Mediterranean flair
- Lemon zest for a bright, citrusy note
Your italian herb garlic spread is perfect with focaccia, ciabatta, or any Italian bread. It’s great with pasta, chicken Parmesan, or a simple lasagna on the weekend.
Roasted Garlic Butter Spread for Deeper Flavor
Take your roasted garlic butter spread to the next level. A simple trick can make it incredibly flavorful. Roasting garlic mellows its taste, turning it from sharp to sweet and creamy. This change will make your cooking much better.
Understanding the Magic of Roasted Garlic
Roasting garlic turns it into a luxurious spread. It softens the garlic, making it caramelized and nutty. This adds a rich flavor to your spread.
- Converts harsh sulfur compounds into sweet sugars
- Produces a creamy, spreadable texture
- Eliminates the sharp bite of raw garlic
Perfecting Your Roasting Technique
To make the best roasted garlic butter spread, follow these steps:
- Select fresh, firm garlic heads
- Slice off the top to expose clove tips
- Drizzle with olive oil
- Wrap in aluminum foil
- Roast at 400°F for 40-60 minutes
| Roasting Time | Flavor Intensity | Texture |
|---|---|---|
| 40 minutes | Light, mild flavor | Slightly soft |
| 60 minutes | Deep, caramelized flavor | Creamy, spreadable |
“Roasted garlic is like culinary magic – it transforms a simple ingredient into a gourmet experience.” – Professional Chef
Your roasted garlic butter spread is now a great addition to many dishes. It’s perfect for bread or vegetables. The secret is patience, letting the garlic roast until it’s sweet and rich.
Parmesan Garlic Spread with Fresh Herbs
Make your garlic butter special with fresh herbs. Create a parmesan garlic spread that turns simple bread into a fancy treat. It’s a mix of butter, garlic, and Parmesan cheese that’s just amazing.
For the best spread, use top-notch ingredients. Start with real Parmigiano-Reggiano cheese. It tastes much better than pre-grated cheese.
Key Ingredients for Your Spread
- 1/4 cup finely grated Parmesan cheese
- 1/2 cup unsalted butter, softened
- 2-3 fresh garlic cloves, minced
- Fresh herbs (parsley, basil, or chives)
The secret to this garlic butter is its texture and taste. Grate the Parmesan with a microplane for a smooth mix. This way, every bite is full of nutty, rich flavor.
| Ingredient | Purpose | Recommended Quantity |
|---|---|---|
| Parmesan Cheese | Adds depth and richness | 1/4 cup, finely grated |
| Fresh Garlic | Provides pungent flavor | 2-3 minced cloves |
| Fresh Herbs | Brings brightness and complexity | 2 tablespoons, chopped |
Your homemade parmesan garlic spread is great on French baguettes, sourdough, or as a topping for baked potatoes and grilled veggies. Tip: Adding Parmesan makes the spread last 5-7 days in the fridge. Enjoy it while it’s fresh!
Storage Tips and Shelf Life for Your Homemade Garlic Spread
Keeping your homemade garlic butter fresh is key. Knowing how to store it right ensures you enjoy its taste and stay safe from food risks.

Handling your garlic butter with care is important. It helps keep its flavor and shelf life in check. Here are some essential storage tips:
Refrigeration Essentials
Follow these refrigeration tips for your garlic butter:
- Always use clean utensils to prevent bacterial contamination
- Store in an airtight container to prevent odor absorption
- Keep away from strong-smelling foods
- Label the container with the preparation date
Freezing for Extended Preservation
Freezing is great for keeping your garlic butter fresh for longer. Here are some freezing tips:
- Wrap tightly in plastic wrap or freezer-safe container
- Portion into small serving sizes for easy thawing
- Freeze for up to 3 months while maintaining quality
The shelf life of your garlic butter depends on the ingredients. Generally, it can last:
| Storage Method | Estimated Shelf Life |
|---|---|
| Refrigerator | 1-2 weeks |
| Freezer | Up to 3 months |
Warning Signs of Spoilage:
- Sour or rancid smell
- Discoloration or dark spots
- Unusual taste or texture changes
Always rely on your senses to check your garlic butter’s quality. If it looks or smells off, it’s best to throw it away and make a new batch.
Creative Ways to Use Your Garlic Bread Spread Beyond Bread
Your homemade garlic bread spread is more than just for bread. It can make many dishes taste better with its rich flavor. Let’s look at some fun ways to use it in cooking.
Breakfast fans can make their mornings better by using this spread. Try it on:
- Toasted bagels
- English muffins
- Breakfast sandwiches
At lunch and dinner, this spread can change the game. Here are some tasty ways to use it:
- Toss with hot pasta for a garlic butter sauce
- Melt over grilled meats like steak or chicken
- Stir into rice or quinoa for more flavor
Vegetables get a boost when you add your garlic spread. Steamed broccoli, roasted asparagus, and sautéed green beans will taste amazing. Just drizzle or toss with your spread for a side dish that’s like a restaurant meal.
For those who like to try new things, here are some ideas. Make crispy croutons with garlic butter, garlic butter shrimp, or add it to corn on the cob. Your cooking can be as creative as you want!
Conclusion
Making your own garlic spread is more than a recipe. It’s a journey that turns simple ingredients into something amazing. You’ve learned how to make a tasty garlic spread in just minutes. It’s easy and packs more flavor than store-bought options.
Homemade garlic spread is not just for garlic bread. You can make roasted garlic or Parmesan-infused spreads for any meal. Your cooking skills will grow as you try new herbs, roasting methods, and flavors.
Begin with the garlic spread recipe you’ve found. As you practice, you’ll get better and more confident. Your homemade spread will make any meal special, whether it’s a quick snack or a dinner for guests.
Great cooking is about passion, creativity, and trying new things. Your garlic spread adventure is just starting. Enjoy the process, savor the delicious outcomes, and make your home-cooked meals unforgettable.