
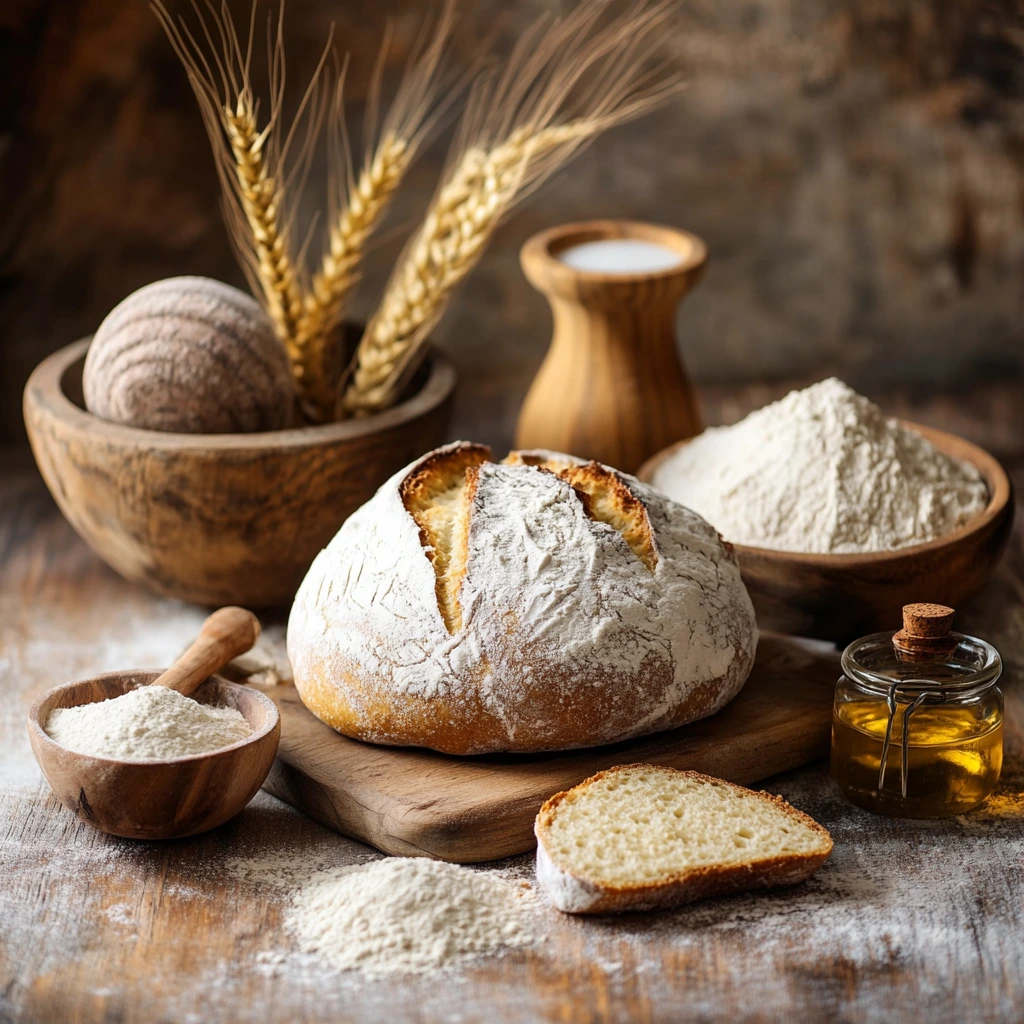
There’s nothing quite like the smell of freshly baked bread wafting through your kitchen — warm, comforting, and oh-so-satisfying. If you’ve ever wanted to bake your own loaf but felt intimidated by the idea of working with yeast, you’re in the right place. This beginner-friendly yeast bread recipe is simple, straightforward, and practically foolproof.
In this step-by-step guide, we’ll walk you through everything you need to know — from choosing the right ingredients to mastering the basics of kneading and proofing. No fancy equipment needed, just a few pantry staples and a little patience. Whether you’re baking for the first time or looking for a reliable go-to recipe, this homemade yeast bread is soft, fluffy, and perfect for sandwiches, toast, or just tearing apart warm with butter. Let’s get baking!
Why This Yeast Bread Recipe Is Perfect for Beginners
Easy-to-Find Ingredients
One of the best parts of this yeast bread recipe is that it uses basic, everyday ingredients — no need to search specialty stores or buy anything fancy. Everything you need is likely already sitting in your pantry, making this a perfect beginner-friendly recipe.
1. All-Purpose or Bread Flour
Flour forms the foundation of any bread recipe. You can use either all-purpose flour for a soft, fluffy loaf or bread flour if you prefer a slightly chewier texture with better gluten structure. Both work great for beginners!
2. Active Dry Yeast
This is the classic yeast bread used in most home baking. You’ll find it in small packets or jars at any grocery store. It’s reliable, easy to use, and perfect for learning how to activate yeast properly — a must-have skill for any home baker.
3. Warm Water
Water helps activate the yeast and forms the dough. The key is using water that’s warm (not hot) — around 100–110°F (38–43°C). If it’s too hot, it can kill the yeast; too cold, and the yeast won’t activate.
4. Sugar and Salt
A small amount of sugar feeds the yeast and helps it rise faster. Salt, on the other hand, strengthens the dough and enhances flavor. Both are simple but essential.
5. Oil or Butter (Optional)
While not required in all bread recipes, a bit of oil or melted butter adds moisture and softness to the final loaf — great for sandwich-style bread.
With these basic ingredients, you’re well on your way to baking delicious, homemade yeast bread without any stress.
No Mixer Required
One of the most intimidating parts of bread baking for beginners is the assumption that you need a stand mixer or fancy equipment. The good news? You don’t! This yeast bread recipe is designed to be made completely by hand — no mixer, no dough hook, and no stress.
All you really need is a large mixing bowl, a wooden spoon or silicone spatula, and your hands. Mixing and kneading by hand not only saves you the expense of a mixer but also helps you get familiar with how the dough should look and feel. It’s a great way to build confidence and understand the texture of well-made bread dough.
Kneading by hand takes around 8–10 minutes, and it’s more therapeutic than you might expect. Pushing, folding, and stretching the dough helps develop gluten — the protein that gives bread its signature structure and chewiness. Plus, kneading gives you a moment to slow down and enjoy the process. No noisy motor, just you and the rhythm of the dough.
If you’re worried about getting tired or making a mess, don’t be. The dough is soft and manageable, and this recipe was crafted to stay beginner-friendly from start to finish. You’ll be surprised at how satisfying it is to shape a beautiful loaf with just your hands.
So if you’re new to bread baking and don’t own a mixer, don’t let that stop you. This no-mixer-required approach proves that simple tools (and a little love) can create bakery-worthy results right in your own kitchen.
Beginner-Friendly Techniques
When you’re just starting out with bread baking, the process can feel overwhelming — but this recipe uses simple, beginner-friendly techniques that make it easy to succeed, even on your first try.
1. Proofing the Yeast
This step may sound technical, but it’s actually simple and rewarding. You’ll dissolve active dry yeast bread in warm water with a bit of sugar and wait for it to become foamy. This shows the yeast is alive and ready to work its magic. Watching it bubble is not only satisfying but gives you a sense of confidence moving forward.
2. Mixing by Hand
No mixer? No problem. You’ll mix the ingredients with a spoon or your hands until a shaggy dough forms. No special method here—just stir and press until the flour is incorporated. It’s messy, fun, and surprisingly effective.
3. Kneading
Learning how to knead dough is a skill every bread baker should have. In this recipe, you’ll knead the dough for about 8–10 minutes until it becomes smooth and elastic. It’s a rhythmic, hands-on process that helps build the dough’s structure. You’ll quickly learn how dough should feel—soft but not sticky, firm but stretchy.
4. Letting It Rise
You’ll let the dough rise in a warm place until it doubles in size. This is called proofing, and it’s your bread’s time to rest and grow. No tricks here—just cover the bowl and let time do the work.
By using these approachable techniques, this recipe takes the guesswork out of bread baking. Even if it’s your first loaf ever, you’ll feel like a pro in no time.
Ingredients You’ll Need
Types of Yeast
Understanding the types of yeast available is key to successful bread baking, especially for beginners. While there are several kinds, the two most common used in home baking are active dry yeast and instant yeast — and both work great in this recipe.
1. Active Dry Yeast
This is the classic option found in most grocery stores. It comes in small packets or jars and has a grainy texture. Before adding it to your dough, it needs to be “proofed,” which simply means dissolving it in warm water with a little sugar to activate it. You’ll know it’s ready when it becomes bubbly and foamy — a clear sign your yeast is alive and active. Proofing also gives you confidence that your bread will rise properly.
2. Instant Yeast (Also Known as Rapid Rise or Bread Machine Yeast)
Instant yeast is finer in texture and works faster than active dry yeast. It can be mixed directly into the dry ingredients without proofing. That said, many bakers still like to activate it first just to be sure it’s working, especially if it’s been stored for a while. It produces slightly quicker rises and is ideal if you’re short on time.
Which Should You Use?
For this beginner-friendly bread recipe, you can use either type. Active dry yeast is great for learning how yeast works, while instant yeast is a little more forgiving and saves time. Just make sure your yeast is not expired, and store it in a cool, dry place (or in the fridge once opened).
With either option, you’re set up for a light, airy, and perfectly risen loaf.
Choosing the Right Flour
Flour is the backbone of any yeast bread recipe, and choosing the right type can make a big difference in your results. The good news? For this beginner-friendly recipe, you have more than one great option — and you don’t need anything fancy to get started.
1. All-Purpose Flour
This is the most commonly used flour in home kitchens, and it’s perfectly suitable for making soft, fluffy yeast bread. It has a moderate protein content (usually around 10–11%), which provides enough gluten development for a tender crumb without being too chewy. If it’s all you have on hand, you can confidently use it and still get a delicious loaf.
2. Bread Flour
Bread flour has a slightly higher protein content (typically around 12–14%), which helps develop more gluten. This results in a slightly chewier texture and a more structured loaf with better rise. If you’re aiming for bakery-style bread or a crispier crust, bread flour is a great option — but definitely not required for this recipe.
3. Whole Wheat Flour (Optional for Blending)
While not recommended for 100% of the flour in your first loaf, you can experiment with substituting about 25–30% of the total flour with whole wheat. It adds a nutty flavor and boosts nutrition, but too much can make the bread dense. Start with a small amount and see how you like it.
Bottom Line:
For beginners, start with all-purpose flour for easy handling and reliable results. As you grow more comfortable, try bread flour or mix in whole wheat to find your perfect blend. No matter which you choose, this recipe is flexible and beginner-approved.
Other Essentials
Beyond flour and yeast, there are a few simple but essential ingredients that bring your yeast bread together. These pantry staples may seem small, but each one plays a vital role in the dough’s flavor, texture, and rise.
1. Warm Water
Water activates the yeast and hydrates the flour to form the dough. The temperature is important — aim for warm water between 100–110°F (38–43°C). Too hot, and it can kill the yeast; too cold, and it won’t activate properly. If you don’t have a thermometer, it should feel like warm bath water.
2. Sugar
A small amount of sugar feeds the yeast and helps it ferment more quickly, which contributes to a better rise and subtle flavor. It’s not enough to make the bread sweet — it simply supports the fermentation process. You can use white sugar, honey, or even maple syrup depending on your preference.
3. Salt
Salt is crucial for flavor and structure. It strengthens the dough by tightening gluten strands, controls yeast activity (so it doesn’t rise too fast), and brings out the full flavor of your bread. Don’t skip it, even in small amounts.
4. Oil or Butter (Optional but Recommended)
A little fat in the dough — like vegetable oil, olive oil, or melted butter — adds richness, tenderness, and moisture. It also helps create a softer crust. While some rustic loaves skip it, this recipe includes it to keep the bread soft and beginner-friendly.
5. A Pinch of Patience
Okay, not an ingredient you’ll find in a jar — but letting your dough rise properly is key. Give it time, and you’ll be rewarded with a light, airy loaf.
Step-by-Step Guide to Making Yeast Bread
Step 1: Activating the Yeast (Proofing)
Activating the yeast, also known as proofing, is one of the most crucial steps in any yeast bread recipe. It ensures that your dough rises beautifully and develops that airy, light texture we all love. The process is simple but important for beginners to understand.
What Is Proofing?
Proofing is the process of dissolving the yeast in warm water with a little sugar to “wake it up” and confirm it’s alive and active. This step helps ensure that your bread will rise properly. If the yeast doesn’t bubble or foam after a few minutes, it means it’s no longer active, and it’s time to start with fresh yeast.
How to Proof Yeast:
- Measure the required amount of yeast into a small bowl or measuring cup.
- Add Warm Water: Pour in the specified amount of warm water — the ideal temperature is about 100–110°F (38–43°C). If you don’t have a thermometer, aim for a warm, comfortable bathwater temperature.
- Add Sugar: Stir in a pinch of sugar to help feed the yeast. The sugar provides a small boost of energy for the yeast to start fermenting.
- Wait and Watch: Let the mixture sit for 5–10 minutes. You should see it begin to bubble and foam, indicating the yeast is active. If this doesn’t happen, try again with a new packet of yeast.
Once your yeast is proofed, it’s ready to be mixed into your dough! This first step ensures your bread will rise properly and have the right texture, giving you a perfect loaf.
Step 2: Mixing and Kneading the Dough
Now that your yeast is activated, it’s time to move on to mixing and kneading the dough. These two steps are crucial for developing the gluten structure and creating a smooth, elastic dough that will rise beautifully.
Mixing the Dough: Start by combining the proofed yeast mixture with the flour, salt, and any other ingredients called for in the recipe. You can do this in a large mixing bowl with a spoon or spatula. Stir until the dough starts to come together into a shaggy mass, with no dry flour left. Don’t worry if it looks messy at first — this is a normal part of the process!
Once the dough has formed, it’s time to move to the next step: kneading.
Kneading the Dough: Kneading is essential for developing the gluten in the dough, which gives the bread its structure and chew. To knead by hand, turn the dough out onto a lightly floured surface. Push the dough down and away from you with the heel of your hand, then fold it back over itself and give it a quarter turn. Repeat this process for 8–10 minutes, or until the dough becomes smooth, elastic, and slightly tacky but not sticky.
Kneading might seem tiring at first, but it’s an important part of the bread-making process. If the dough sticks to your hands, dust with a little flour, but don’t add too much — you want the dough to remain soft and pliable.
Once kneaded, shape the dough into a ball, cover it, and let it rest before the next step: rising!
Step 3: First Rise and Shaping the Dough
The first rise, also known as the bulk fermentation, is a crucial step in developing the bread’s texture and flavor. This is where your dough starts to expand, as the yeast ferments and produces gases that make the bread rise. After kneading, it’s time to let your dough rest and grow.
The First Rise:
- Shape the Dough into a Ball: After kneading, turn the dough into a smooth ball, folding the edges underneath to form a tight surface. This helps create a uniform rise.
- Grease a Bowl: Lightly grease a large bowl with oil or butter to prevent the dough from sticking. Place the dough ball in the bowl, ensuring it’s coated lightly in oil to keep it from drying out.
- Cover and Rest: Cover the bowl with a clean kitchen towel or plastic wrap. Set it in a warm, draft-free area, such as near a stove or in an oven with just the light on. Let the dough rise for 1 to 1.5 hours, or until it has doubled in size.
Shaping the Dough: Once the dough has risen, it’s time to shape it into a loaf. Gently punch down the dough to release excess air, which can cause holes in the bread. Then, turn it out onto a lightly floured surface. Gently flatten it into a rectangle, fold the sides in, and roll it up tightly from one end to the other to form a loaf shape.
Once shaped, your dough is ready for the second rise — a final proofing before baking.
Step 4: Second Rise and Baking to Perfection
The second rise, also known as proofing, is the final chance for the dough to develop a light, airy texture before baking. It’s crucial to allow your dough enough time to rise to ensure the perfect loaf with a tender crumb and golden crust.
The Second Rise:
- Shape the Dough: After punching down the dough and shaping it into a loaf, place it into a greased loaf pan or onto a baking sheet, depending on the shape you prefer.
- Cover and Rest: Again, cover the dough with a clean towel or plastic wrap to keep moisture in. Allow the dough to rise for 30–60 minutes in a warm, draft-free area. It should puff up and expand slightly, but don’t expect it to double in size like the first rise.
- Tip for the Perfect Rise: If you’re in a cooler environment, you can place the dough in an oven preheated to 200°F (93°C) for a few minutes, then turn off the heat and let the dough rise there.
Baking the Bread:
- Preheat the Oven: Set your oven to 375°F (190°C) to ensure it’s hot and ready for the bread.
- Bake: Place the dough in the oven and bake for 25–30 minutes. The bread is done when it’s golden brown on top and sounds hollow when tapped on the bottom. If you have a thermometer, it should register around 190°F (88°C) inside the loaf.
- Cool: Once baked, let the bread cool on a wire rack. This prevents the bottom from getting soggy.
With patience and care, your bread will come out perfectly risen, soft, and delicious!
Pro Tips for Perfect Homemade Bread Every Time
How to Tell If Your Dough Has Risen Enough
Knowing when your dough has risen enough is key to achieving that perfect texture and structure in your bread. Under-risen dough can result in dense, flat loaves, while over-risen dough can collapse, leading to a poor rise. Here are a few simple ways to tell if your dough is ready for the next step.
1. The “Double in Size” Rule
The most basic guideline is that your dough should double in size during the first rise. This is a visual cue that the yeast has had enough time to ferment and produce gases, causing the dough to expand. If you’re unsure, gently press two fingers into the dough — if the indentation remains and doesn’t bounce back, it’s a sign that the dough has risen enough.
2. The Poke Test
For the second rise, you can use the “poke test.” Gently press your finger into the dough. If the indentation remains and doesn’t quickly spring back, it means the dough has risen adequately and is ready to be baked. If the dough bounces back too quickly, give it a little more time to rise.
3. The Dough Should Be Puffed, Not Overly Shiny
The dough should be puffed up and slightly domed but not overly shiny or wet. If the dough looks overly sticky, you may have added too much moisture during mixing, and you should consider a brief knead to adjust it.
4. Don’t Rush
If you’re unsure, it’s always better to give the dough a little extra time to rise than to underproof it. The yeast needs time to work its magic, and patience is key to a successful loaf.
Kneading Tips for Gluten Development
Kneading is an essential step in bread-making that helps develop the gluten network, which gives the bread structure, elasticity, and that signature chewy texture. Proper kneading ensures your bread rises well and bakes up perfectly. Here are some tips to make kneading easier and more effective.
1. Use the Right Technique
When kneading, use the heel of your hand to push the dough away from you, then fold it back over itself and give it a quarter turn. Repeat this motion, applying gentle pressure. It’s important not to be too rough or overwork the dough, as this can cause it to become tough.
2. Don’t Add Too Much Flour
While it’s tempting to add extra flour when the dough feels sticky, resist the urge. Adding too much flour can make the dough dry and dense. Instead, sprinkle flour sparingly as needed, just enough to keep the dough from sticking. The dough should feel slightly tacky but not sticky.
3. Look for the “Windowpane Test”
To check if your dough is kneaded enough, try the “windowpane test.” Stretch a small piece of dough between your fingers. If it forms a thin, translucent membrane without tearing, the gluten has developed properly. If it tears, continue kneading for a few more minutes.
4. Don’t Overknead
Kneading should typically take 8–10 minutes. If you knead for too long, the dough can become overly elastic, which will result in a dense loaf. Stop once the dough is smooth, elastic, and slightly tacky to the touch.
By mastering these kneading techniques, you’ll ensure your bread has the perfect texture and rise!
Why Oven Temperature Matters
The temperature of your oven plays a critical role in the success of your yeast bread. It impacts how the dough rises and bakes, affecting both texture and flavor. Here’s why oven temperature matters:
1. Proper Rise and Oven Spring
When you place your dough in the oven, it will continue to rise, a process known as “oven spring.” This happens because the heat causes the yeast to produce more gas, expanding the dough. If the oven is too cool, the dough won’t rise enough, leading to a dense loaf. If it’s too hot, the dough can over-expand quickly and collapse, ruining the texture.
2. Even Baking
A preheated oven ensures that the bread bakes evenly. If your oven isn’t hot enough at the start, your bread may not brown properly or may bake unevenly, with some parts undercooked. For a golden crust and fully cooked interior, it’s essential to reach the right temperature before putting your dough in.
3. Crust Development
Oven temperature affects the crust, too. A hotter oven creates a beautifully crisp and golden crust. If the temperature is too low, the crust may not form correctly, leaving your bread with a pale, soft exterior. A good balance of heat helps achieve that satisfying contrast between the soft, fluffy inside and the crispy outer crust.
4. Consistency
Maintaining a consistent oven temperature throughout baking is essential for uniform results. Using an oven thermometer can help ensure that your oven is running at the proper temperature, as some ovens tend to be inaccurate.
By getting your oven temperature just right, you’ll achieve that perfect loaf every time!
How to Cool Bread Properly (Don’t Skip This Step!)
Cooling your bread properly after baking is just as important as the baking process itself. If you skip this step, you could compromise the bread’s texture, flavor, and overall quality. Here’s why and how to cool your bread the right way:
1. Prevents a Soggy Bottom
When bread is removed from the oven, it continues to release steam. If you leave it on a solid surface like a baking sheet, the trapped moisture can make the bottom of your loaf soggy. To prevent this, place the bread on a wire rack immediately after removing it from the oven. The rack allows air to circulate all around the loaf, keeping the crust crisp and preventing sogginess.
2. Enhances Texture and Flavor
Allowing your bread to cool for at least 30 minutes before slicing is essential for optimal texture and flavor. The cooling period lets the crumb (the inside of the bread) set, making it easier to slice and preventing the bread from becoming gummy. Cutting too soon can also release heat and steam, making the bread lose its moisture and affecting its texture.
3. Enhances Aroma
Letting the bread cool also gives time for its delicious aroma to fully develop. Freshly baked bread has a wonderful fragrance that can be easily lost if cut too early.
4. Don’t Skip It!
While the tempting aroma may make you want to dig in right away, skipping this cooling process can result in disappointing bread. Patience is key—cool your bread properly for the best results!
Common Beginner Mistakes (and How to Avoid Them)
Bread Didn’t Rise?
If your bread didn’t rise as expected, don’t panic. There are several common reasons why bread fails to rise, but most of them can be easily corrected with a little understanding of the process. Here’s what might have gone wrong and how to fix it:
1. Yeast Issues
Yeast is the primary factor in making dough rise. If the yeast is old or expired, it won’t activate properly. Always check the expiration date on your yeast packets. Additionally, yeast needs warmth to activate; if the water or milk used to proof the yeast is too hot (above 120°F or 49°C) or too cold, it can kill the yeast or prevent it from activating.
2. Inadequate Rising Time
If you didn’t give your dough enough time to rise, it won’t develop the structure needed for a good loaf. The first rise typically takes 1-1.5 hours, and the second rise takes around 30-60 minutes. Ensure your dough is in a warm, draft-free area during rising. If it’s too cold, the yeast will work slower.
3. Overworking the Dough
Over-kneading can deplete the yeast’s ability to produce gas, leading to poor rising. Be mindful to knead the dough only for the recommended amount of time, usually about 8–10 minutes.
4. Too Much Flour
Adding too much flour can make your dough too stiff, which limits its ability to expand during the rise. If your dough feels too firm, add a little more water to loosen it up.
5. Incorrect Oven Temperature
If your oven temperature is too low, the dough might not rise sufficiently during baking. Always preheat the oven to the correct temperature before baking.
If your bread doesn’t rise, troubleshooting these common issues can help you achieve that perfect loaf next time!
Dough Too Sticky or Too Dry?
Getting the right dough consistency is essential for making great bread. If your dough is too sticky or too dry, it can impact the final texture and rise. Here’s what to do if you find yourself with dough that’s not quite right:
1. Dough Too Sticky?
If your dough is too sticky, it can be challenging to handle and knead. Here’s how to fix it:
- Add Small Amounts of Flour: While kneading, sprinkle a small amount of flour at a time to help reduce stickiness. Avoid adding too much, as this can make the dough dry and dense.
- Use Wet Hands: If the dough is too sticky to work with, try wetting your hands slightly. This will make it easier to handle without adding excess flour.
- Allow Extra Kneading Time: Sticky dough often needs a little more kneading to develop the gluten, which helps it firm up and become less tacky. Knead for 5-10 more minutes until it becomes smoother.
2. Dough Too Dry?
If your dough is too dry and crumbly, it’s often because there isn’t enough moisture. To fix this:
- Add Water Gradually: Add small amounts of warm water (a teaspoon at a time) while kneading until the dough becomes soft and elastic. Be careful not to overdo it.
- Check Flour Measurements: Sometimes, using too much flour can result in dry dough. Make sure you measure your flour correctly, preferably using a kitchen scale for accuracy.
- Let It Rest: If the dough still feels dry after kneading, let it rest for 10 minutes. This can help the flour absorb the moisture better.
With these tips, you can achieve the perfect dough consistency for a successful bread-making experience!
Crust Too Hard or Too Soft?
The texture of your bread’s crust is just as important as its interior. If your crust is too hard or too soft, it can affect the overall enjoyment of your loaf. Here’s how to troubleshoot common crust problems:
1. Crust Too Hard?
A tough, overly hard crust can happen for several reasons. Here’s how to fix it:
- High Oven Temperature: If your oven is too hot, the crust may form too quickly, leaving the inside undercooked. Lower the temperature by 10-15°F (5-8°C) and bake a little longer for a more even crust.
- Overbaking: If the bread is in the oven for too long, the crust can become overly thick and hard. Check your bread near the end of the baking time to avoid overbaking.
- Steam During Baking: Adding steam to your oven during the first 10-15 minutes of baking can help create a crisp crust without it becoming too tough. You can do this by placing a pan of water in the oven or spraying the bread with water before baking.
2. Crust Too Soft?
A soft crust can make your bread feel underbaked or overly soft. To fix it:
- Lower Humidity in Oven: A lack of steam can result in a softer crust. If you want a thicker crust, reduce the steam or skip it entirely in the second half of baking.
- Increase Oven Temperature: If your bread’s crust is too soft, try increasing the oven temperature by 10-15°F (5-8°C) during the last part of baking to help it crisp up.
- Cool Properly: After baking, allow the bread to cool on a wire rack. If left on a solid surface, moisture can collect and soften the crust.
By adjusting these factors, you can achieve the perfect balance between a crisp, golden crust and a soft, airy interior.
How to Store Your Fresh-Baked Bread Properly
Proper storage of freshly baked bread is key to maintaining its flavor, texture, and freshness for as long as possible. Here’s how to keep your bread at its best:
1. Let It Cool Completely
Before storing, allow your bread to cool completely on a wire rack. This helps prevent moisture buildup, which can make the crust soggy or cause mold to form. Cutting into hot bread releases steam, so give it at least 30 minutes to cool.
2. Use a Paper Bag for Short-Term Storage
If you plan to eat the bread within a few days, store it in a paper bag. The paper allows the bread to breathe, preventing excess moisture from making the crust soft while keeping the interior fresh. However, avoid storing bread in plastic at this stage, as it traps moisture and can soften the crust.
3. Keep It in a Breadbox
A breadbox is ideal for keeping your bread fresh for several days. It offers a controlled environment, balancing airflow and humidity, which helps preserve both the texture and flavor of the bread without it becoming too dry or soggy.
4. Freeze for Long-Term Storage
If you have leftover bread or want to keep it for later, freezing is your best option. Slice the bread before freezing to make it easy to thaw individual pieces. Wrap the bread tightly in plastic wrap or aluminum foil, then place it in a freezer-safe bag. When ready to eat, thaw it at room temperature or toast slices directly from the freezer.
By following these steps, you can enjoy fresh bread for several days or even weeks after baking.
Conclusion
Making homemade yeast bread may seem intimidating at first, but with the right guidance, anyone can master it. Here’s a quick recap of the essential steps to follow for a beginner-friendly, delicious loaf:
1. Gather Simple Ingredients
Start by ensuring you have all the basic ingredients—flour, yeast, water, sugar, salt, and oil. These easy-to-find ingredients set the foundation for your bread.
2. Proof the Yeast
Activating the yeast is the first crucial step. Mix warm water with a bit of sugar and yeast, letting it sit for about 5-10 minutes until it’s bubbly. This shows the yeast is active and ready to go.
3. Mix and Knead the Dough
Next, combine the ingredients and knead the dough for about 8-10 minutes until it’s smooth and elastic. This step develops the gluten, which gives your bread its texture.
4. Allow for Proper Rising
Let the dough rise in a warm place for 1-1.5 hours, until it doubles in size. Then, punch it down and shape it into a loaf. Give it a second rise before baking.
5. Bake and Cool
Bake the dough in a preheated oven, and don’t forget to check the temperature with a thermometer to make sure it’s fully baked. After baking, let it cool on a wire rack to prevent moisture buildup.
By following these steps, you’ll have the perfect, homemade yeast bread that’s soft, flavorful, and satisfying—a perfect choice for beginners!
2 thoughts on “The Best Yeast Bread Recipe for Beginners (Step-by-Step Guide)”